Friday, January 26, 2018

Let it Snow or Not- Snowflake Winter Nail Design

Hello everyone! Hope everyone is having a good winter, or a least trying to get through it. If you live in a cold environment or really anywhere it has been a cold winter for everyone, even the people that live in a normally warmer environment. Anyways this week we will be creating a let is snow nail design even if we are all tired of the snow, I know I am. But for some reason I still wanted to create a snow themed nail design.

Snowflake Nail Design
 Snowflake Nail Design

Here are the nail polishes and nail art tools used for this nail design: 


Base and top coat- - CND Stickey Base Coat and Revlon Extra Life No Chip top coat.

Nail polish-  Zoya Enchanted- Saint, JulieG- Blueberry Fizz- texture, and Revlon Holographic Pearls (for some reason I didn't take a photo of this polish, so I garbed a photo from online.) 

Acrylic paint- white 

Nail art tools- medium and small dotting tool, detail brush, thin striping brush, and a small detail brush. 

Other- glass or cup of water to clean off nail art brushes.

Let's start this snow filled nail design! 

Snowflake Nail Design
Snowflake Nail Design, on left hand

As always start off with a thin layer of base coat.

Let the base coat dry and then on your index and pinky finger nail, polish that with a periwinkle blue polish (I used Zoya- Saint), then on your thumb, middle and ring finger nail polish that with a glittery or textured periwinkle blue polish (I used  JulieG- Blueberry Fizz this is a textured polish)

On my right hand I polished the thumb and ring finger with JulieG- Blueberry Fizz and the index, middle, and pinky with Zoya- Saint.

Then for an added touch, I just had to add some holo to this design. Take a holographic top coat (I used Revlon Holographic Pearls) one that has a little bit of holo in it, and apply that to all of the nails over both of the polishes. 

Snowflake Nail Design 
 Snowflake Nail Design, on right hand

Snowflake Nail Design 
 Snowflake Nail Design, on left hand    

Then let your base colors dry, and now on the snowflakes.This design like most of the designs I do, it is just random patterns/ lines that are put together, their is no set way of doing this design. 

All of the snowflakes should start off with a star like pattern, then add some arrow like lines on each line, you can have a lot of lines, one, or just a few. 

Snowflake Nail Design 
 Snowflake Nail Design,Thumb nail
On the thumb, the snowflake that is on the lower right hand corner I added some triangle shapes in the center of the snowflake.  

Then on all of the nails with a dotting tool, you can make some small dots for some small snowflakes. 

Snowflake Nail Design
Snowflake Nail Design, on left hand  
    
To be extra random on the pinky finger nail on the left hand, I added some swirls on the side of the nail.

Snowflake Nail Design 
Snowflake Nail Design, on right hand

Then on the right hand on the ring finger nail, I took a stripping brush and made some line lines that looked kind of like icicles, with two small star shapes for snowflakes.  

Snowflake Nail Design Snowflake Nail Design
 Snowflake Nail Design, on left hand

Snowflake Nail Design
Snowflake Nail Design, right hand

Once you have your snowflakes the way you like apply a top coat to protect your nails from the cold and snowy weather, or really just from chipping to soon.

Hope all of you enjoyed this snowflake nail design!

See you next time for more nail fun!  

Friday, January 19, 2018

Happy Belated New Years- Purple & Gold Glitter Gradient

Hello everyone! Sorry that it has been a few weeks since I did a post, a lot of unexpected things have come up and I have not had a chance to sit down a do a nail toutial. Now I have a chance to do one. Anyways I hope everyone had a nice and safe New Year, and for today we will kind of be creating a belated New years nail design, a purple and gold glitter gradient, yes we will be creating this design in the middle of January, I thought this design was very pretty and really could be worn at anytime. 

Purple and Gold Glitter Gradient 

 Here are the nail polishes and nail art tools used for this simple design:


Base and top coat- CND Stickey Base Coat and Revlon Extra Life No Chip top coat

Nail polishes- Fun Lacquer- Million Dollar Dream and Zoya- Urban Grunge- Finley

Nail art tools- a makeup sponge

That's all you will need!  

 Let's start this pretty glitter gradient design that is great for any party or just for fun! 

Purple and Gold Glitter Gradient, Fun Lacquer- Million Dollar Dream and Zoya Finley 
 Purple and Gold Glitter Gradient, Fun Lacquer- Million Dollar Dream and Zoya Finley
 Purple and Gold Glitter Gradient

Start off by applying a thin layer of base coat to all of your nails, then let that dry.

Just like last year, this year will be filled with lot of holographic glitter polishes (gotta love the holo!) Once your base coat has dried polish all of your nails with a dark purple holo polish, or just a glitter purple polish.

Purple and Gold Glitter Gradient 
 Purple and Gold Glitter Gradient
 Purple and Gold Glitter Gradient

Let that dry, then take a makeup sponge and polish a little bit of a gold glitter polish on to a makeup sponge, then dab that on the nails, focusing most of the glitter near the tip of the nails. You will need to repeat this step for each nail and you may also need to cut some of the sponge if the polish dries out.

I actually thought that I sponge a little to much glitter near the tips of the nails and if I was to do this again I would have not done a much, but I still feel like this turned out well.  

Then with the brush that is in the polish, with very little on the brush polish some glitter more up the nail, so it looks like the gold glitter is almost fading into the purple.      

Purple and Gold Glitter Gradient 
 Purple and Gold Glitter Gradient 

Once you have your glitter gradient with the right amount of glitter, you can now apply a top coat to seal in your design and keep your nails nice and shinny, and to help them last through any party.  

Their you go now you have a fun glitter nail design that is great for any party that you go to throughout the year, or even just for fun!

Sorry that I did not get a chance to post this in time for New Year, even though this is great design for New Years, I still though it would be nice to show all of you.

Hope you enjoyed this glitter gradient nail design!

See you next time for more nail fun! 

Saturday, December 23, 2017

Light Of My Life- Christmas Lights Design

Hello everyone! Merry Christmas and Happy Holiday's, today we will be creating another Christmas nail design, last week we made candy canes on our nails, for this week we will make Christmas lights on our nails. I was planning on doing one more Christmas nail design, then I realized that this Monday is Christmas, so I will only be doing these two designs.

Christmas Light Nail Design 
Christmas Light Nail Design

Here are the polishes and nail art tools used for this nail design:


Base and top coat - CND Stickey Base Coat and Revlon Extra Life No Chip top coat.

Nail polishes- Emily De Molly- Everlasting Gaze, Cirque- Madder, Color Club Halo's- Harp on, Zoya- Dream, and Zoya- Urban Grunge-Merida. 

Acrylic paint- white and black 

Nail art brushes- two small thin detail brushes.

Other- small jar with acetone to clean off brushes and a small cup of water to also clean off brushes.

Let's start this bright and festive nail design!

Christmas Light Nail Design 
 Christmas Light Nail Design

Start off with a thin layer of base coat.

Let your base coat dry, then polish a turquoise green holographic polish on your nails, I used  a new polish that I just purchased not to long ago called Emily De Molly- Everlasting Gaze.  

One your base polish has dried we wills start to make the Christmas lights on all of the nails. Take a thin detail brush, with black paint on it (I used two different once, one for just paint and the other for polish.) Start on the thumb and going all the way to the pinky nail make a squiggly line, on one nail I did add a loop. 

After you make the squiggly lines, make some small squares to hold the bulbs in place, on each nail I made two to three small squares. 

 Christmas Light Nail Design
 Christmas Light Nail Design

Then for the bulbs I first made the shape with white paint and then went over that with different colored polishes, once the white paint had dried. Also make sure to make attach the bulbs to the small squares. I used a red, green, blue and silver polish, you can use the same colors or different ones it is up to you, I just thought I would go with some Christmas type colors. 

Just for some small detail, once your bulbs have dried you can make small white line to show a reflection of light on the bulbs, this is optional if you want to skip this step that is okay, I just did this for more detail.   

Christmas Light Nail Design
 Christmas Light Nail Design
 Christmas Light Nail Design

Once your bright and colorful Christmas light nail design has dried apply a top coat to seal in your design and to make it even more shinny, to where it all most looks like it will light up. 

Hope all of you enjoyed this bright and colorful Christmas light nail design!

Have a wonderful Christmas/ Happy Holiday and a safe and Happy New Years!

See you next time for more nail fun!  

Friday, December 15, 2017

Candy Cane Lane

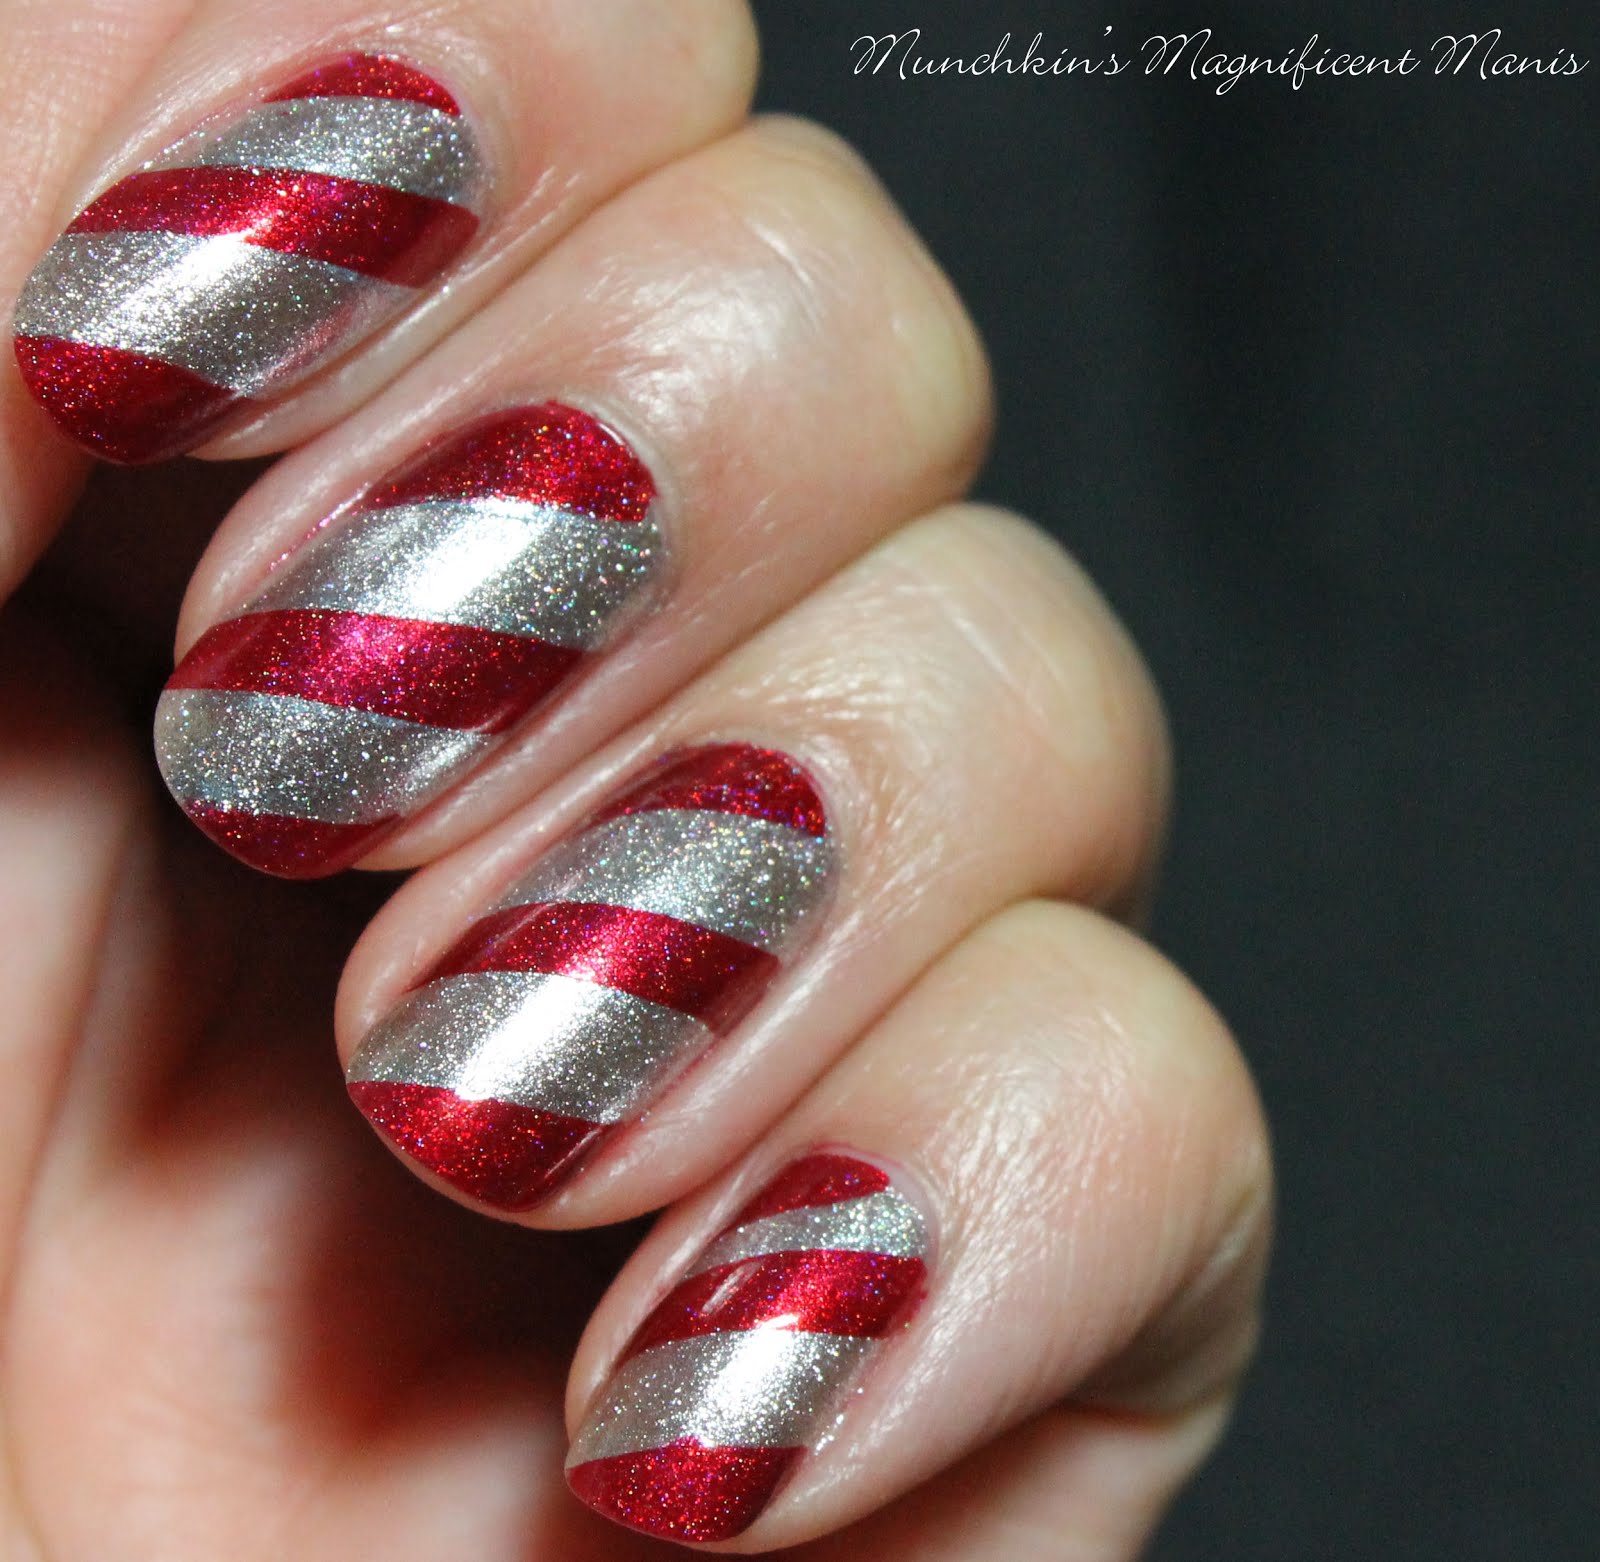
Hello everyone! Hope all of you are enjoying the winter weather, if you live in a cold environment like myself. If you are anything like me then, no you are not enjoying the cold snowy weather. Anyways seeing how Christmas is quickly approaching, this week we will be making candy canes on our nails, and not just any candy cane with plain white polish and plain red, we will be using a silver and red polish with some holo in it, because what better way then to use holo polish, besides it looks more festive.
    
Candy Cane Nail Design
 Candy Cane Nail Design

Here are the polishes and tools used for this festive nail design, and yes this design only needs a few things!

 
Base and Top coat- CND Stickey Base Coat and Revlon Extra Life No Chip top coat.
Nail polishes-  OPI Holiday 2017- Ornament to Be Together and Cirque- Madder.
Nail art tools- just some nail art tape.
Other- scissors and tweezers to take off the tape (Items not show above)
That's all you need!
Let's get this fun and yummy candy cane nail design started!
Candy Cane Nail Design  
Candy Cane Nail Design
Start off with a thin layer of base coat, my fav is CND Stickey base coat.
Let that dry, then polish all of your nails with a silver polish that has some holo in it. The polish I used is Ornament to Be Together from OPI, this polish is part of their new holiday collection for 2017. This silver polish has a subtle amount of holo in compared to most holos that I have. 
Once your base color of silver has dried, take your nail art tape and cut it into small pieces and place them on an angle on the nail, so that it will look like a candy cane.
Candy Cane Nail Design 
 Candy Cane Nail Design
At the tip of the nail, polish that area with a red holo polish, then the next area leave that silver. Repeat this for each part, to where every other part is red (as shown in the photo above.)
Grab your tweezers and right away, make sure your red polish does not dry and peel off the nail art tape that you placed on the nails. Doing this right away will help to keep your lines looking clean and straight.  

Repeat all of the steps above for all of your nails, or on my other hand I did things a little different. 

Candy Cane Nail Design
 Candy Cane Nail Design
 Candy Cane Nail Design

If you only want a few nails with the candy cane design on it you can just do the design on two nail, the thumb and ring finger nail (like the photo above), or even just as a accent nail, the ring finger nail.

Candy Cane Nail Design 
 Candy Cane Nail Design
   Candy Cane Nail Design

Once you have your candy cane nails the way you like, apply a top coat to seal in your design and to make your holo candy canes even more shinny. 

Hope you enjoyed this simple holiday nail design!

See you next time for more nail fun! 

Next week we have another Christmas nail design!