Showing posts with label Nail Art Tape. Show all posts

Tuesday, July 2, 2019

Happy 4th of July- Nail Design

Hello everyone! Happy 4th of July! Well almost. I can't believe I am say that all ready it feels like it was just Memorial day! Anyways it has been some years since I last did a 4th of July nail design, since I first staring do this blog about five years ago, so I thought I would do one this year. I kind of feel like with 4th of July designs their is not much you can do with them other then a flag, fireworks, and some way incorporating red, white and blue, so I tried my best. 

4th of July Nail Design  
4th of July Nail Design  

Here are the polishes and nail art tools for this simple 4th of July nail design:

 
Base and top coat- - CND Stickey Base Coat and Revlon Extra Life No Chip top coat.

Nail polishes- Zoya- Renee- Redbook trio, Zoya- Estelle, and Color Club Halo's- Harp on.

Acrylic paint- white.

Nail art tools- nail art tape, and a thin stripping brush.

Other- a small glass jar with acetone in it to clean off your nail art brush, and a cup of water to clean off your nail art brush as well. Twisters to pull nail art tape off the nails.

This is a very simple 4th of July design that is great for beginners!

4th of July Nail Design
 4th of July Nail Design 

As always start off with clean dry nails that are free of any old polish. Then apply a thin layer of base coat to help your design to last. 

Let that dry.

Next we will be applying nail art tape to all of the nails except for the ring finger nail, that nail we will polish with a silver holographic polish. Take any color of nail art tape and cut a small amount off, then place the tape on the nails at an angle.

4th of July Nail Design  
4th of July Nail Design  

Then near the cuticle take a red polish and polish one half of the nail that we taped off. Then right away take some twisters and peel of that tape. Do this same step for all four nails. 

Then once your done with that step, polish the other half of the nail with a blue polish, being careful not to over lap the red and blue polish.

4th of July Nail Design  
 4th of July Nail Design 

Then for the design part, take a thin stripping brush with white paint on it, and then make a straight line going in between the nail (the same area that you placed the nail art tape), then once you get near the tip of the nail make a few smaller lines that come off of the larger line you just made. 

For our final touch I wanted to add some of the silver holo to the nail as well that we polished on the ring finger nail. Once again take that same thin stripper brush with some silver holo polish on it and make a shorter line right next to the white line and then make a few shorter lines from that line on each side of that line. 

In the end this design ended up looking kind of like a feather, which I was not really going for but it worked out anyways. 

4th of July Nail Design  
   4th of July Nail Design 

Once your design is 4th of July ready, apply a top coat to seal in your design and to help it last through all of your 4th of July celebrations.

I did end up doing this design on my right hand as well, I did not change anything keep it the same as the left hand. 

4th of July Nail Design  
4th of July Nail Design 

Hope all of you enjoyed this simple 4th of July nail design and have a safe and Happy 4th of July!

See you next time for more nail fun!   

Friday, December 15, 2017

Candy Cane Lane

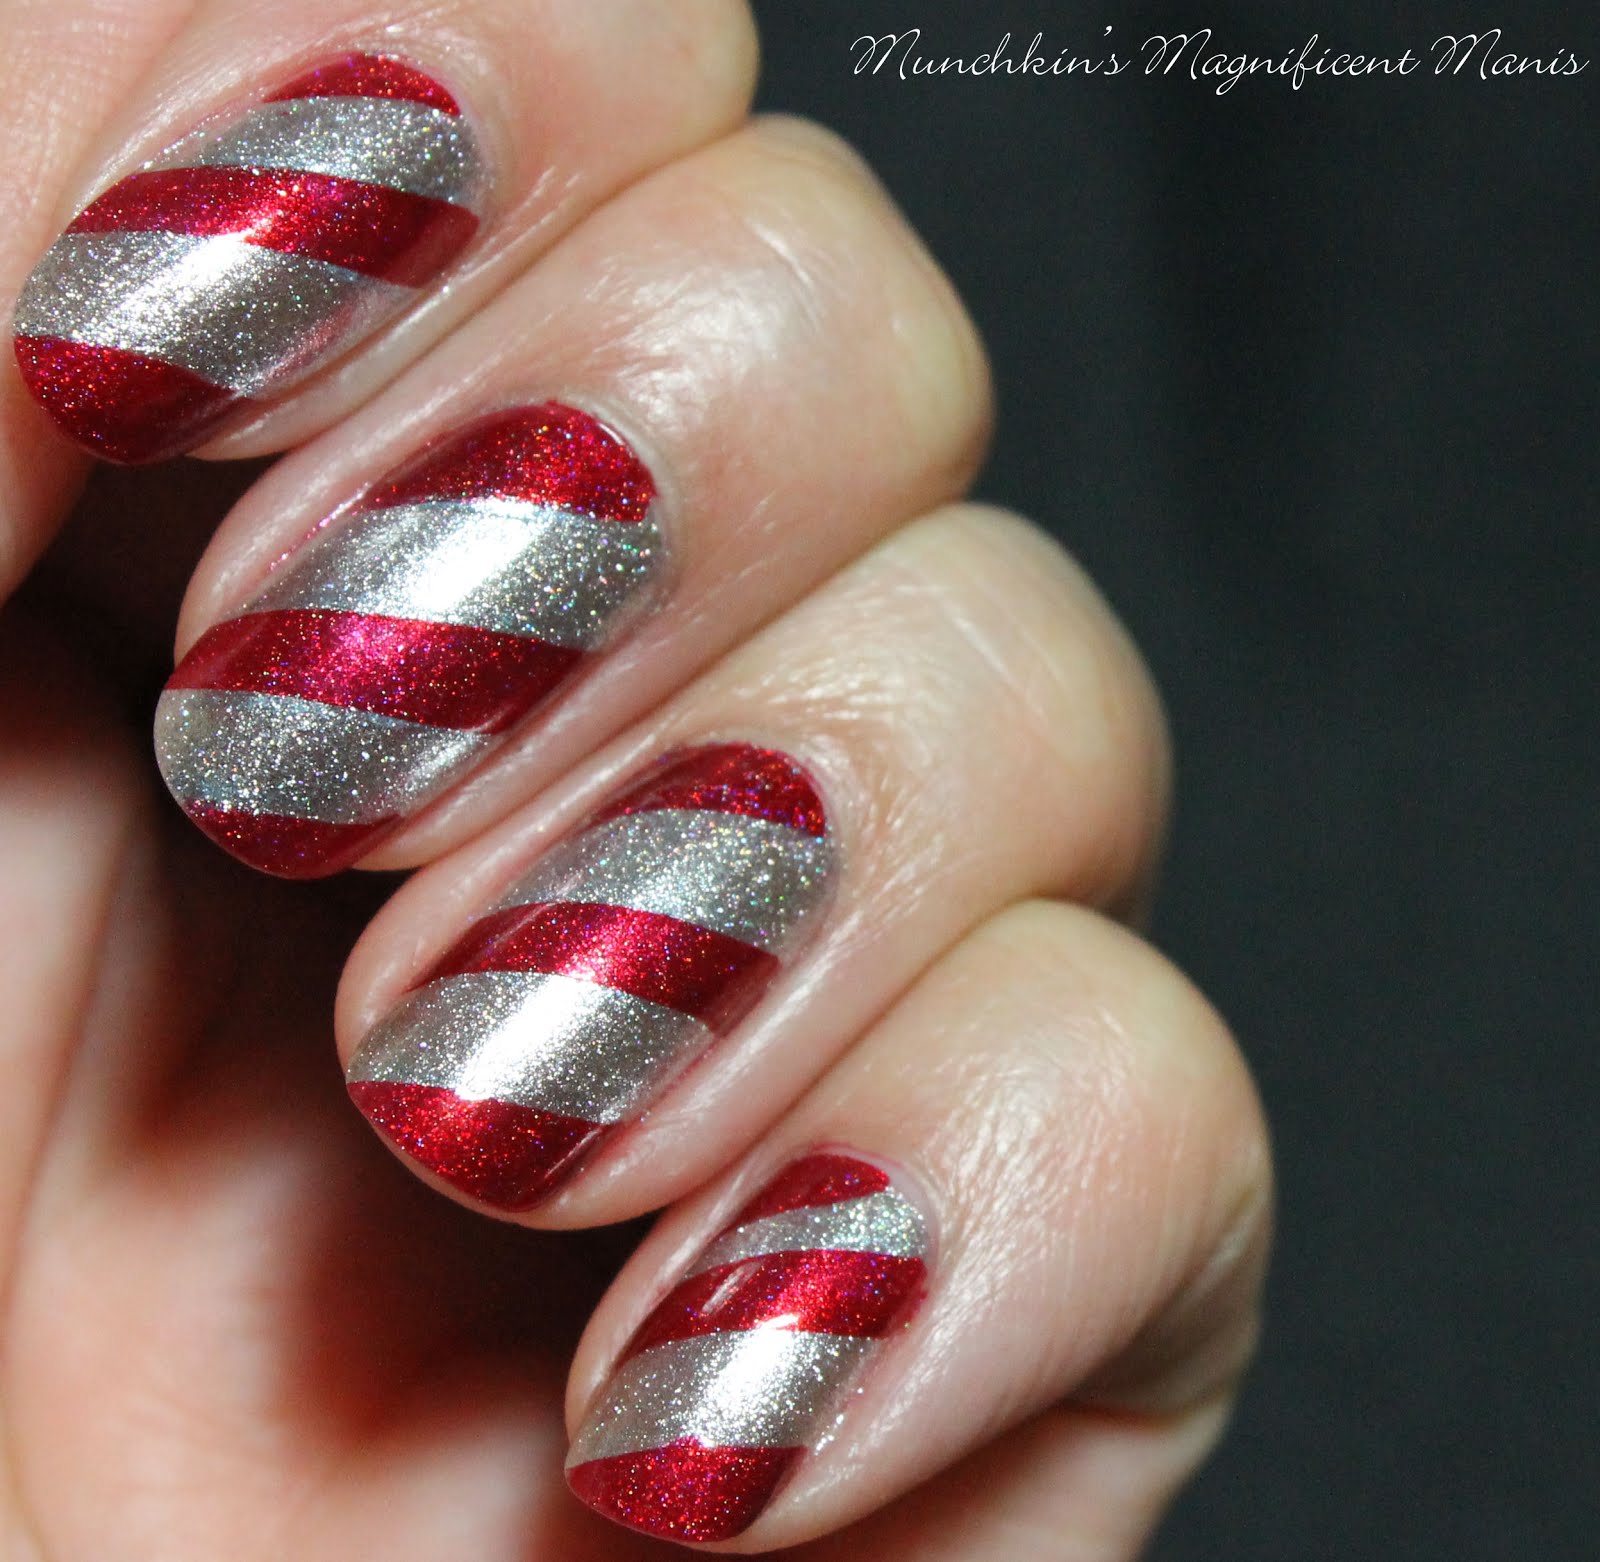
Hello everyone! Hope all of you are enjoying the winter weather, if you live in a cold environment like myself. If you are anything like me then, no you are not enjoying the cold snowy weather. Anyways seeing how Christmas is quickly approaching, this week we will be making candy canes on our nails, and not just any candy cane with plain white polish and plain red, we will be using a silver and red polish with some holo in it, because what better way then to use holo polish, besides it looks more festive.
    
Candy Cane Nail Design
 Candy Cane Nail Design

Here are the polishes and tools used for this festive nail design, and yes this design only needs a few things!

 
Base and Top coat- CND Stickey Base Coat and Revlon Extra Life No Chip top coat.
Nail polishes-  OPI Holiday 2017- Ornament to Be Together and Cirque- Madder.
Nail art tools- just some nail art tape.
Other- scissors and tweezers to take off the tape (Items not show above)
That's all you need!
Let's get this fun and yummy candy cane nail design started!
Candy Cane Nail Design  
Candy Cane Nail Design
Start off with a thin layer of base coat, my fav is CND Stickey base coat.
Let that dry, then polish all of your nails with a silver polish that has some holo in it. The polish I used is Ornament to Be Together from OPI, this polish is part of their new holiday collection for 2017. This silver polish has a subtle amount of holo in compared to most holos that I have. 
Once your base color of silver has dried, take your nail art tape and cut it into small pieces and place them on an angle on the nail, so that it will look like a candy cane.
Candy Cane Nail Design 
 Candy Cane Nail Design
At the tip of the nail, polish that area with a red holo polish, then the next area leave that silver. Repeat this for each part, to where every other part is red (as shown in the photo above.)
Grab your tweezers and right away, make sure your red polish does not dry and peel off the nail art tape that you placed on the nails. Doing this right away will help to keep your lines looking clean and straight.  

Repeat all of the steps above for all of your nails, or on my other hand I did things a little different. 

Candy Cane Nail Design
 Candy Cane Nail Design
 Candy Cane Nail Design

If you only want a few nails with the candy cane design on it you can just do the design on two nail, the thumb and ring finger nail (like the photo above), or even just as a accent nail, the ring finger nail.

Candy Cane Nail Design 
 Candy Cane Nail Design
   Candy Cane Nail Design

Once you have your candy cane nails the way you like, apply a top coat to seal in your design and to make your holo candy canes even more shinny. 

Hope you enjoyed this simple holiday nail design!

See you next time for more nail fun! 

Next week we have another Christmas nail design!   
     

Friday, December 30, 2016

New Year, New Beginnings- New Year Nail Design

Hello everyone! Happy New Year, well almost New Year! I can't believe how fast this year has gone! This year has been another big year for me, with a new career choice deciding to become a professional/ licensed nail tech, going back to school again to get licensed, passing the state board test, and then getting a job in a salon. This year has defiantly brought some big changes! In the coming year, I hope for more awesome new adventures!

Anyways today to celebrate this New Year we will be creating a new year nail design, with silver, holo silver, and black nail polish and for a pop of color adding some rainbow glitter to the design. This design can be kind of hard because we will be painting words and numbers on the nail, don't worry I do have a easier alternative that I did on my right hand.  

Happy New year 2017 Nail Design          Happy New year 2017! 

Here are the polishes and nail art tools use for this design:
 
Base and top coat - CND Stickey Base Coat and Revlon Extra Life No Chip top coat. 

Nail polishes- Sally Hansen- Hard as Nails- Black Heart, Sally Hansen- xtreme wear-Celeb city, Color Club Halo's- Harp on, Snowman rainbow glitter- frosty, and Color Club- Mini- Silver Glitter.

Nail art polishes- Kiss nail art polishes in black and silver.

Acrylic paint- black and white.

Nail art tools- a thin detail brush, a small dotting tool and nail art tape.

Other- a jar or cup with water in it to clean your nail art brushes, tweezers and small nail scissors, and a toothpick to place the glitter (not show in the photo above.) 

Let's start this New Year off right, with a cool nail design!    

Happy New year 2017 Nail Design
Happy New Year 2017 Nail Design
Start off with a base coat to protect your nails.
Once your base coat has dried, polish your thumb and pinky nail black, your middle and ring finger a glittery/ shimmery silver, and on your thumb a silver holographic. Also the black polish I used for this design  Sally Hansen- Hard as Nails- Black Heart is an awesome cheap black polish, that covers in one coat, the way it should be with a dark polish!

Happy New year 2017 Nail Design
 Happy New Year design on the thumb nail.

Let's start off with the thumb nail. This part can be kind of hard, I found that if you first paint the words with white acrylic paint it makes it a little bit easier, that if you mess up you can just wipe off the paint. Once you have Happy New Year! on your nails let that dry and then if you would like, take a silver stripping polish and go over the words again. Then once that dries take a rainbow glitter and polish that on the nail to look like confetti. 
Happy New year 2017 Nail Design  
 Silver Holo, black, and rainbow glitter nail design on index nail.
Next we will make the design on the index nail. First make sure the silver holo is dry, then take three strips of nail art tape and staring from the corner of the nail, place them on the nail on a slant. 
With your black thin nail art polish, fill in the top two areas that are taped off (like the photo above) and then with a regular black polish fill in the rest. I used the black stripper polish because it was easier to use a smaller brush near the top, that way you don't mess up that part with a thicker brush. 
* Make sure to peel up the tape with tweezers right away, don't wait for the polish to dry!
Then take your black stripper polish and make two thin lines in the blank areas.
After that has dried take a toothpick and place your rainbow glitter at the top corner of the design for a pop of color.
Happy New year 2017 Nail Design  
  2017 on middle and index nail 
Another hard part is writing 2017 on the middle and index nail. Once again I found that using black paint to write 2017 made it much easier. Start off with 2 and then 0 on the middle finger nail, then 1 and 7 on the ring finger nail, try to make sure that all of the numbers line up.
Once your numbers have dried, polish your rainbow glitter all over the nails so that is also looks like confetti. 
Happy New year 2017 Nail Design   
 Dripping glitter on the pinky nail.

Lastly the easy part dripping sliver glitter. Take your dotting tool with the sliver glitter on it, first drag the dotting tool on the tip of the nail, then drag the glitter down the nail making some long and some short drips. You will need to re- dip your dotting tool in the silver glitter polish when making the drips. 
 Happy New year 2017 Nail Design
 Happy New Year Nail Design! 

Once your New Year design is New Years ready, or just dried apply a top coat to protect your nails and to help them last into the New Year.

Happy New year 2017 Nail Design, simple design
  Other New Years Nail design on the right hand.
Was the first design a little to hard? Here is another option that incorporates some of the first design just made more simple.
On the index nail I did the same design as the pinky nail with a silver background and silver dripping glitter.    
The middle and ring finger nail I used the nail art tape to make a simple design. You just place as many pieces of nail art tape as you would like,and starting from one corner on a slant. The middle finger nail I used four pieces and the ring finger nail I used three pieces. 

Make sure to put extra top coat over the tape to make sure it sicks to the nails. I have ran into the problem of the tape not sicking well. 

Than for an add touch just place some glitter in the corner where all the tape meets. 
The pinky nails just polish some rainbow glitter over the black. 
Happy New year 2017 Nail Design, simple design     Design on the other thumb nail
For the thumb nail this is the same design that is created on the index nail on my left hand. The thicker black part is just in the middle and the two thin lines are on the sides. 
Happy New year 2017 Nail Design, simple design 
New Years Nail Design on the right hand.

Above is the final design that I created on my right hand, this is a great option if writing Happy New Year! 2017 is a little to hard.

Hope all of you enjoyed this party ready or just sitting at home watching the ball drop on TV design.

See you next year for more nail fun! 

The start of next year I have a collection that I am super excited to share with all of you, it is a collection based on one of my favorite movies, and of course a lot more fun nail art that we can try together or you can just look at and enjoy!     

Have a fun and safe New Year 2017!