Wednesday, May 22, 2019

Dragonfly Dreams- Dragonfly Nail Design

Hello everyone! Today we will be creating a dragonfly design. This design is inspired by a design that I would do on this lady, that would come to the nail salon that I use to work at and she would always want a dragonfly on her big toenail. So after doing this design plenty of times on her, I thought I would give it a try on my own finger nails, and show all of you how it is done. 


Dragonfly Nail Design 

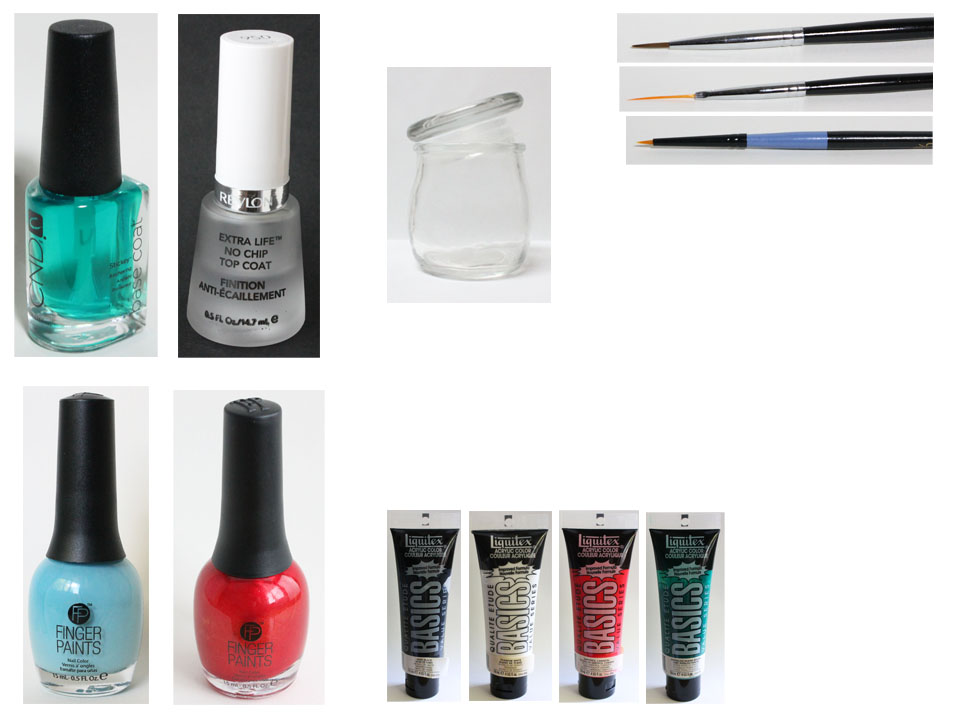
Here are the nail art tools and polishes used to create this dragonfly design:


Base coat and top coat - CND Stickey Base Coat and Revlon Extra Life No Chip top coat.

Nail polishes- Sally Hansen- Insta Dri Matte- Smoldering Teal, Loreal- textured polish, too dimensional, Sally Hansen- xtreme wear-Celeb city, and Color Club- Mini- Silver Glitter.

Acrylic paint- (optional used to create an outline) White.

Nail art tools- thin detail brush, medium and large dotting tools.

Other- a small glass jar with acetone in it to clean off your nail art brushes.


Dragonfly Nail Design 
Dragonfly Nail Design

Start off with clean nails, with no polish on them, and apply a thin layer of base coat.

Let that dry.

Then polish all of your nails with a teal colored polish, I used Sally Hansen- Insta Dri Matte- Smoldering Teal.

Let that dry as well.

Dragonfly Nail Design 
 Dragonfly Nail Design

We will first start off with the very simple part, the glitter trail that is left behind by the dragonfly. I know dragonflies don't leave a glitter trail, but I thought it would look pretty as a part of this design and I was really unsure what I could put on the other nails, so we will go with a glitter trail.  

Start off by take a little bit of your glitter polish and pouring some out on a nail mat or a plastic bag, then taking a small detail brush with that glitter on it and make a very big curved line that starts at the index nail and end at the pinky finger nail. I did each part of the line in sections/ one nail at a time. Just make sure the line lines up when you put your finger together.

Dragonfly Nail Design 
Dragonfly Nail Design

To complete this design we will make the dragonfly on the thumb nail. With all of the designs I do I always like to create an outline with acrylic paint, for this design I first created the outline with white, this part is optional you can always go straight in with nail polish. 

For creating the white outline, first take a clean detail brush with white paint on it and we will make the wings first. Also make sure to leave a little bit of space in between the wings for the body.

Starting on the right side make a teardrop shape near the tip of the nail and then right under that make another teardrop shape for the wings. Repeat this step on the other side for the other part of the wings.

For the body take a few different sized dotting tools to make your dots/ body for the dragonfly, with a sliver polish starting with a large dot and then going small, make a kind of curved line with dots for the body going down the nail.

If you did create a outline with white paint, once that has dried with a small detail brush and a glittery purple (our whatever colored polish you would like), go over the wings with that polish. 

Dragonfly Nail Design
 Dragonfly Nail Design

Once you have your design the way you like apply a topcoat to seal in your design and to make it nice and shinny, I did use a matte teal polish for the base color. 

Hope all of you enjoyed this design, that is nice and simple and great for Spring and Summer.

See you next time for more nail fun!   

Wednesday, May 15, 2019

Sally Hansen Insta- Dri Matte Nail Polishes Review

Hello everyone! Today we will be going over some kind of newer polishes that Sally Hansen released a few months ago as a part of their Insta Dri line. Not to long ago I did a review on their Jelly Belly Polishes that where also a part of their Insta Dri line, I also purchased these around the same time and I wanted to also give them a try. Unlike the Jelly Belly polishes I think the Insta- Dri Matte's are a permanent part of their line. 

Sally Hansen Insta Dri Matte Polish  
Sally Hansen Insta Dri Matte Polishes 

The Sally Hansen Insta- Dri Matte's are made up of eight polishes, as you can see from the photo above I only purchased two of the eight polishes, I will rarely buy a whole collection of polishes because most of the time I am only interested in a few of the polishes.

This collection is of course is all matte polishes, here is a list of all of the polishes names:

Gold Rush, a gold colored polish
Rose Flush, a rosy peach color
Molten Mauve, a mauve red  
Burnished Wine, a purple magenta
Violet Velvet, a purple
Blue Steel, a royal blue
Smoldering Teal, a teal 
Smokey Silver, a silver

Let's take a closer look at the two polishes that I purchased.

Sally Hansen Insta Dri Matte Polish 
 Sally Hansen Insta Dri Matte Polish
 Sally Hansen Insta Dri Matte Polish, Smoldering Teal with a glossy top coat

First off you may look at the photo's above and say those polishes do not look matte? That is because I did apply a glossy topcoat to all of my nails, I personal like the look of glossy over matte. I do have a photo of the polishes on a swatch wheel that show them both matte and glossy, that I will put into this post as well.

Anyways first we have Smoldering Teal, just like the name says (like all of the polishes in this collection it says the color right in the name.) this is a teal polish that also has some aqua in it as well. This polish also remind me of the ocean or a mermaid color. This polish had a pretty good formula, it did take me three coats to be opaque.

Sally Hansen Insta Dri Matte Polish
Sally Hansen Insta Dri Matte Polish, Violet Velvet with a glossy top coat

Lastly we have Violet Velvet, this is purple/ violet polish that does have some blue in it. This also had a good formula as well, it was opaque for me in three coats as well. 


Sally Hansen Insta Dri Matte Polish 
Sally Hansen Insta Dri Matte Polish, Shown Matte and Glossy

Above is a photo of the polishes both matte and glossy, I personal like them better glossy but they still looked nice matte.  


Sally Hansen Insta Dri Matte Polish
     Sally Hansen Insta Dri Matte Polish

These polishes also have the wider brushes just like the Jelly Belly polishes, but I found the formula to be better and easier to apply, it also may be the colors that I picked from this collection, these colors are much easier for me to polish, then the lighter colors I picked from the Jelly Belly Collection.

As for the matte formula, these polishes where very easy to apply. I have found that some matte polishes dry/ become matte to fast, like you polish one part and go to the next part of the nail and that is all ready matte, you then go to do your next stroke and because of that already being dry it just does not look right. Even thought these polishes are Insta Dri I did not find that to happen you could polish the whole nail and it would not become matte to fast. 

As for drying very fast, I am never to sure on that I also wait forever for my polish to dry just to make sure I don't mess them up. 

Sally Hansen Insta Dri Matte Polish Sally Hansen Insta Dri Matte Polish
Sally Hansen Insta Dri Matte Polish, Smoldering Teal and Violet Velvet

In conclusion I would recommend these polishes even though I only tried two, the formula seems good and they look good both matte and glossy.

   
I purchased these at Walmart for $3.96

Here are some other places where you can purchase this collection as well. 

 Target $4.09

 Ulta$4.99

Walmart  $3.96


Hope all of you enjoyed this small review of the Sally Hansen Insta Dri Matte Polish! 

See you next time for more nail fun!           

Friday, May 10, 2019

I Choose You Pikachu- Pikachu Nail Design

Hello everyone! Today we will be doing something just a little bit different, in celebration of the new movie, Detective Pikachu that came out today, May 10. I will be showing you a recreation of the Pikachu design that I did back in 2015, this will not be a step by step tutorial because this design is very similar to the one I created in 2015, but  I will still add a link to that design if any of you would like to create it. 

Pokémon Pikachu Nail Design 2015 and 2019 
 Pikachu Nail Design 2015 and 2019

As all of you may have guessed I am a big Pokemon/ Pikachu fan and I super excited to see the new Detective Pikachu Movie! I have been a fan ever since Pokemon came to the USA in the 90's and Pikachu has always been my favorite. So I thought I would give the Pikachu design another try jut in time for the movie. 

As you can see from the photo above I did make a little bit of a change, on the thumb nail I add a teal background, I put Pikachu near the cuticle, and I painted Pikcahu with acrylic paint instead of polish like I did on the first design.
  
Pokémon Pikachu Nail Design 2015 and 2019

Then on the ring finger nail I made the Poke Ball/ a circle that did not covering up the whole nail on the same teal background. As for the other nails I decided to keep them the same, with the Poke Ball on the entire nail.   


Pokémon Pikachu Nail Design 2015 
 Pokémon Pikachu Nail Design 2015

With anything I feel that with time you can improve, looking back at the design I did back in 2015, I feel like I did better this time around, I mean the design I did back in 2015 when I first started this blog was still good, but I can tell that I have improved. The main thing I noticed is the cuticle area looks better now. 

 Pokémon Pikachu Nail Design
Pokémon Pikachu Nail Design 2019

Even the redo design that I did, I would still not mind recreating/ changing up this design again just to see if I can do better. On the design I created now, I did make the center parts of the Poke Balls a little big. Also what you can't see in the photo is I actually had to redo Pikachu on thumb because I messed up, but after waiting a while and trying again he came out really good.  


Pokémon Pikachu Nail Design
Pokémon Pikachu Nail Design 
Pikachu Design on thumb nail 

For this design I really wanted to recreate this design for the movie and just to see how I could improve on the design that I did back in 2015. Also along with the design it's self I feel like I have also improve on the photo as well. I do use a pro camera, well starter camera the Canon EOS Rebel T3 (this is a older camera, but still good), at first back in 2015 I took my photos next to a window, which is not always reliable, now I used a day time photography like bulb. I take my photos both then and now, in front of a box that I have covered with white paper or now sometimes a black piece of fabric. My set up is not fancy at all it is very basic, but I try to make my photos look like they are not just taken with a cellphone camera.    
Pokémon Pikachu Nail Design
Pokémon Pikachu Nail Design 

Pokémon Pikachu Nail Design 
Pokémon Pikachu Nail Design  

If you would like to create this design as well, here is the link to my first design called
 Pika- Pika and you can have you nails ready to see Detective Pikachu too.

Hope all of you enjoined this post even if it was not a step by step tutorial, but just a then and now.

See you next time for more nail fun!    

Wednesday, May 1, 2019

Cherry Fest- Cherry Nail Design

Hello everyone! Happy first day of May! I can't believe it's already May, time is going by way to fast! Anyways today we will be create a fun and cute cherry design that I thought would be cute for spring and summer time. When it comes to cherries I don't actually like the fruit is self, but I do like cherry flavored candy and cherry scented things, my favorite fruit is strawberries and pineapples. What is your favorite fruit?
  
Cherry Nail Design  
Cherry Nail Design  

Here are the polishes and nail art tools to create this cute cherry nail design:  


Base and top coat- CND Stickey Base Coat and Revlon Extra Life No Chip top coat.

Nail polishes- Finger paints- Tiffany imposter, and Finger paints- Cubism Crimson.
(Just two polishes that is all you need, the rest is done with paint.) 

Acrylic paint- black, white, red, and green.

Nail art tools- thin liner brush, thin stripper brush, and a very small thin detail brush.

A cup of water to clean off your nail art brushes.

Cherry Nail Design  
 Cherry Nail Design 

Start off with clean nails, with no polish on them, then on your dry nails apply a thin layer of base coat to help your design to last and to protect them as well.

Let that dry. 

Then polish your thumb, middle and ring finger nail with a light blue, these are the nails that we will be doing the nail art on. Then on your index and pinky nail polish those two nails with a shimmer red polish, those two nails will just stay red.

Let that dry as well.

Cherry Nail Design
Cherry Nail Design 

Once your base polishes has dried, we will create the cherry nail art on our thumb, middle and ring finger nails, you also can always do this design on all the nails or even just one, it is up to you.   

For the cherries I did use two different colors of red, the red paint that I already had, and then I added a very small amount of black to the red a well, to make the red a little bit darker, although when I used the two colors on the nail it was a little hard to see the different in color. 

For the cherry shapes, take a liner brush with red paint on it and make random circles on the nail, making sure to leave a good amount of blue/ background around the nail. As stated above I did use two different reds, so make sure some of the cherries are a lighter/ brighter red and some are a darker red.

Cherry Nail Design  
Cherry Nail Design

Also for the cherries you can make some of them overlap like I did more so on the thumb, and some that are just one cherry. 

Then on to the steams of the cherries, take a thin stripper brush with green paint on it and from the red circles/ cherries we just made make a green line. On the cherries that are overlapping make the green lines connect, also on some of the steams make some smaller lines for leaves. 

For a small added touch I added a few very small leaves in the area around the cherries, most of the nail I just put three leaves. 

For are very last small detail we will add a very small white line on the cherries for the refection. Take your very small detail brush with white paint on it and on the corner of your cherries make a very small curved line. 

 Cherry Nail Design
 Cherry Nail Design 

Once you have your cherry design the way you like and ready for spring/ summer, apply a top coat to seal in your design and to help it last. 

Hope all of you enjoyed this cute and simple cherry nail design, that is really good for beginners.  

See you next time for more nail fun!