Friday, April 15, 2022

Peep Peep- Easter Nail Design

Hello everyone! Happy Easter! Today on the blog we will be create a cute Easter chick and flower nail design. 

Easter Nail Design

Here are the polishes and nail art tools used to create this nail design:


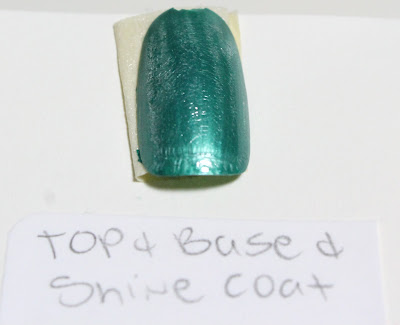
Base and top coat- CND Stickey Base Coat and CND Super Shiney Top Coat.

Polish- Finger paints- Tiffany Imposter, and Sally Hansen- Insta Dri- Peeps Blue.

Acrylic Paint- White, yellow, red, green, black, and purple. Mixed white and yellow to make a more opaque yellow, mixed yellow and green for a lighter green, and mixed yellow and red to make orange. 

Nail art tools- Thin dealt and stripper brush.

Other- water to clean off nail art brushes. 


Easter Nail Design

Apply base coat.

Let that dry.

Polish, I used two kinds of light blue polish, which is not necessary but I just like to use more than one polish.

Thumb and pinky nails- Finger paints- Tiffany Imposter.
Index, middles and ring finger nails- Sally Hansen- Insta Dri- Peeps Blue

Let that dry. 

Easter Nail Design

On all three nails we will be making the grass first. Take a thin stripper brush with a darker green paint on it, starting on the tip of the nails make some over lapping lines, then with a lighter green do the same thing for some contrast in the grass. 

Next we will make the steams for the flowers. With that same stripper brush with some green paint on it, on the index nail make two long lines, on the ring finger make three longs, then two short lines for the leaves. 

Easter Nail Design

On the index and ring finger nail we will make some daisies. On the steams that we just made, take a thin detail brush with white paint on it, staring right on the steam make two lines, then two more on the sides, lastly make two lines on top to make your very simple daisy. Repeat this step for all of your flowers. For the final touch add a small yellow circle in the middle of the flower. 

Easter Nail Design

Lastly we will make the chick and egg on the middle finger nail. For the chick, take a small detail brush with yellow paint on it, make an oval shape for the body, then make a small circle on top of that oval. 

For the other small details; legs, beak, and wing. Take you thin stripper brush with orange on it make two lines coming from the bottom of the body and two small ones form the sides for the feet. 

For the beak make a small triangle on the side of the small circle. Then for the wing make two small curved lines right beside each other on the body. 

For out final touch we will make a small Easter egg, with purple paint just make a small oval, egg shape on the ground near the chick. 

Easter Nail Design

Once your nails are Easter ready apply a top coat to seal in your nail design and to help it to last. 

Hope all of you enjoyed this Easter nail design and have a Happy Easter!

See you next time for more nail fun! 

Saturday, April 9, 2022

Floral Bloom- White and Pink Flower Nail Design

Hello everyone! Happy spring time! Here in the USA it is now spring time, even though it may not feel like it just yet, at lest where I live. Today we are going to create a spring themed nail design, with white and pink flowers.

White and Pink Flower Nail Design 

Here are the polishes and nail art tools used to create this pink spring nail design:

Base and top coat- CND Stickey Base Coat, and CND Super Shiney Top Coat.

Nail polish- Sally Hansen- Color Therapy- Mauve Mantra, Zoya Sunshine- Minnie, and Zoya Sunshine- Missy.

Acrylic paint- Red, green, yellow, and white. Mix red and white to make pink. 

Nail art tools- Thin detail and stripper brush, and a small flat brush.

Other- Cup of water to clean off your nail art brushes. 

White and Pink Flower Nail Design

Apply base coat.

Let that dry.

Polish- Different shades of pink polish. I pretty much always like to have a mix of different polishes on my nails, you of course can just have one shade of pink polish. 

Thumb- Light pink (Zoya Sunshine- Minnie).

Index and pink finger nail- a slightly brighter light pink (Zoya Sunshine- Missy).

Middle, and ring finger - Light pink with a little bit of pink shimmer ( Sally Hansen- Color Therapy- Mauve Mantra).

Let that dry. 

White and Pink Flower Nail Design

Multiple Flowers on the Middle and Ring Finger Nails-

First we will start off with the smaller flowers on the middle and index nails. For both nails we will make one larger flower near the tip of the nails and a few flower petals around that. The middle finger nail does have a few more petals than the ring finger nail.

For the large flower, take a detail brush with white paint on it starting near the tip of the nail make a petal shape, then two on the sides, and one at the top, you will need to go over this a few times to be opaque. Repeat this step on the other nail.

On the middle finger nail I decided to add a four more petals on the sides, the ring finger nail I just added two petals.

Once the white has dried take a thin stripper brush with pink paint on it (I just mixed red and white to make my pink paint) on the white petals make very close lines on each petal. 

Lastly on the flowers make a small yellow dot on the center. 

As always with any design you can add more larger flowers or more petals, depending on your nail length and size. 

White and Pink Flower Nail Design

For a final touch we will add leaves and vines. Take your thin stripper brush with green paint on it   and make leaves on the sides of the flowers and a few around the nail. Then make some random lines around the flower for the vines. 

White and Pink Flower Nail Design

Large Flower on the Thumb Nail: 

On the thumb nail we will make one large flower. Take a small flat brush with white paint on it, starting from the middle of the nail swipe up to make a petal, then do this again on both sides and then twice under those to petals. You will need to go over this a few times to be opaque. 

Once that is dry, similar to the smaller flower we will make the pink part of the flower. With your thin detail brush make a lot of small lines close together on each petal. 

Lastly for the flower make the yellow circle in the center of the flower. 

For the final touch again, we will make two leaves on the side of the flower and a small one on top, and then more lines for the vines. 

White and Pink Flower Nail Design

Once your nails are spring time ready apply a top coat to seal in your design and to help it to last   though spring or at lest until you want to change your nails. 

Hope all of you have enjoyed this white and pink flower nail design.

See you next time for more nail fun! 

Friday, April 1, 2022

Kapa Nui Polish Review- Better For You Nail Polish

Hello or Aloha everyone! Today we will be taking a look at a new to me brand called Kapa Nui. This is a brand that is suppose to be healthier for you, free of toxins, fume- fee, body and planet safe, and a lot of other better for you clams. Along with being made in Hawaii. I found this brand on Facebook and was interested in them really because they are made in Hawaii, I honestly don't really care for the "healthy for you/ better for you" brands, it really doesn't matter to me.

Also Kapa Nui in Hawaiian means Grand Covering. 

Kapa Nui Polish Review

Let's take a look at the polishes that I got. On the Kapa Nui website they an option to get different collections; ones that are already set up for you, or the set that I got the personalized collection. As for the personalized collection you can pick any three polishes from the list that they have. I went for I guess a more ocean theme.

Kapa Nui Polish Review

In this collection it includes, three polishes that you can pick, nail polish remover, top and base coat (all in one), cuticle pusher, remover pads, and a caring case/ bag.  

Kapa Nui Polish Review

The polishes them self come in a small bottle 9ml/0.3 fl.oz. The bottle themselves are nice with a wood look to them. 

Their base and top coat is an all in one and is 15ml/ 0.5fl.oz, which is a bigger size. This topcoat is not like other topcoat, when you apply the base/ top coat it does't look like anything is going on the nails, and to me it does have an alcohol smell to it, and in the bottle it just looks like water. It does only have 2 ingredients in it 1-methoxy & 2-propanol, not sure what those are because I don't know anything about those ingredients. 

As for the polishes they only have three ingredients; water, acrylates, and copolymer. Also on the bottle say may contain other things as well, that you can hopefully see in the photo above. This polish is actually free of fumes and does not have the nail polish smell to it. 

Also in the collection they give you a nail polish remover. That once again has one ingredient 1,3- dioxolane. I once again know nothing about any of these ingredients to know are they "really better for you"? Also on the website they say you have to use this remover to remove the polish. 


Lastly in this set they also included a free mini size of the shine finishing coat (shine top coat). This was another on that did not apply like any topcoat. I honestly did not like this at all. I tried this on my swatch nails and it looked bad. That I am glad I didn't use this on my actual nails.


As you can see on this polish it looks like it has cracked. 

In this photo it is a little hard to see, but the topcoat looks kind of smeared at the bottom of the nail. 


This nail I didn't use the shine coat and it looks fine. So I would skip the shine coat and just get the top & base. 


Their was also a card in the collection bag to that was a nice touch just saying Mahalo/ Thank you and then on the back how to us the polish and remover. 

The one thing I do have to say about the instructions on the back is they say cure time. As someone that is a licensees nail tech, regular nail polish does not cure, this is a term used for gel polish that you cure under LED lamp. Regular polish just dries by air it doesn't cure.  

Anyways let's take a look at the polishes.

Kapa Nui- Kailua Bay

Kapa Nui- Kailua Bay

Kapa Nui- Kailua Bay

Kapa Nui- Kailua Bay

Kailua Bay is a light ocean blue cream polish. Kailua Bay is a beach on Oahu, where the water are turquoise and the sand is powdery white (according to Kapa Nui website). This polish applied well in two coats, when I applied this I felt like I was applying acrylic paint to my nails. As you can tell I had a hard time cleaning this polish up around the nails and cuticles (I am not perfect at polishing) I tried their remover and a regular remover with very little luck. I finally just had to scrap the sides of the finger and just leave the cuticles.

Kapa Nui- Molokini Mermaid

Kapa Nui- Molokini Mermaid

Next we have Molokini Mermaid a glitter shimmer teal polish. Molokini is a island off of Maui. This applied okay in three coats. This one was also har to clean top around the nails and cuticles. This polish is pretty and reminds me of the ocean in Hawaii. 

Kapa Nui- Anini

Kapa Nui- Anini

Lastly we have Anini a greenish, turquoise shimmer metal polish. Anini is a beach on the Island of Kaua'i. This polish applied well in two coats and was a little better or I just polish better with this one. 

With all of these polishes I wanted to test if they would work well with my usual top and base the CND sticky base and CND top coat, along with thier base and top coat. Well that did not go well at all, on my right had I applied the CND top and base coat with the Kapu Nui polish, it started to chip right way the next day I could peel off all of my polish. 

On my left hand I use the Kapa Nui top and base, it was a little betters still had some chipping through out the week, regular polish last very well on me, with little to no chipping though out the week. 

Then when it came to removing the polish that was very hard. I used their remover like it said and it took what seem like forever to remover, probably half an hour. I was thinking maybe it was user error, then I looked at reviews on Facebook and some other people had the same issue removing their polish. At one point I actually had to scrap the polish off of my nails, which is not good. 

Kapa Nui Collection

In conclusion I like the idea and look of they collection, that you can pick any three polishes that you want and the look of the set is pretty and reminds me of Hawaii. The polishes them self I was not happy with. They are pretty, but don't wear well and are very hard to remove. I personal think even though Kapa Nui says to use their system, that you should still be able to use your usual top and base and the polish should not be so hard to remove.

So unfortunately I will not be purchasing any more of these polishes, honestly if I could I would return this set, but on the website they have a month return policy, and I am pass the month of having these. I guess that maybe I will try and get these to work, I really don't know. I really did want to like these polishes, they where not cheap or affordable either, they where kind of pricey for what they are.

Lastly is there really a "better for you nail polish" because nail polish now days don't have the dangerous chemicals in them anyways. I personally like the Zoya that is 10 free of a lot of the bad chemicals that some polishes have. Also I think if you are worried about nail polish being bad, just don't wear it. 

Anyways I will still leave a link to the website, maybe these polishes could work out better for you, or maybe you like the better for you nail polish.

kapanuinails- personalized polish collection  originally $74.50 on sale as of this post $65.00 

They also have where you can get savings 10%, 15%, 20% buy 1 get 1 free and $5 gift card.

The individual polishes cost $10.50 each USD.

Hope this review was somewhat helpful even though it didn't go to well for me.

See you next time for more polish fun!