Showing posts with label Sally Hansen. Show all posts

Saturday, July 18, 2026

Tropical Dream Vacation- Tropical Nail Design

Hello everyone! Hope everyone is having a good summer so far. Like every summer I love doing tropical design and I am missing Hawaii so much right now and I want to go back so bad! If you are like me and dreaming of a tropical vacation this nail design well be great for us to create together. Today's design remind me of the beautiful ocean and the sunset, along with a yummy smoothie that you can find on a tropical vacation. 

Tropical Nail Design

Here are the polishes and nail art tools used to create this tropical nail design:


Base and top coat- CND Stickey Base Coat and CND Super Shiney Top Coat.

Polishes- Pretty& Polished- Sea Spray, China glaze- Shades of Paradise- Mer-Made For Bluer Waters, Holo Taco-Vacation collection-Beach Please, Sally Hansen- Triple Shine- Lemon Shark, OPI Hawaii- Is Mai Tai Croooked, and OPI- La Paz-itively Hot. 

Acrylic paint- Black, white, blue, yellow.

Nail art brushes- Thin detail, linear, and striper brushes.

Other- Makeup sponge for gradients, a small cup of water to clean off your nail art brushes, and Liquid latex for easy clean up when you are doing gradients. Also not pictured a Q-tip or cotton swab. 

Tropical Nail Design

Apply a topcoat to clean dry nails, and let that dry.

Polish- 

This is the base colors that you need for your gradients, always start off with the lights color. 

Thumb- Light shimmery ocean colored polish (China Glaze- Mer- Made For Bluer Waters)

Index, middle, ring and pinky finger nails- a yellow cream polish (Sally Hansen- Lemon Shark)

Tropical Nail Design

Tropical Nail Design

Sunset Gradient On the Index, Middle, Ring and Pinky Fingers: 

We will first start off with the sunset gradient, that kind of reminds me of a fruit smoothie. Take a makeup sponge, take a pink cream polish (OPI- La Paz-itively Hot), over lapping that polish just a little, polish with a light orange (OPI- Is Mai Tai Croooked) then over lapping that polish a little, lastly polish a yellow cream polish (Sally Hansen- Lemon Shark.)

For easy clean up if you are not allergic to liquid latex, apply a liquid latex (I use the Holo Taco one) around all the fingers. 

Now take your makeup sponge with the pink side facing your cuticle and dab on your nail, you will have to repeat the steps that you just did above for each nail. You always need to reapply your polish on the sponge for each nail. 

Once you are finished with your gradient peel off your liquid latex if you applied one to your fingers. 

Tropical Nail Design

Beach Scene On The Ring Finger Nail:

On the ring finger nail we will create the beach scene. If you don't have a light blue paint, first take some white paint and a little blue and mix those to together. Take a thin striper brush with a darker blue paint on it, near the tip of the nail make a thin line for your ocean, also on the side of the nail make a slanted line for where the ocean and the sand will be. Leave some space on the side of the nail for some sand, by polishing a sand colored polish (Holo Taco- Beach Please.)

Back to the ocean water, take a detail brush with a blue on it and near the line we just made paint this area with the blue, then with the lighter blue near the tip of the nail paint that area. Try to blend the two colors together where they meet. 

For the ocean waves take a thin striper brush with white paint on it, where the light and the dark blue meet make a thin line, while that is till wet take a clean dry liner brush, push that wet paint upward to make a wave. Then where the water and the sand meet make a wavy line there as well. 

On the sand make a large palm tree, take a thin striper brush with black paint on it make a thin line from the sand, then two curved lines on each side, two more from that, and lastly one form the top for your palm tree. Then for your palm leaves make very small lines on each of the lines you just made (this is very tedious, but looks great in the end) 

Next for the final touches, we will make the sun, first to make an outline we will make a half oval with white paint, then once that dries go over that with yellow paint. To show the glow from the sun, take a little bit of the yellow and paint that around the sun. 

Lastly we will make two very small birds in the sky, by making to small v shapes near the cuticle. 

Tropical Nail Design

Ocean On The Thumb Nail: 

For the last part of the nail design we will create the ocean. First we need to create the gradient just like the sunset gradient we did above, we will repeat the same steps.For the colors start with a darker holo blue (Pretty& Polished- Sea Spray), then the same as your base color (China glaze- Mer-Made For Bluer Waters) and lastly a sand colored polish (Holo Taco- Beach Please). You will need to dab the nail a few times to be opaque. 

For your the final touches for your ocean nail take a thin striper brush with white paint on it, make a wavy line where the ocean and the water meet and while it is still wet with a clean linear brush push that paint upward. Then for a final touch take a Q-tip with white paint on it and dab that on the wave you just made to give that bubble look that the ocean sometimes has. 


Tropical Nail Design

Once your tropical nail design is all ready for your next vacation or you are just dreaming of one, apply a top coat to seal in your design and to help it to last.

Tropical Nail Design
Practice Design 

Hope all of you enjoyed this tropical dream vacation design! 

See you next time for more nail fun! 

Saturday, March 30, 2024

Easter Time- Easter Nail Design

Hello everyone! Happy Easter! Today on the blog we will be creating a cute Easter nail design with a bunny and a chick in an egg. 

Easter Nail Design

Easter Nail Design

Here are the polishes and nail art tools used to create the Easter design- 


Base and top coat- CND Stickey Base Coat and CND Super Shiney Top Coat. 

Polishes- China Glaze- Chalk Me Up!, Zoya Mini- Daisy, Zoya Mini- Rayne, Zoya Mini- Leslie, Zoya Mini- Eden, Holo Taco- Polar Princess, and Sally Hansen- Hard as Nails- Hard to get. 

Acrylic paint- White, black, yellow, green, red, and pink. (mixed yellow and red for orange if you don't have an orange paint.) 

Nail art brushes- Thin detail, linear and stripper brushes. 

Easter Nail Design

Apply a base coat and let that dry.

Polishes- 
Thumb- a light blue cream polish ( China Glaze- Chalk Me Up!)
Index- a light yellow shimmer (Zoya- Daisy)
Middle- a light blue shimmer (Zoya- Rayne)
Ring- a light purple shimmer (Zoya- Leslie)
Pinky- a pink cream polish (Zoya- Eden) 

Then take an iridescent polish, Holo Taco Polar Princess and polish it over the pink to give the pink a shimmer. 

Let that dry. 


Easter Nail Design
Easter Nail Design

For this design we will just be creating nail art on the ring finger and the thumb nail. The Index, middle and pink nail will just stay the blank colors with no nail art. 

Easter Nail Design

Chick in the Egg on the Ring Finger Nail- 

For your little chick I first made an outline of him with white and then went over him with yellow that way the yellow would pop more/ you can see it better.

First take a linear brush with white paint on it and make a large oval in the middle of the nail, add two lines above his head for hair, make a small half body for your chick too, we will let that dry. 

Once your base white has dried take a yellow paint and paint over the white a few time until it is opaque. 

For the egg shell make some triangle shapes along your nail above your chick, then fill in the bottom half of the nail with white polish. 

Lastly for his face make two small black dots for his eyes and then for his beak take a orange paint and make a small upside down triangle.

Easter Nail Design

Easter Bunny on the Thumb Nail- 

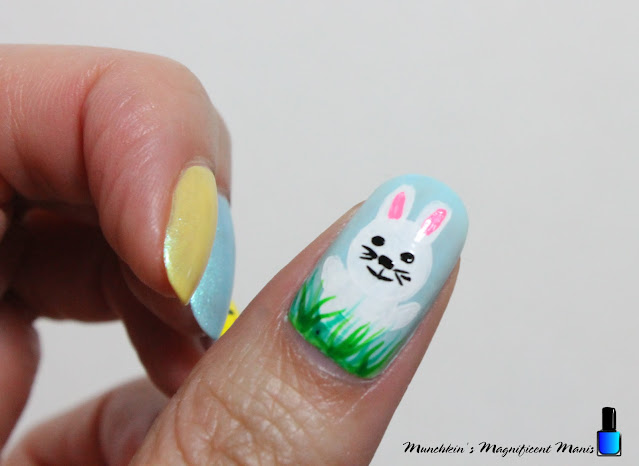
On the thumb nail we will make a bunny in the grass. Take a detail brush with white paint on it and make a circle in the middle of the nail and fill that in for his head, then for his ears make two small oval shapes. For his body make a large oval, then for his arms make two thin oval shapes on each side of his body. 

Let that dry. 

For his face take that same detail brush with black paint on it and make two small dots for his eyes and one user that for his nose. 

Then take a stripper brush with black paint on it, make a few lines on the side of his face for whiskers. Then make a small line down his nose and a curved line for his smile. 

Lastly for his ears make a thick oval shape in his ears with pink paint. 

Now will need to make the grass for our bunny to sit in. Make sure you have two greens, a light and a dark green. First take your light green on a stripper brush and make some grass like lines under/ on your bunny, then do the same with a darker green. 

Easter Nail Design

Once your nails are Easter ready apply a top coat to seal in your nails and to help them to last.

Here is the practice version of the Easter design. I actually like how the chick turned out in the practice version because he looks chubby, I could not get him to look like this on my nails, my nails are not as wide as the nails that I practice on.  

Hope all of you enjoyed this Easter nail design and if you celebrate Easter hope you have a good Easter!

See you next time for more nail fun! 

Saturday, January 27, 2024

Snowflakes- Snowflake Nail Design

Hello everyone! Today on the blog we will be creating a winter snowflake themed nail design. In the last posted where we created a snowman on our nails, I had said that the weather where I live has been kind of on the mild side/ kind of warm for winter. Well last week winter weather hit us and it was in the single digits and the teens with snow. Anyway that's why I thought it would be fitting to create a pretty snowflake nail design, plus I just felt like creating another snowflake design. 😀

Snowflake Nail Design

Here are the polishes and nail art tools used to create this pretty snowflake nail design:

Top and base coat- CND Stickey Base Coat and CND Super Shiney Top Coat. 

Polishes- Holo Taco- Twice in a Blue Moon- Magnetic Magic Collection, Sally Hansen- xtreme wear-Celeb city, Holo Taco- Flakie, Holo Taco- World's First- Chorme Collection, Kiss nail art striper- Silver. 

Nail art tools- Thin stripper brush, small dotting tool, and a makeup sponge. 

Other- Water to clean off your nail art brushes. 

Snowflake Nail Design

Apply a top coat, let that dry.

Polishes- 

Thumb, index, middle, and pinky finger nails- shimmery blue (Holo Taco- Twice in a Blue Moon)

Ring finger nail- Silver (Sally Hansen- xtreme wear-Celeb city)

Let that dry.

Snowflake Nail Design

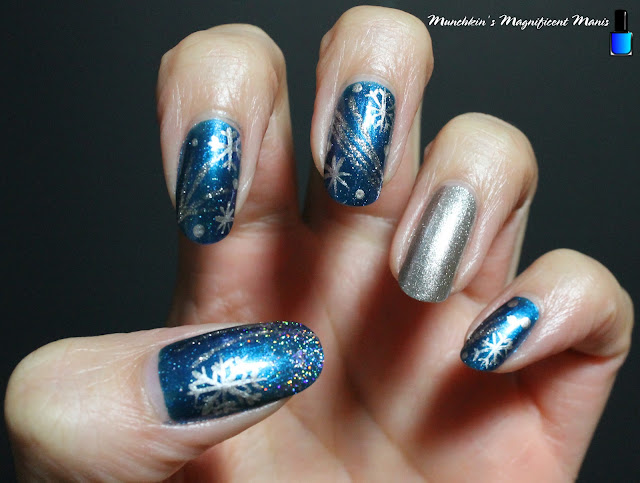
We will first start off with the thumb nail. On the thumb we will first make a glitter gradient (this is done only on the thumb nail) take a glitter polish and first polish some mainly on the tip of the nail, then take a makeup sponge with that same glitter polish on it and dab that on the tip of the nail mainly focusing on the tip of the nail, making the glitter look like it is fading up the nail.

Let that dry. 

Take a nail art polish or a silver polish on a thin brush and make two curved lines on the side of the nail right next to each other. 

Lastly we will make a large snowflake on the lower right hand corner. Take a thin stripper brush with sliver metallic polish on it and make a cross shape then make two lines on each side of the cross shape, then make two very small lines on every large line to complete your snowflake.  

Snowflake Nail Design

Snowflake Nail Design

We will now go on to creating the next design part on the index and middle finger nails. Starting with the index nail take your silver nail art polish and make four line from the left side of the nail. 

Then make a more simple version of the snowflake that we just made on the thumb nail, on the upper right hand corner/ near the cuticle. Then near the tip of the nail make a star shape snowflake. 

For the final touch take a dotting tool with silver metallic polish on it and make a few dots in some of the empty space on the nail.

On to the middle finger nail, take your nail art polish and make a few lines across the nail. 

Then make two snowflakes one near the cuticle again and one near the tip of the nail that is a simple star shape snowflake. 

Then finish off the nail with a few silver dots.

Snowflake Nail Design

Lastly we will finish this nail design with the pinky nail. Once again take your nail art polish and make a few lines from the side of the nail.

On this nail because it is the smallest nail we will just make one snowflake near the tip of the nail.

Then once again make a few silver dots on the empty space around the nail. 

Snowflake Nail Design

Once your nails are ready for the snow, apply a top coat to seal in your nail and to help it to last. 


Here is the practice version of this snowflake design 

Hope all of you enjoyed creating this snowflake nail design, and try to keep warm this winter if you live some where it is cold. 

See you next time for more nail fun!

Friday, November 24, 2023

Autumn Time- Fall Nail Design

Hello everyone! Hope everyone had a good Thanksgiving and a long weekend (if you got the time off from work.) Today on the blog we will be creating a fall themed nail design, even though most people are probably like it is winter, but it is actually it is still fall, so I thought we could still go a head and create a fall design, even thought most people might be in the winter/ Christmas mood. 

Fall Nail Design

Here are the polishes and nail art tools used to create this fall nail design-


Top and Base coat- CND Stickey Base Coat and CND Super Shiney Top Coat.

Polishes- Sally Hansen- xterme wear- Sun kissed and OPI Hawaii- That's Hula- rious. 

Acrylic paint- Black, red, yellow, green, and brown.

Nail art brushes- Thin detail brush and stripper brush.

Other- Small cup of water to clean off nail art brushes. 

Fall Nail Design

Apply a top coat, let that dry.

Polish-

Thumb, index, and pinky- orange creme polish. 

Middle and ring finger nail- light green creme polish. 

Let that dry. 

Fall Nail Design

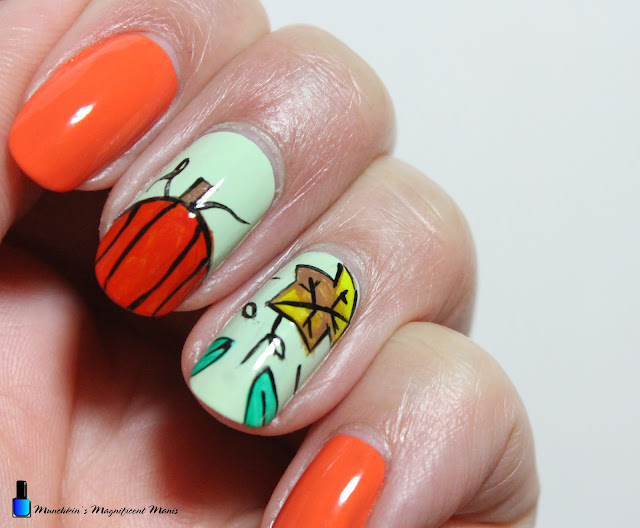
Pumpkin on the Middle Finger Nail: 

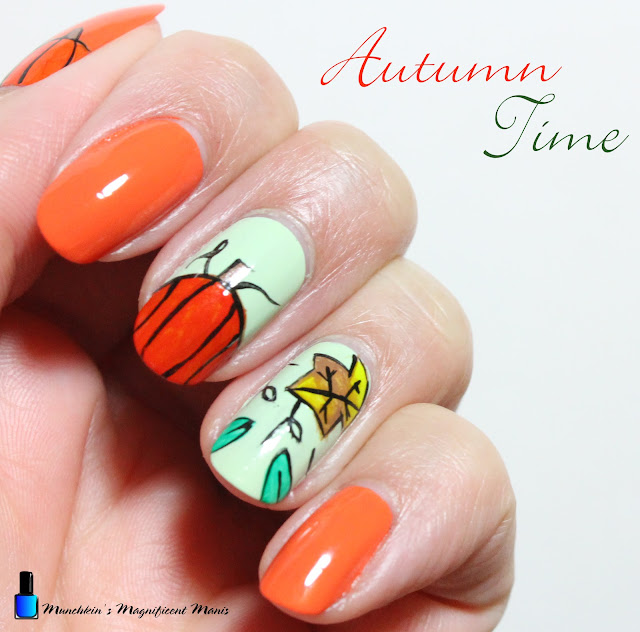
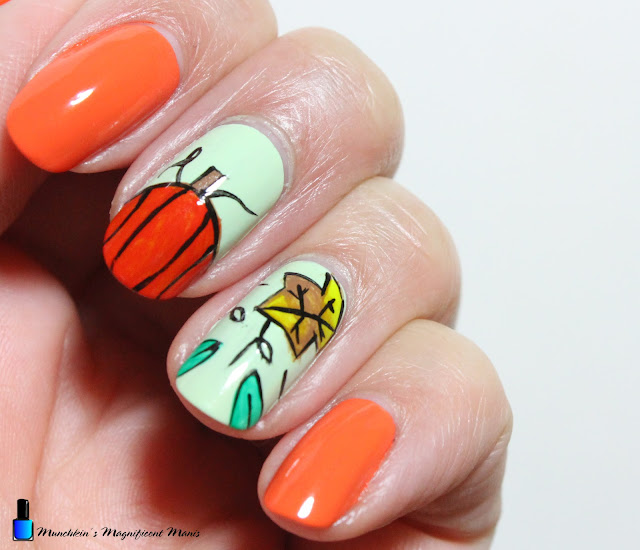
First we will start off with the pumpkin design on the middle finger nail. Take a thin stripper brush with black paint on it, starting near the tip of the nail make an oval shape. Then make a stem and fill that in with brown paint. 

Then with a detail brush, mix yellow and red to make orange (unless you have orange paint) and then fill in your pumpkin.

For some small details make four line on your pumpkin, then make a curved line with a loop coming out of the top your pumpkin and another curved line on the other side. 

Fall Nail Design

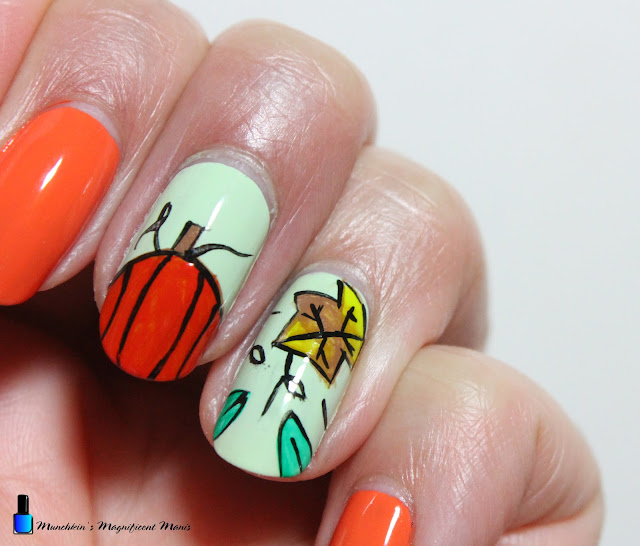
Leaves on the Ring Finger Nail:

Next we will make leaves on the ring finger nail. First we will make the lager leaf on the upper right hand corner of the nail near the cuticle. First take a thin stripper brush with black paint on it and make small triangle near the center of the nail, make two more triangles on both sides, then fill that in with yellow and brown, once you have the leaf color opaque enough make a few line in the leaf for the veins. 

After that make two green leaves on the tip of the nails and then outline them. 

Lastly make a few curved lines in the empty space of the nail for some vines. 

Fall Nail Design

Pumpkin's on the Thumb Nail:

Lastly on the thumb nail we will make two pumpkins, take a thin stripper brush with black paint on it and make a large oval and then a small oval right next to each other. 

Fill in your pumpkins with orange paint, then make a stem with brown paint, and outline the stem.

Then on your pumpkins make two line on them. 

Fall Nail Design

Fall Nail Design

Once your nail design is Fall/ Autumn ready apply a top coat to seal in your design and to help it to last.

Hope all of you are having a good fall and had a Happy Thanksgiving!

Hope all of you enjoyed this fall nail design!

See you next time for more nail fun! 
 

Tuesday, September 6, 2022

No Socks and Flops- Beach Nail Design

Hello everyone! Today we will be creating a flip flop/ beach nail design, I know I am a little behind on this design, seeing how we are at the end of summer, or according to stores and the media we are already in fall/ Halloween season. But oh well, I still want to create a beach and tropical designs, after this one I do have one more tropical design already done, I just have to do a post on it. This summer we have been doing kind of a lot and I have not had much time on the weekend/ during the week for nail art.

Beach Nail Design

Here are the polishes and nail art tools used to create this beach and flip flop nail design:


Top and base coat- CND Stickey Base Coat and CND Super Shiney Top Coat.

Polishes- Sally Hansen- Insta Dri- Peeps Blue and Glam Polish- Sandy toes anything goes- Beauty and the beach. 

Acrylic paint- Blue, white, red, yellow, greens, peach and brown.

Nail art brushes- Thin stripper and detail brush, and a flat brush.

Other- Water to clean off your nail art brushes.

Beach Nail Design

Apply a base to clean dry nails.

Let that dry.

Polish- 

Thumb, middle, and ring- light blue (Sally Hansen- Insta Dri- Peeps Blue) 

*This is your base color for the ocean/ beach design no the middle and ring finger nail, your water is all done with acrylic paint, but you still need nail polish as a base for the paint to stick to.*

Index and pinky nail- ocean blue with iridescent flakes (Glam Polish- Sandy toes anything goes)

Let that dry. 

Beach Nail Design

Beach Nail Design

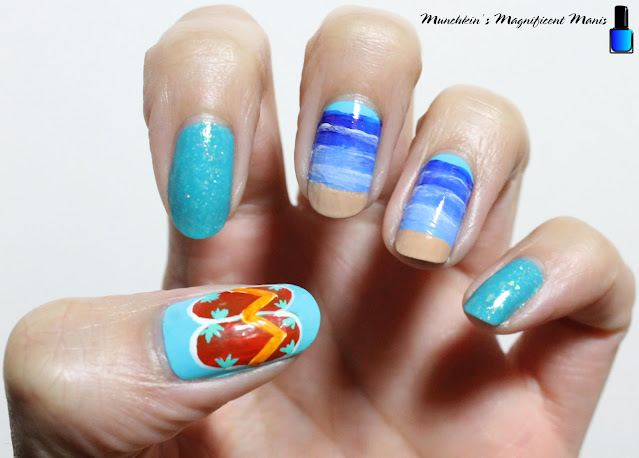
Beach/ Ocean Design on the Middle and Index Nails:

For your beach you will need two shades of blue, a dark and a light blue. For the light blue, I just mixed the dark blue and white to make the light blue that I wanted.

Starting near the cuticle, leaving a small bit o space, take your flat brush with the dark blue paint and swim to across the nail, do the same with the light blue. You will need to do this a few time to be opaque, also make sure to blend the two colors together when you paint the nails.

For the sand just mix a peach with a very small amount of brown to make your sand.

For the final touch in the water, take a thin detail brush with a very small amount of white paint on it make a few random lines in the blue, then before it dries smudge the lines to make waves.

Beach/ Flip Flops Nail Design

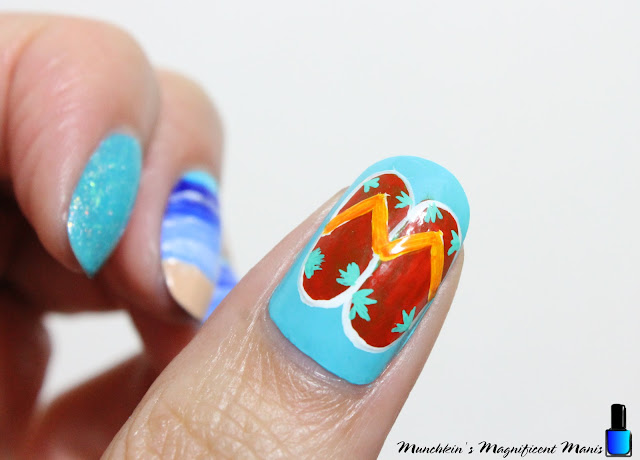
Flip Flops on the Thumb Nail:

For the flip flop on the thumb I mixed red and orange to make a reddish orange for the flops. For the green plants on the flops I mixed green and white for a lighter green. 

For the flip flop shape, you first will start with the base of the flip flop where your heel of the foot goes, by making a long oval shape, then for the area where the toes go make a circle, these two shapes connect to make your flop.

Repeat this step for your next flip flop, you can make them right next to each other like I did, or you can leave some space in-between them. 

For the part the flop that goes in between your toes make a thick V shape with white, then go over the white with orange, that way the orange will show.

Lastly for the final touches you can outline the flop with white and also add some green plants/ flowers to your flip flops. 

Beach Nail Design
Beach Nail Design

Once your nails are beach ready, apply a top coat to seal in your design and to help it last though your last minute beach trips, unless you are lucky to leave somewhere where you can go to the beach year round.

Hope all of you enjoyed this beach nail design and that everyone is having/ had a nice summer.

As stated above I have one more tropical sunset nails design as summer is winding down. 

See you next time for more nail fun!

Friday, April 15, 2022

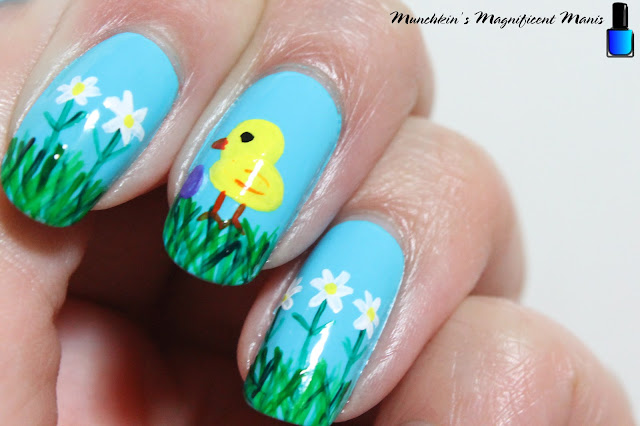
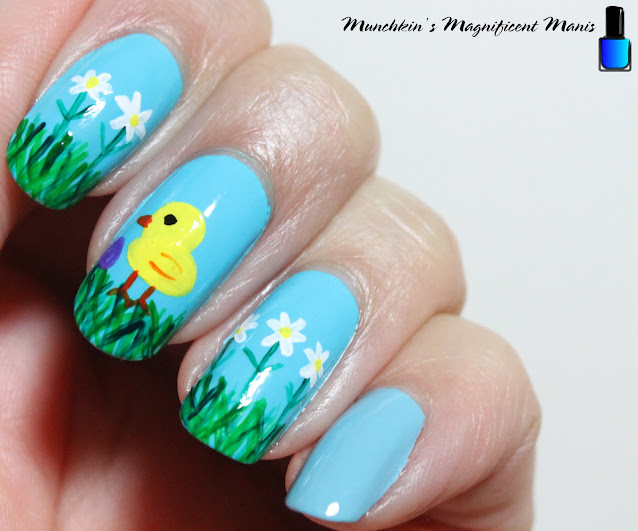
Peep Peep- Easter Nail Design

Hello everyone! Happy Easter! Today on the blog we will be create a cute Easter chick and flower nail design. 

Easter Nail Design

Here are the polishes and nail art tools used to create this nail design:


Base and top coat- CND Stickey Base Coat and CND Super Shiney Top Coat.

Polish- Finger paints- Tiffany Imposter, and Sally Hansen- Insta Dri- Peeps Blue.

Acrylic Paint- White, yellow, red, green, black, and purple. Mixed white and yellow to make a more opaque yellow, mixed yellow and green for a lighter green, and mixed yellow and red to make orange. 

Nail art tools- Thin dealt and stripper brush.

Other- water to clean off nail art brushes. 


Easter Nail Design

Apply base coat.

Let that dry.

Polish, I used two kinds of light blue polish, which is not necessary but I just like to use more than one polish.

Thumb and pinky nails- Finger paints- Tiffany Imposter.
Index, middles and ring finger nails- Sally Hansen- Insta Dri- Peeps Blue

Let that dry. 

Easter Nail Design

On all three nails we will be making the grass first. Take a thin stripper brush with a darker green paint on it, starting on the tip of the nails make some over lapping lines, then with a lighter green do the same thing for some contrast in the grass. 

Next we will make the steams for the flowers. With that same stripper brush with some green paint on it, on the index nail make two long lines, on the ring finger make three longs, then two short lines for the leaves. 

Easter Nail Design

On the index and ring finger nail we will make some daisies. On the steams that we just made, take a thin detail brush with white paint on it, staring right on the steam make two lines, then two more on the sides, lastly make two lines on top to make your very simple daisy. Repeat this step for all of your flowers. For the final touch add a small yellow circle in the middle of the flower. 

Easter Nail Design

Lastly we will make the chick and egg on the middle finger nail. For the chick, take a small detail brush with yellow paint on it, make an oval shape for the body, then make a small circle on top of that oval. 

For the other small details; legs, beak, and wing. Take you thin stripper brush with orange on it make two lines coming from the bottom of the body and two small ones form the sides for the feet. 

For the beak make a small triangle on the side of the small circle. Then for the wing make two small curved lines right beside each other on the body. 

For out final touch we will make a small Easter egg, with purple paint just make a small oval, egg shape on the ground near the chick. 

Easter Nail Design

Once your nails are Easter ready apply a top coat to seal in your nail design and to help it to last. 

Hope all of you enjoyed this Easter nail design and have a Happy Easter!

See you next time for more nail fun!