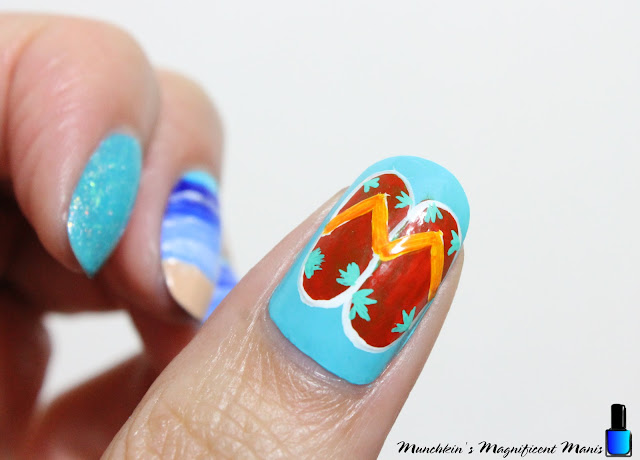
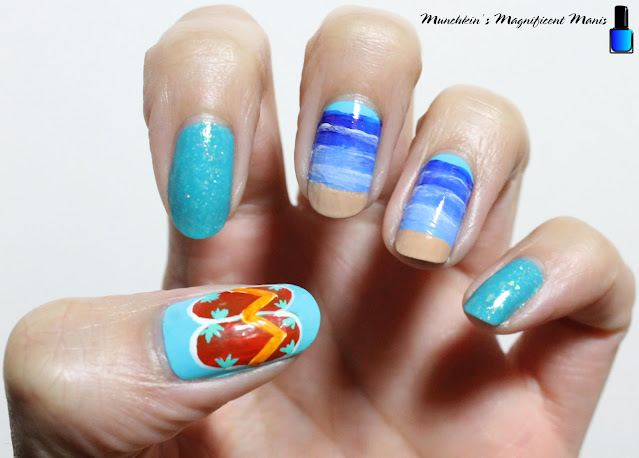
Hello everyone! Today we will be creating a flip flop/ beach nail design, I know I am a little behind on this design, seeing how we are at the end of summer, or according to stores and the media we are already in fall/ Halloween season. But oh well, I still want to create a beach and tropical designs, after this one I do have one more tropical design already done, I just have to do a post on it. This summer we have been doing kind of a lot and I have not had much time on the weekend/ during the week for nail art.
Here are the polishes and nail art tools used to create this beach and flip flop nail design:
Polishes- Sally Hansen- Insta Dri- Peeps Blue and Glam Polish- Sandy toes anything goes- Beauty and the beach.
Acrylic paint- Blue, white, red, yellow, greens, peach and brown.
Nail art brushes- Thin stripper and detail brush, and a flat brush.
Other- Water to clean off your nail art brushes.
Apply a base to clean dry nails.
Let that dry.
Polish-
Thumb, middle, and ring- light blue (Sally Hansen- Insta Dri- Peeps Blue)
*This is your base color for the ocean/ beach design no the middle and ring finger nail, your water is all done with acrylic paint, but you still need nail polish as a base for the paint to stick to.*
Index and pinky nail- ocean blue with iridescent flakes (Glam Polish- Sandy toes anything goes)
Let that dry.
Beach/ Ocean Design on the Middle and Index Nails:
For your beach you will need two shades of blue, a dark and a light blue. For the light blue, I just mixed the dark blue and white to make the light blue that I wanted.
Starting near the cuticle, leaving a small bit o space, take your flat brush with the dark blue paint and swim to across the nail, do the same with the light blue. You will need to do this a few time to be opaque, also make sure to blend the two colors together when you paint the nails.
For the sand just mix a peach with a very small amount of brown to make your sand.
For the final touch in the water, take a thin detail brush with a very small amount of white paint on it make a few random lines in the blue, then before it dries smudge the lines to make waves.
Flip Flops on the Thumb Nail:
For the flip flop on the thumb I mixed red and orange to make a reddish orange for the flops. For the green plants on the flops I mixed green and white for a lighter green.
For the flip flop shape, you first will start with the base of the flip flop where your heel of the foot goes, by making a long oval shape, then for the area where the toes go make a circle, these two shapes connect to make your flop.
Repeat this step for your next flip flop, you can make them right next to each other like I did, or you can leave some space in-between them.
For the part the flop that goes in between your toes make a thick V shape with white, then go over the white with orange, that way the orange will show.
Lastly for the final touches you can outline the flop with white and also add some green plants/ flowers to your flip flops.
Once your nails are beach ready, apply a top coat to seal in your design and to help it last though your last minute beach trips, unless you are lucky to leave somewhere where you can go to the beach year round.
Hope all of you enjoyed this beach nail design and that everyone is having/ had a nice summer.
As stated above I have one more tropical sunset nails design as summer is winding down.
See you next time for more nail fun!


No comments:
Post a Comment