Showing posts with label Glam Polish. Show all posts

Tuesday, September 6, 2022

No Socks and Flops- Beach Nail Design

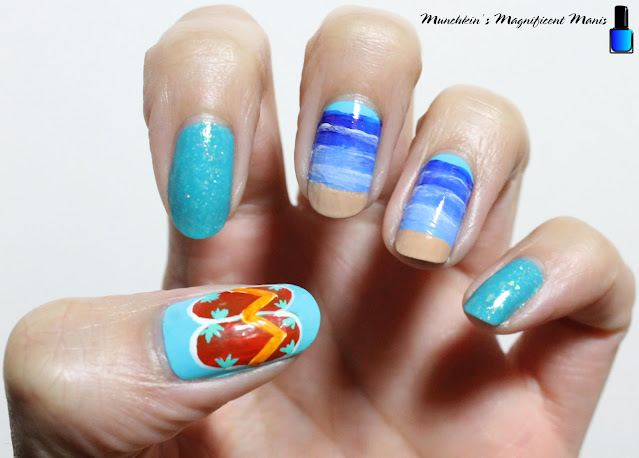
Hello everyone! Today we will be creating a flip flop/ beach nail design, I know I am a little behind on this design, seeing how we are at the end of summer, or according to stores and the media we are already in fall/ Halloween season. But oh well, I still want to create a beach and tropical designs, after this one I do have one more tropical design already done, I just have to do a post on it. This summer we have been doing kind of a lot and I have not had much time on the weekend/ during the week for nail art.

Beach Nail Design

Here are the polishes and nail art tools used to create this beach and flip flop nail design:


Top and base coat- CND Stickey Base Coat and CND Super Shiney Top Coat.

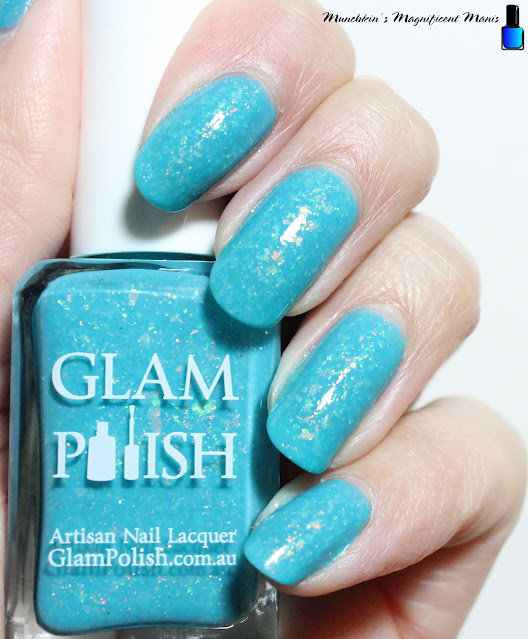
Polishes- Sally Hansen- Insta Dri- Peeps Blue and Glam Polish- Sandy toes anything goes- Beauty and the beach. 

Acrylic paint- Blue, white, red, yellow, greens, peach and brown.

Nail art brushes- Thin stripper and detail brush, and a flat brush.

Other- Water to clean off your nail art brushes.

Beach Nail Design

Apply a base to clean dry nails.

Let that dry.

Polish- 

Thumb, middle, and ring- light blue (Sally Hansen- Insta Dri- Peeps Blue) 

*This is your base color for the ocean/ beach design no the middle and ring finger nail, your water is all done with acrylic paint, but you still need nail polish as a base for the paint to stick to.*

Index and pinky nail- ocean blue with iridescent flakes (Glam Polish- Sandy toes anything goes)

Let that dry. 

Beach Nail Design

Beach Nail Design

Beach/ Ocean Design on the Middle and Index Nails:

For your beach you will need two shades of blue, a dark and a light blue. For the light blue, I just mixed the dark blue and white to make the light blue that I wanted.

Starting near the cuticle, leaving a small bit o space, take your flat brush with the dark blue paint and swim to across the nail, do the same with the light blue. You will need to do this a few time to be opaque, also make sure to blend the two colors together when you paint the nails.

For the sand just mix a peach with a very small amount of brown to make your sand.

For the final touch in the water, take a thin detail brush with a very small amount of white paint on it make a few random lines in the blue, then before it dries smudge the lines to make waves.
Beach/ Flip Flops Nail Design

Flip Flops on the Thumb Nail:

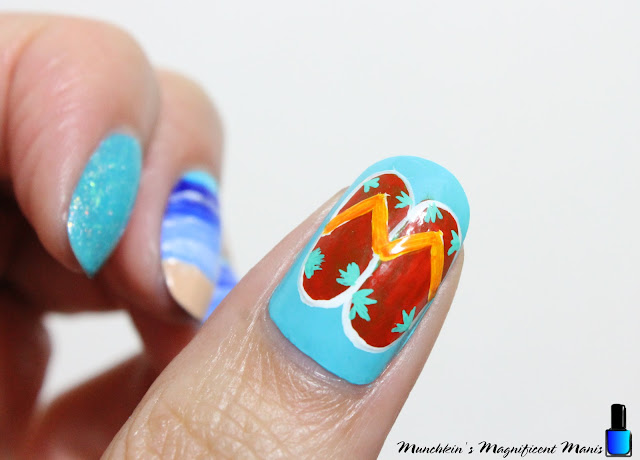
For the flip flop on the thumb I mixed red and orange to make a reddish orange for the flops. For the green plants on the flops I mixed green and white for a lighter green. 

For the flip flop shape, you first will start with the base of the flip flop where your heel of the foot goes, by making a long oval shape, then for the area where the toes go make a circle, these two shapes connect to make your flop.

Repeat this step for your next flip flop, you can make them right next to each other like I did, or you can leave some space in-between them. 

For the part the flop that goes in between your toes make a thick V shape with white, then go over the white with orange, that way the orange will show.

Lastly for the final touches you can outline the flop with white and also add some green plants/ flowers to your flip flops. 

Beach Nail Design
Beach Nail Design

Once your nails are beach ready, apply a top coat to seal in your design and to help it last though your last minute beach trips, unless you are lucky to leave somewhere where you can go to the beach year round.

Hope all of you enjoyed this beach nail design and that everyone is having/ had a nice summer.

As stated above I have one more tropical sunset nails design as summer is winding down. 

See you next time for more nail fun!

Friday, March 18, 2022

How Did I Not Know About This Polish? Glam Polish Review

Hello Everyone! Sorry that it has been while, I just started a new job and trying to get use to that and finding time to do this blog has been a little tuff and then a few weekend ago I was not feeling well, now all is good. Anyways this year I kind of would like to try out different polish brands. Today we will be giving the brand Glam Polish another try, I have tried out their polish before and really enjoy it. So today we will not technically be try out a new brand, but in the next coming week we will. The brand Glam Polish is an indie brand polish that is made in Australia, that is hand mixed/ mixed into small batches. They do have a warehouse in the US along with Australia. 

Today we have a polish that I am super excited about because of the name of the polish.   

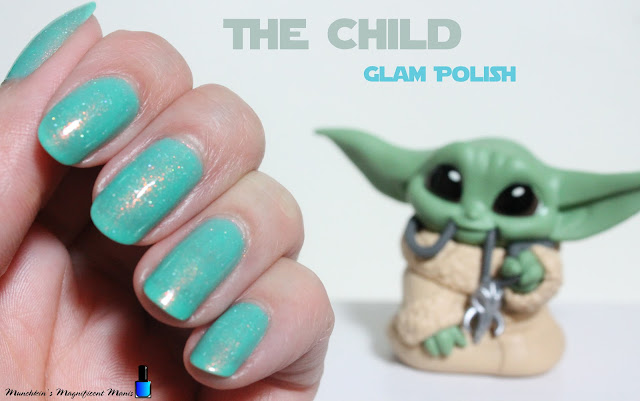
Glam Polish The Child

Glam Polish The Child

That Polish is the Child from The Mandalorian (Star Wars). I just happen to go on the Glam Polish website and saw that they had a Mando trio collection! I was so surprised and was thinking how did I not know about this trio, I love Grogu (The Child) he is so cute and the only reason why I am even interested in The Mandalorian. 

This trio came out sometime in 2020, and has three polishes The Child, This Is The Way and I Have Spoken. Unfortunately I could not get the whole trio just The Child, the other two are sold out and this trio is limited edition. I am still glad that I was able to get my favorite Grogu (The Child) polish. 

I did purchase two other polish one is from a Star Wars inspired collection and then one that is beach themed. 

Glam Polish Review

Let's take a look at the three polishes. 

Glam Polish The Child

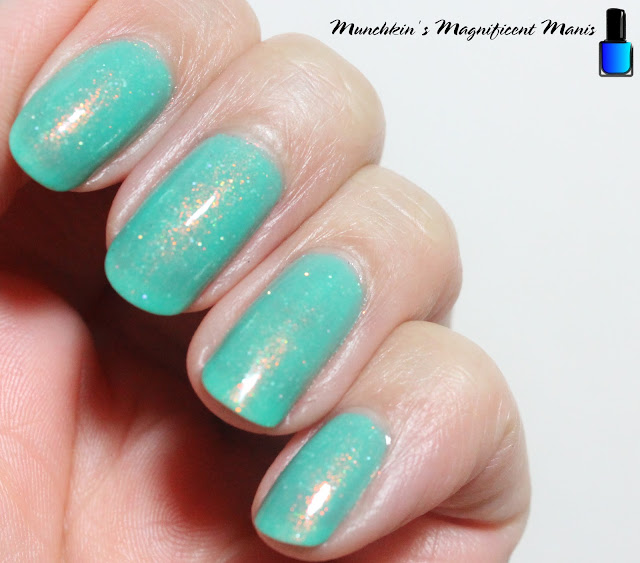
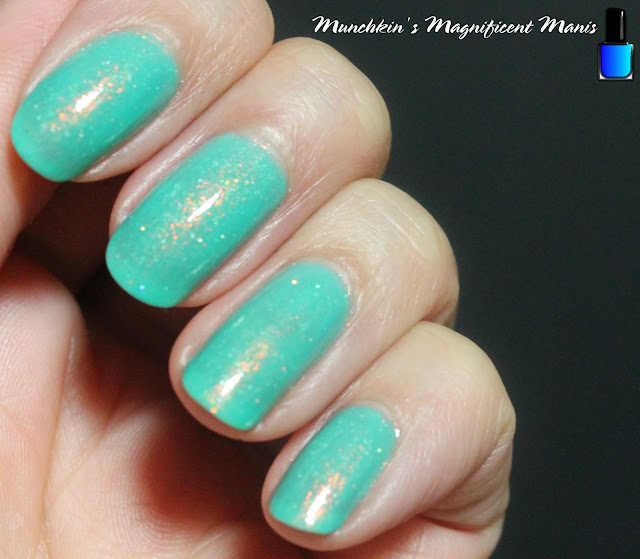
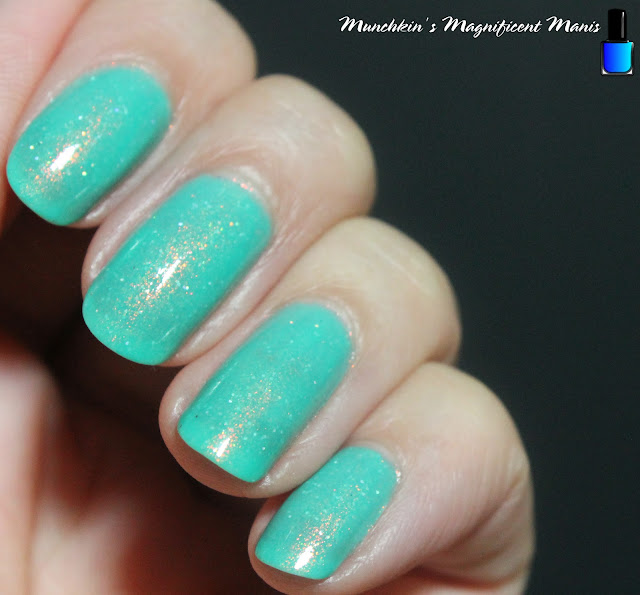
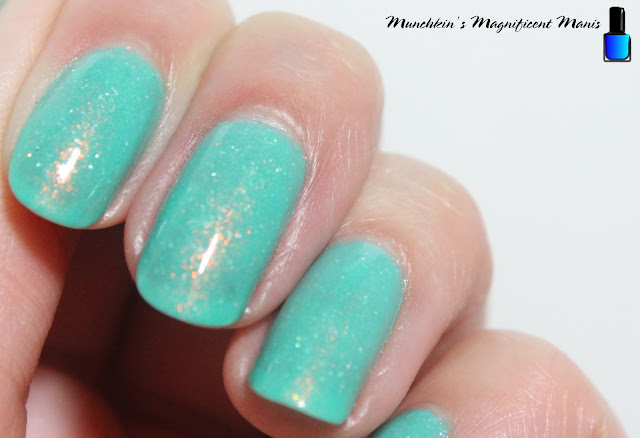
First we will go over my fav, well when it comes to name, The Child this is a light sea foam green polish, with some shifting shimmer and small holographic glitter. This polish is on the sheer side it took three coat for me to get it to be opaque. I do have trouble polishing lighter colored polishes and I did have some trouble with this one. 

Glam Polish The Child

The Child is still available on the Glam Polish website for $10.00 USD
collections/mando/products/the-child-limited-edition

Glam Polish Obi- Wan

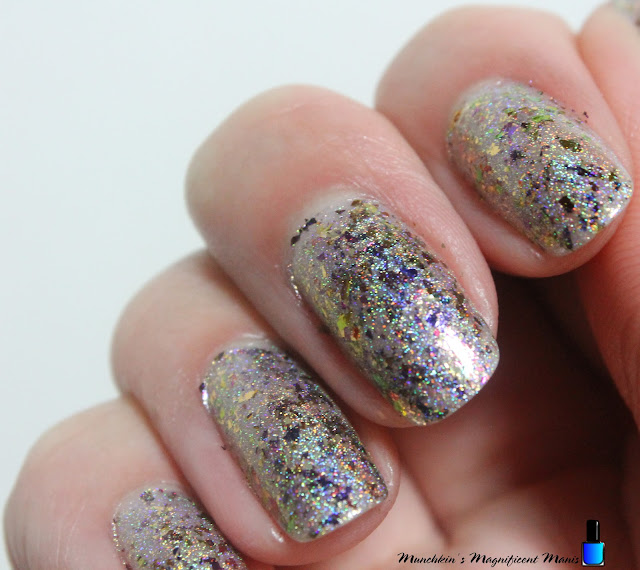
Next we have Obi- Wan this is from the Star Wars inspired collection A Galaxy Far Far Away. This polish has a holographic copper/gold base, with a lot of multi-chrome flakes, some glitter, this polish has a lot going on in it and is so pretty and unique. This polish was opaque for me in two coats. This polish did look kind of similar to the photos that I seen online of the polish This is The Way from the Mando trio, so that is why I picked out this one.

Glam Polish Obi- Wan

Obi- Wan is also still available on the Glam Polish website for $12.50 USD
a-galaxy-far-far-away/products/obi-wan-limited-edition

Glam Polish Sandy Toes Anything Goes

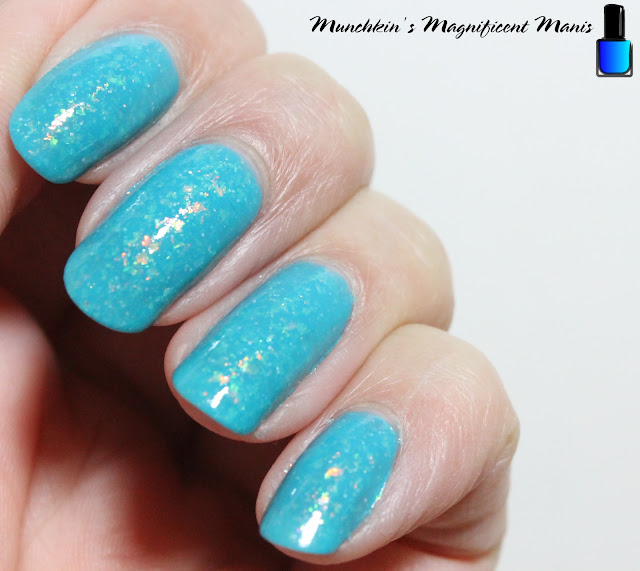
Lastly we have Sandy Toes Anything Goes form the Beauty and the Beach collection. This polish was just a random one that I picked out, unlike the last two that are Star Wars themed. Anyways Sandy Toes Anything Goes is an aqua blue polish, with iridescent flakes in it, along with some small holo glitter. This polish was opaque for me in three coats. 

Glam Polish Sandy Toes Anything Goes
 
Sandy Toes Anything Goes is available on the Glam Polish website for $12.50 USD 

Glam Polish Obi-Wan

In conclusion Obi- Wan was actually my favorite polish when it came to the polish it's self. This polish applied the best for me and is just super unique, you don't really see polishes that look like this everyday. 

Glam Polish The Child

Second we have to be The Child because Grogu, I love this little green dude. The polish is pretty, I just had a little trouble polishing this one. The first time I wore this it just didn't look good, it was probably just me, it did end up looking much better the sound time around.

Glam Polish Sandy Toes Anything Goes

Third would be Sandy Toes Anything Goes. I love blue polishes and the beach theme is always a plus. For some reason this polish the first time I wore it to, just did not look right/ good, once again I gave it another go and it looked better. Once again maybe it was just me?

Hope all of you enjoyed this review of some polishes from Glam Polish. In the next few weeks I will have a review of, a new to me brand that I was just curious to try that I saw on Facebook, this polish is a brand, that is suppose to be a better for you polish that is made in Hawaii, So we will see how that goes.

See you next time for more polish fun! 


Friday, January 20, 2017

Sorry I bit you & Hawaiian Rollercoaster- Experiment 626 collection

Hello everyone! I have a collection that I am super excited to share with all of you, the Glam Polish Experiment 626 collection! This collection I recently stumbled across on Glam Polish and Harlow & Co.'s Facebook page around December 2016, this collection actually came out October 2016 (why I was just finding out about this collection?) If you have been following/ checking out this blog for a while then you know I love the movie Lilo & Stitch and that I just had to have this collection. Lucky it was around Christmas time, so I asked my hubby if he could get me this collection for Christmas, which he did (Yay!)  

Glam Polish Experiment 626 Collection     
For this post I will be review the polishes for the collection, but I will be do it a little bit different. Most nail polish bloggers swatch the whole collection at once (they polish their nails with one polish, take the pic, remove, then on to the next polish) as for me I like to where the polishes all week and truly enjoy them

Their are nine polishes in this collection, so I will be wearing two at a time (the last one just that one polish) and I will review/ go over two of the polishes at a time. I know this will take a while to do, but I thought this would be a different and fun way of reviewing these polishes for all of you. Then the final polish/ post I will give my final thoughts on this collection. 

Also this is the first time that I have tried any polishes from Glam Polish. Glam Polish is an Australian indie brand, where all of their polishes are hand mixed.  

Anyways let's get into these polishes!

 I'm sorry I bit you and pulled your hair...
 Glam Polish Experiment 626 Collection- I'm sorry I bit you and pulled your hair...

All of these polishes in this collection have interesting names, they are based on sayings in the movie or names, which is cool. If you are anything like me then you have watched this movie a million time and know exactly where in the movie/ what scene each of these polish names came from. That why in the collage above I induced a picture from the movie that is based on the polish name. 

The first polish that I will be sharing with you is I'm sorry I bit you and pulled your hair... yes this is a long name for a polish! This polish is a light coral pink holographic polish, with some gold shimmer in it. This polish took me two coat to be fully opaque, it might cover in one but I just wanted to make sure, so I added a second coat. Before I added a top coat this polish was a little dull on the nails, but look shinny and better with a top coat. Also the formula was a little thick.  


Glam Polish.com- I'm sorry I bit you and pulled your hair $11.50 US (Directly from Glam Polish in Australia.) 

  I'm sorry I bit you and pulled your hair...
 I'm sorry I bit you and pulled your hair... 
  I'm sorry I bit you and pulled your hair...

The name I'm sorry I bit you and pulled your hair... was from the scene when Lilo and Mertle got into a fight during hula practice because Mertle called Lilo crazy for feeding a fish a peanut butter and jelly sandwich. She later comes across Mertle and her other friends and says sorry. Lilo is such a nice person, even though Mertle didn't except her apology

 Hawaiian Rollercoaster Ride
  Glam Polish Experiment 626 Collection- Hawaiian Rollercoaster Ride 

The next polish is Hawaiian Rollercoaster Ride. This polish is teal/ ocean green with scattered holographic, glass flecks and large and small size holo glitters in it. This polish reminds me of the ocean and one of the many colors of it. This polish took two coats to be opaque, this polish is very glittery but still seem to apply very smooth. The formula was a little on the thin/ sheer side.      
 

Glam Polish.com- Hawaiian Rollercoaster Ride $11.50 (Directly from Glam Polish in Australia.) 
       
 Hawaiian Rollercoaster Ride
 Hawaiian Rollercoaster Ride 

The name of this polish Hawaiian Rollercoaster Ride was from the scene when Lilo, Nani, David and Stitch decided to spend a day at the beach and go swimming, build sand castles, and go surfing. Stitch was scared to go surfing at first because he doesn't know how to swim, but then later deiced to go surfing with Lilo and Nani. Hawaiian Rollercoaster Ride was also the name of the song that was playing while they where surfing.     

Hope all of you enjoyed the review of these two polishes so far, stay tuned for the rest of this collection coming in the next weeks. Next week we will be review two more polishes from this collection and more to come.

See you next time for more nail fun! Well more of the Glam Polish Experiment 626 Collection!