Showing posts with label Fall Nail Deisgn. Show all posts

Saturday, November 22, 2025

Autumn Colors- Fall Nail Design

Hello everyone! Today on the blog we will be creating a very simple fall nail design, with a fall colored gradient and some black colored leaves and branches, a long with a touch of gold glitter. 

Fall Nail Design

Here are the polishes and nail art tools used to create this fall nail design-

Top and base coat- CND Stickey Base Coat and CND Super Shiney Top Coat.

Polishes- Orly- Melting Point- Erupt To No Good, OPI Lisbon- Now Museum Now You Don't, and Holo Taco- 1st Anniversary- Gold Flakie. 

Acyclic paint- Black 

Other- Water for cleaning nail art brushes, makeup sponge for gradients, and liquid latex for easy clean up around the nails.

Fall Nail Design

Fall Nail Design

Apply a top coat to clean dry nails, let that dry.

Polish all of the nails with a shimmer orange (Orly- Erupt To No Good.)

Let that dry. 

Fall Nail Design

Fall Nail Design

Fall Colored Gradient:

First we will start off with a gradient on all of the nails and we will also be doing nail art on all of the nails as well. 

First we need to apply a liquid around the fingers to help with clean up and to make doing gradients much easier. 

For the gradient part take a makeup sponge and polish a brick red polish on the sponge (OPI- Now Museum Now You Don't) and slightly over lapping the polish with the same color that we used as our base color the shimmer orange (Orly- Erupt To No Good.) The brick red should be near the tips of the nails.

Then dab the sponge on to each nail, you will need to repeat this step at least three times to be opaque.  

Once you have finished your gradient peel off your liquid latex with some tweezers. 

For an added touch polish a gold flakie polish over the nails, apply one coat for a subtle gold sparkle. 

Fall Nail Design

Fall Nail Design

Leaves and Branches Design on all of the Nails: 

On all of the nails we will be creating a simple nail design of leaves and branches. Take a thin striper brush with black paint on it and staring near the cuticle, on a corner of the nail, make a long straight line, on the end of the long line that you just made make a leaf shape, then on each side of the long line make a few shorter line and make a leaf shape at the end of those lines. 

On most of the nails I made four of these, also on some of the nails I just made a leaf shape. On almost all of the nails I created two of these design, the only nail that I did one is the pinky nail. 

Fall Nail Design

Fall Nail Design

Once your design is fall ready apply a top coat to seal in your design and add a nice shine to your nails, along with helping them last. 

Hope all of you enjoyed this simple fall nail design and are having a good fall!

Here is the practice version.

See you next time for more nail fun! 

Friday, November 24, 2023

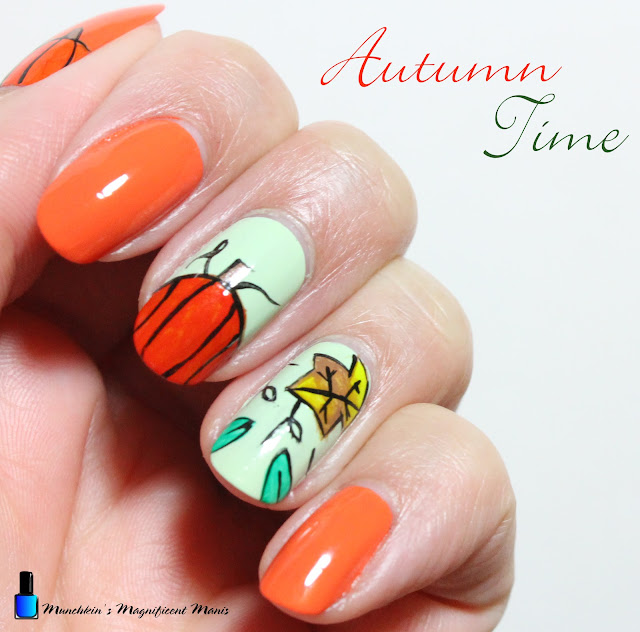
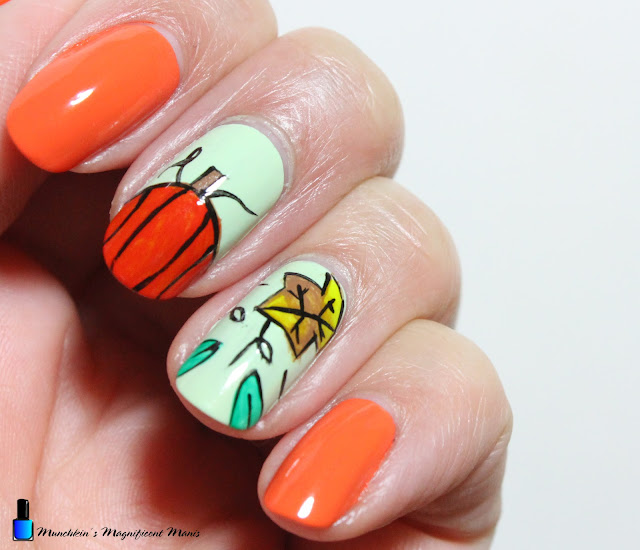
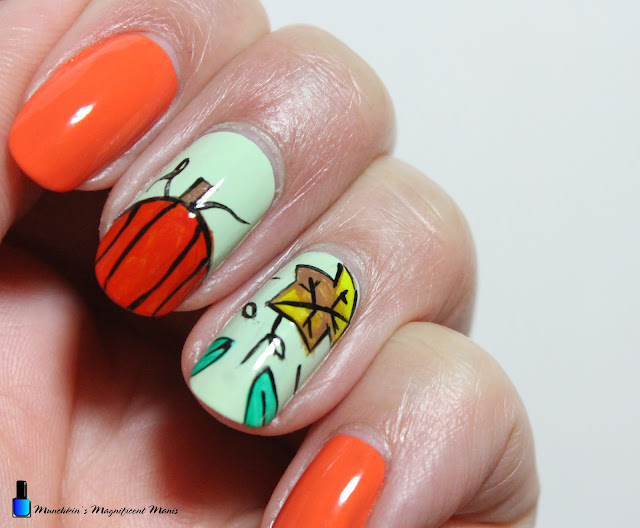
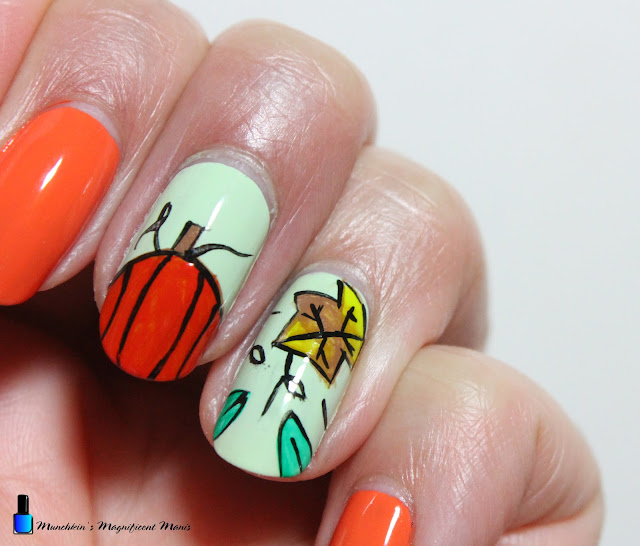
Autumn Time- Fall Nail Design

Hello everyone! Hope everyone had a good Thanksgiving and a long weekend (if you got the time off from work.) Today on the blog we will be creating a fall themed nail design, even though most people are probably like it is winter, but it is actually it is still fall, so I thought we could still go a head and create a fall design, even thought most people might be in the winter/ Christmas mood. 

Fall Nail Design

Here are the polishes and nail art tools used to create this fall nail design-


Top and Base coat- CND Stickey Base Coat and CND Super Shiney Top Coat.

Polishes- Sally Hansen- xterme wear- Sun kissed and OPI Hawaii- That's Hula- rious. 

Acrylic paint- Black, red, yellow, green, and brown.

Nail art brushes- Thin detail brush and stripper brush.

Other- Small cup of water to clean off nail art brushes. 

Fall Nail Design

Apply a top coat, let that dry.

Polish-

Thumb, index, and pinky- orange creme polish. 

Middle and ring finger nail- light green creme polish. 

Let that dry. 

Fall Nail Design

Pumpkin on the Middle Finger Nail: 

First we will start off with the pumpkin design on the middle finger nail. Take a thin stripper brush with black paint on it, starting near the tip of the nail make an oval shape. Then make a stem and fill that in with brown paint. 

Then with a detail brush, mix yellow and red to make orange (unless you have orange paint) and then fill in your pumpkin.

For some small details make four line on your pumpkin, then make a curved line with a loop coming out of the top your pumpkin and another curved line on the other side. 

Fall Nail Design

Leaves on the Ring Finger Nail:

Next we will make leaves on the ring finger nail. First we will make the lager leaf on the upper right hand corner of the nail near the cuticle. First take a thin stripper brush with black paint on it and make small triangle near the center of the nail, make two more triangles on both sides, then fill that in with yellow and brown, once you have the leaf color opaque enough make a few line in the leaf for the veins. 

After that make two green leaves on the tip of the nails and then outline them. 

Lastly make a few curved lines in the empty space of the nail for some vines. 

Fall Nail Design

Pumpkin's on the Thumb Nail:

Lastly on the thumb nail we will make two pumpkins, take a thin stripper brush with black paint on it and make a large oval and then a small oval right next to each other. 

Fill in your pumpkins with orange paint, then make a stem with brown paint, and outline the stem.

Then on your pumpkins make two line on them. 

Fall Nail Design

Fall Nail Design

Once your nail design is Fall/ Autumn ready apply a top coat to seal in your design and to help it to last.

Hope all of you are having a good fall and had a Happy Thanksgiving!

Hope all of you enjoyed this fall nail design!

See you next time for more nail fun! 
 

Tuesday, November 16, 2021

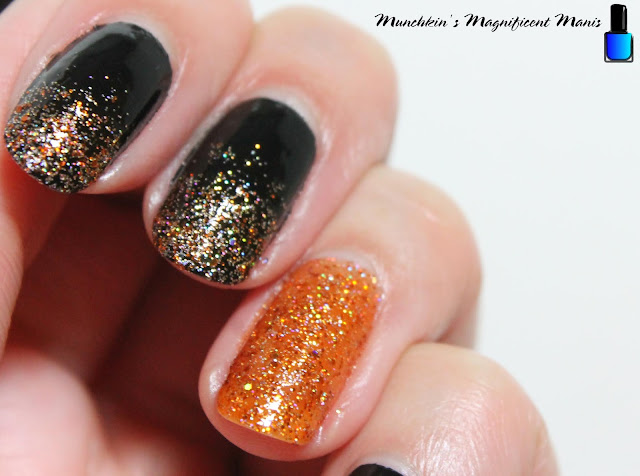
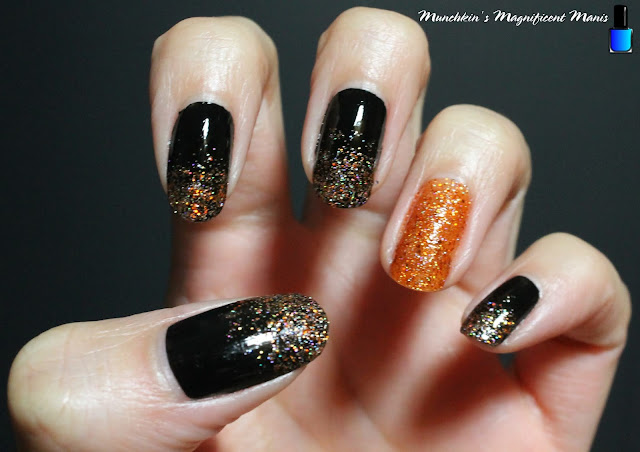
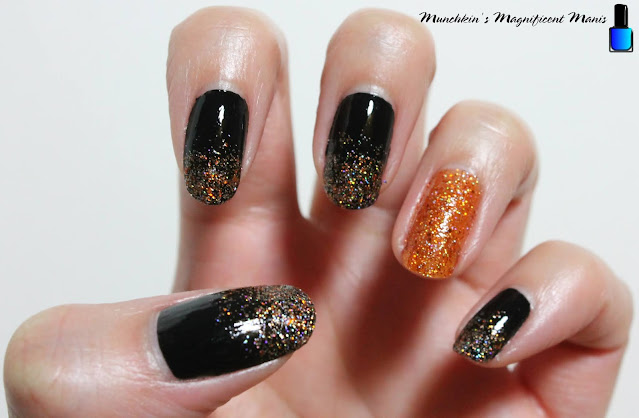
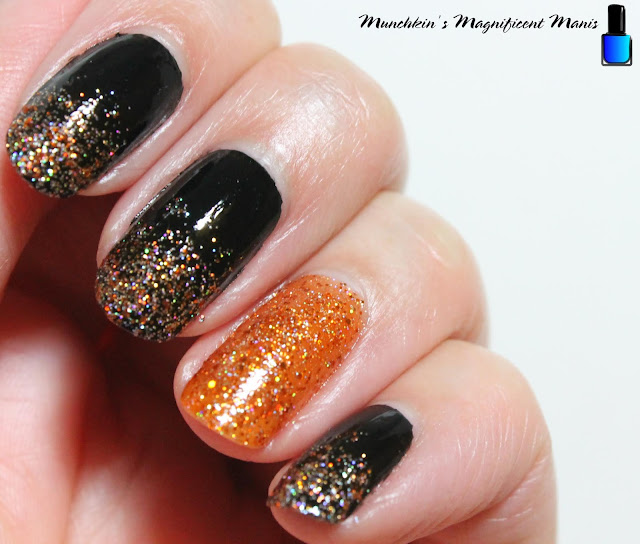
Fall Glitter Gradient

Hello everyone! Today we will be creating another glitter gradient, for the fall. For this gradient we will be using a Holo Taco's Zyler the cat. I remember in one of Simply Nailogical's video's, Cristine had said that Zyler's polish doesn't get much love, so I wanted to show this polish some love by creating a glitter gradient with it. Also this orange glitter polish is perfect for a fall glitter gradient or a Halloween design even though Halloween is over with. 

Fall Glitter Gradient

Here are the polishes and nail art tools used to create this fall glitter gradient:


Base and top coat- CND Stickey Base Coat and Revlon Extra Life No Chip top coat.

Polishes- Sally Hansen- Hard as Nails- Black Heart and Holo Taco- Zyler the cat.

Nail art tools- Just a makeup sponge. 

Fall Glitter Gradient

Fall Glitter Gradient

Apply a base coat to clean dry nails. 

Let that dry.

Polish- 

Thumb, index, middle, and pinky- a black creme polish.

Ring finger- Orange glitter polish (Holo Taco- Zyler the cat) 

Let that dry.

Fall Glitter Gradient

Fall Glitter Gradient

Once your base polish has dried. Take your orange glitter polish and polish a very thin layer on the tip of your nails, focusing most of the polish on the tip of the nail and a little going up the nail.

Do this on all the nails except the ring finger nail, unless you decided to create this gradient on all the nails.

Fall Glitter Gradient

Fall Glitter Gradient

Now take a makeup sponge and polish some of the orange glitter polish on the sponge, then dab the sponge on to just the tip of the nails.

Do this on all of the nails again.

For this polish I did take the polish brush and went over the glitter part one more time, just to add a little more in the middle of the nails, that way it looks like a gradient. 

Fall Glitter Gradient

Fall Glitter Gradient

Now that your fall glitter gradient is done apply a top coat to seal in your design and to help it to last. 

Fall Glitter Gradient

There you go a simple and fun fall nail design, that you can create anytime of the year or just change up the colors of glitters. I have done quite a few glitter gradients on this blog and they are always a fun and simple way to jazz up your nails.  

Hope all of you are enjoying the fall season here in the US. Also hope you enjoy this fall glitter nail design!

See you next time for more nail fun!  

Wednesday, November 23, 2016

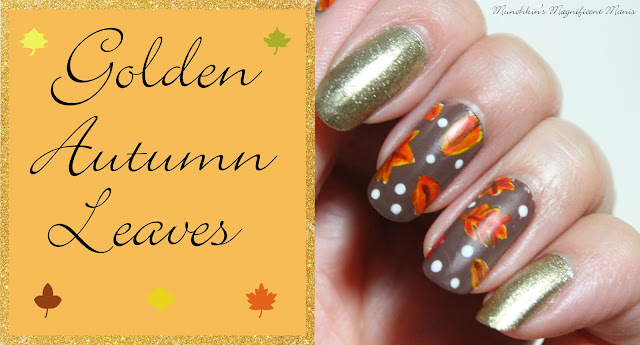
Golden Autumn Leaves- Fall Nail Design

Hello everyone! Hope everyone is having a nice fall. This year has been a weird fall, especially where I live it has been warm for fall, now that it is the end of November it is starting to feel cold and more fall or winter like. Anyways today we have matte and glossy fall nail design that we will be creating. The leaves will be on a brown matte background and just to add some color, we will be add some gold as well.

Fall Leaves Nail Design  
Fall Leaves Nail Design  

Here are the nail polishes and tools used for this fall design: 


Base and Top coat- CND Stickey Base Coat, Revlon Extra Life No Chip top coat, for a matte look; NYC- Matte Me Crazy topcoat.

Nail polishes- NYC- Brownstone, Revlon- Gold Coin, and China glaze- white on white.

Acrylic paint- white, red, yellow, blue. (red & yellow to make orange, and red, yellow, and blue to make brown.) 

Nail art tools- a thin detail and liner brush and a small dotting tool.

Other- small glass jar or cup with water in it to clean nail art brushes. 


Let's start this fall design! 

Fall Leaves Nail Design
Close up of leaf design on middle and ring finger nail. 

Fall Leaves Nail Design  
 Close up of leaf design on thumb nail.
Start off with a thin layer of base coat, to protect your nails. 

Then polish your ring, middle, and thumb nail brown and your pinky and index finger nail gold.

Once your base color has dried, we will first make the outline of the leaves with white paint, this will help the colors for the leaves to stand out.  

On all three nails I made a few random leaf shapes, their really is no certain way that you do this design.  You can make a simple leaf with only one point, or a leaf with more then one point.

Once you have the white outline of the leaves and that has dried, you take an orange, red and yellow paint and start to paint the leaves. For example some of the leaves I would start off with a yellow and then take a orange and go over that, while some yellow is still showing. For the leaves it is okay if you don't clean off your brush each time, it gives a nice blend of color when you do this. 

When you have the leaves the colors that you want, take a brown paint or if you don't have one mix red, yellow and a little bit of blue to make a brown. This will be for the vein of the leaves. For the veins just make a line down the center then, a few lines to follow the outline of the leaves.

When I had added all of the leaves to the design, it just felt like it was missing something. So with a small dotting tool I added a few white dots with some white polish, making sure to add just a few, that way you can still see the brown background.

Fall Leaves Nail Design 
 Fall Leaves Nail Design.

Then once your fall nail design has dried apply a glossy top coat to all of your nails. Once your glossy top coat has dried, on the nails that you did the fall leaves design on apply a matte top coat to give this design a different look. You may need to go over the glossy top coat again to make sure your nails are all matte.

I thought adding the matte top coat on the leaf design would be great for a fall look, along with a touch of sparkle/ color with a glossy gold color. Also the white dots I put into this design kind of look like snow, and this is kind of fitting for the weird fall that we have been having (depending on where you live) because one day this week the weather was in the 70's the next day in the 30's and light snow. I know crazy! 

 Fall Leaves Nail Design

 Fall Leaves Nail Design
   Fall Leaves design on middle and ring finger nail

Want another option? On my right hand I did the leaf design on just my middle and ring finger nail and polished my thumb, index and pinky gold. This maybe an even simpler option for you, if you just want the design on two finger or you could even just do this design on your ring finger as a accent nail.

Hope all of you enjoyed this fall leaf design! Also have a nice Thanksgiving!

See you next time for more nail fun!