Showing posts with label Halloween Nail Design. Show all posts

Friday, October 31, 2025

Happy Halloween- Nail Design

Hello everyone! Happy Halloween! I was planning on do this post a few days before Halloween, as you can see that did not happen, I am posting this on Halloween, which is ok too. It has just been a long tiring week and I did not get a chance to finish this post before Halloween. Anyways 
today on the blog we will be creating a cute Halloween design with pumpkins and a ghost. 

Halloween Nail Design

Here are the polishes and nail art tools used to create this Halloween nail design:


Base and top coat- Orly- Bonder Base Coat (been trying another base coat) and CND Super Shiney Top Coat.

Polishes- Holo Taco- Rainbow Collection-Orange Drink, Holo Taco- Electric Holo Collection- Hot - Wire Pink, Holo Taco- Rainbow Collection- Purple Slushie, Holo Taco- Electric Holo Collection- Electrostatic, and Holo Taco- Electric Holo Collection- Circuit Breaker.

Acyclic paint- black, white, green, yellow, and red (to make orange)

Nail art brushes- thin striper and detail brush.  

Other- makeup sponge for gradients, and water to clean off nail art brushes. 

Halloween Nail Design

Apply a top coat to clean dry nails, let that dry. 

Polishes- 

Thumb, ring and pinky finger nails- Orange holographic polish ( the base color for the thumb and pinky nails.)

Index nail- Silver holographic polish. 

Middle finger nail- Black holographic polish.


Halloween Nail Design

Gradient on the Thumb and Pinky Finger Nails- 

First we will start off with gradient on the thumb and pinky finger nails. On the pinky finger nail we will not be have nail art over the gradient, just on the thumb nail. 

First we need to apply a liquid around the fingers to help with clean up and to make doing gradients much easier. 

For the gradient part take a makeup sponge and polish a purple holographic polish (Holo Taco- Purple Slushie) and slightly over lapping the polish a pink holographic polish (Holo Taco- Hot Wire Pink), then once agin slightly over lapping the polish, with the same color you used as your base color the orange holographic polish (Holo Taco- Orange Drink.)

Then dab the sponge on to each nail, you will need to repeat this step at least two times to be opaque.  

Once you have finished your gradient peel off your liquid latex with some tweezers. 

Halloween Nail Design

Pumpkin on the Thumb Nail-

Once you are finished with the gradient on the pumpkin. First take a thin detail brush with white paint on it, (we will first make the outline/ shape of the pumpkin with white) to make your pumpkin make an apple like shape in the middle of the nail, fill that in a few times to be opaque. We are first making an outline of the pumpkin in white, that way it will show more over our gradient.

Once your white outline has dried take an orange or mix red and yellow to make an orange, and fill in your white pumpkin shape at lest three times to be opaque, let that dry. 

For your pumpkin's face make three triangles, first the one in the middle for the nose and then two above that for the eyes, then fill that in with black paint.

For the pumpkins smile, make a curved line under the triangle nose, then at the top of the curved line make a straight line on each side making a small square for the tooth, then fill in the smile with black paint. 

For the final touch, make a green stem at the top of the pumpkins head and then two curved lines for the vines. 

Halloween Nail Design

Halloween Nail Design

Pumpkin on the Ring Finger Nail-

On to the pumpkin on the ring finger nail, we will be using the whole nail of the pumpkin and just making a face on the nail. First take a thin striper brush with black paint on it and make a triangle in the middle of the nail for the nose (I accidentally made the nose to big), then make two triangles above the nose for the eyes, fill in the triangles with black paint. 

For the pumpkins smile, make a curved line under the triangle nose, then at the top of the curved line make a straight line on each side making a small square for the tooth, then fill in the smile with black paint. This tooth I made a little bigger. 

Halloween Nail Design

Ghost on the Middle Finger Nail- 

Lastly we will be making a little ghost on the middle finger nail. Take a thin detail brush with white paint on it make a circle for the head, then two oval shapes for the arms, and then make a two curved line for his body to where it make a tale near the tip of the nail. Then fill in your ghost a lest three times to opaque. 

For the ghost eyes and mouth, take a medium size dotting tool with black paint on and and make two dots for the eyes and then a lager dot for the mouth, you can always use a paint brush to make the mouth a little bigger. 

Halloween Nail Design

Once your nails are ready for tricks or treats apply a top coat to seal in your design and to help it last through all of the candy eating that you will be doing. 

Hope everyone has a safe and Happy Halloween and of course hope all of you enjoyed this cute Halloween nail design! 

See you next time for more nail fun! 

Monday, October 30, 2023

Boo Happy Halloween Nail Design

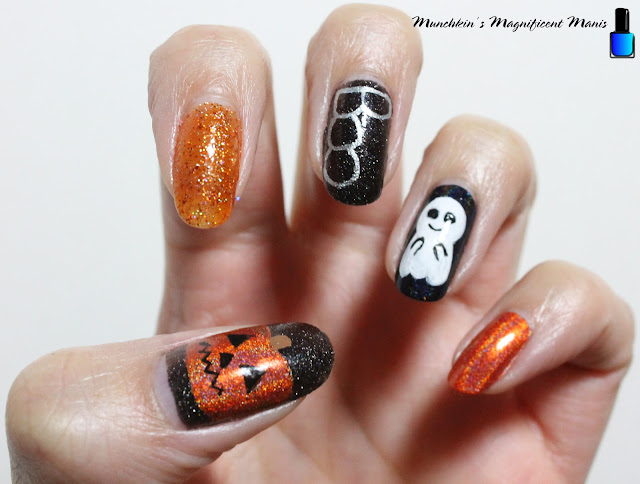
Hello everyone! Happy Halloween! Today on the blog we will be creating a cute Halloween design with a ghost and a pumpkin, just in time for your treat or treating or Halloween parties.

Halloween Nail Design

Here are the polishes and nail art tool used to create this cute Halloween nail deign.


Base and top coat- CND Stickey Base Coat and CND Super Shiney Top Coat.

Polishes- Holo Taco- Double Dare- Cristine's  Bday Polish, Holo Taco- Zyler the cat, Holo Taco- Electrostatic- Electric Holo Collection, Holo Taco- Orange Drink- Rainbow Collection, and Holo Taco- World's First- Chorme Collection. 

Acrylic paint- Black, white, and brown.

Nail art brushes- Thin detail brush and stripper brush.

Other- Water and acetone to clean off your nail art brushes.

Halloween Nail Design

Apply a top coat to your nails, let that dry.

Polishes- 

Thumb and middle finger nails- Black polish (Holo Taco- Double Dare)

Index- Orange glitter polish (Holo Taco- Zyler the cat)

Ring- Black holographic polish (Holo Taco- Electrostatic)

Pinky- Orange holographic polish (Holo Taco- Orange Drink)

Let that dry.

*With all of the nail art that I create I go back and fourth between the nails, to let each part dry before staring another part of that design.*

Halloween Nail Design

Halloween Nail Design

Ghost on the Ring Finger Nail

First we will start off with the ghost on the ring finger nail. Take a small detail brush with white paint on it and near the cuticle make a circle, then make two lines going down the circle you made for the body and then make three curved lines for his "feet". Then fill in your ghost with the white paint, you will need to go over this a few time to be opaque. 

Once your ghost has dried, we can make his cute little face. Take a detail brush or a dotting tool with black paint on it and make two eyes. Then with your thin striper brush make a small curved line under his eyes for his smile.

Lastly we will make his little hands, take that same detail brush and make curved lines on each side of his body for this little nub arms. 

Halloween Nail Design

Halloween Nail Design

The Word Boo the the Middle Finger Nail

Next we are on the the harder part, writing the word boo on the nail, first we will make the outline with white paint, I find it easier to make an outline first that way if you mess up and the paint has not dried you can still wipe it off and try again. Then when you have your outline the way you like you can then go over it with silver chrome polish. 

Halloween Nail Design

Pumpkin on the Thumb Finger Nail 

With the pumpkin I also first make an outline of the shape of the pumpkin first with a thin stripper brush with brown paint on it. Then take an orange holographic polish and fill in your outline.

Let that dry, and then we will make the pumpkins face. Take a thin detail brush with black paint on it and make two triangles for the eyes, then a small triangle under the eyes for the nose, the for the mouth make a zig zag line. 

Lately take your thin detail brush with brown paint on it and make a small square on the top for the stem. 

Halloween Nail Design

Once you have your cute Halloween nail design they way you look apply a top coat to seal in your nails and help them to let though all of your trick or treats.


Halloween Nail Design
Here is the practice version, for some reason I couldn't get the ghost little smile to look the same, but the final design still turned out cute.

Hope all of you have a safe and Happy Halloween, and hope you enjoyed this Halloween design!

See you next time for more nail fun! 

Tuesday, October 25, 2022

Treats Only, Candy Time- Halloween Nail Design

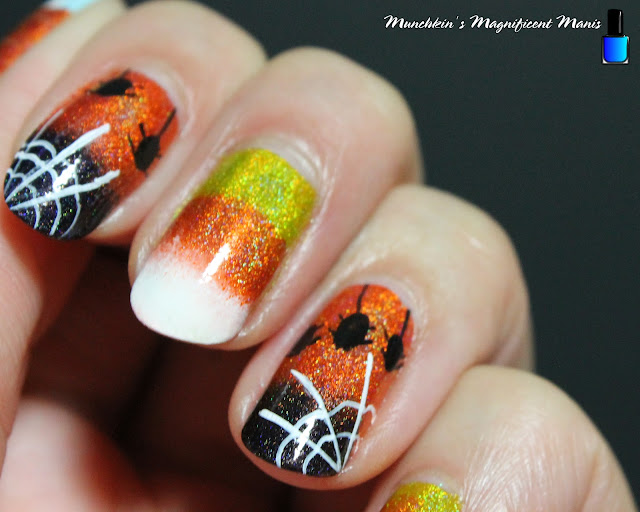
Hello everyone! Happy Halloween! It's that time again for lots and lots of candy and some scares too. Today on the blog we will be creating a Halloween design, with candy corn, spiders, a ghost and a pumpkin. 

Halloween Nail Design

Here are the polishes and nail art tools used for this Halloween nail design- 


Base and top coat- CND Stickey Base Coat and CND Super Shiney Top Coat. 

Polish- China Glaze- Chalk Me Up!, Holo Taco- Orange Drink- Rainbow Collection, Holo Taco- Lemon Sucker- Rainbow Collection, Holo Taco- Electrostatic- Electric Holo Collection, and Sally Hansen- Hard as Nails- Hard to get. 

Acrylic paint- Black, white, and brown.

Nail art tools- Thin detail and striper brushes, and a large dotting tool. Also a makeup sponge. 

Other- Water to clean off your nail art brushes.

Halloween Nail Design

Apply a base coat, then let that dry.

Polish-

Thumb- Light blue.

Index and ring finger nail- Holographic orange.

Middle and pinky finger nail- Holographic yellow.

Let that dry.

Halloween Nail Design

Halloween Nail Design

Candy Corn Gradient- 

First we will start off with the candy corn gradient. Starting with your yellow base on the middle and pinky finger nail. Take that same base color, the yellow on a sponge, then polish orange, then lastly white for the gradient. Create a strip going down the sponge with all three colors.

Dab the sponge on the nail staring with the white on the tip. You will need to repeat this step a few time for it to be opaque.

Halloween Nail Design

Orange and Black Gradient, with Spiders- 

Just like the candy corn nails we will be doing a gradient with orange and black. Take a sponge with orange and black polish on it. Then dab the nails a few time for it to be opaque. 

For the spider web make three long lines from the left side on the index nails, and the right side on the ring finger nail. Then on each web make a curved line in each section of the web. 

Now on to the spiders, I decide to keep them very simple, by just make an oval shape for the body and then making four lines for the legs. Also add some lines from the cuticles to the spiders. 

Halloween Nail Design

Ghost on top of a Pumpkin- 

On the thumb nail we will make a ghost that is sitting on top of a pumpkin (even though my ghost kind of looks like a snowman.🙃) 

Staring off with your pumpkin, take the orange polish that you used on the other nails and staring near the cuticle, make kind of a heart shape, by swiping up to the middle and then doing the same thing on the other side. Then fill that in. 

Once your pumpkin is dry you can also outline the pumpkin with brown and make some curved lines inside the pumpkin as wells long with a stem. 

For the ghost, take some white paint on a detail brush and make a circle for the head than an oval shape for his body, lastly make two arms. 

For the ghost face take a large dotting tool with black paint on it and make two dots for the eyes. then, once that has dried make two smaller white dots over the black. For the smile make a small curved line under the eyes. Lastly you can add some pink checks as well.

Lastly a step I kind of wish I left out is, add some orange and black dot to the blue background.

Halloween Nail Design

Once your nails are ready for all the candy, apply a top coat to seal in your design and to help it last all Halloween.

Hope all of you enjoy this Halloween nail design and have a safe and Happy Halloween!

See you next time for more nail fun! 

Tuesday, November 16, 2021

Fall Glitter Gradient

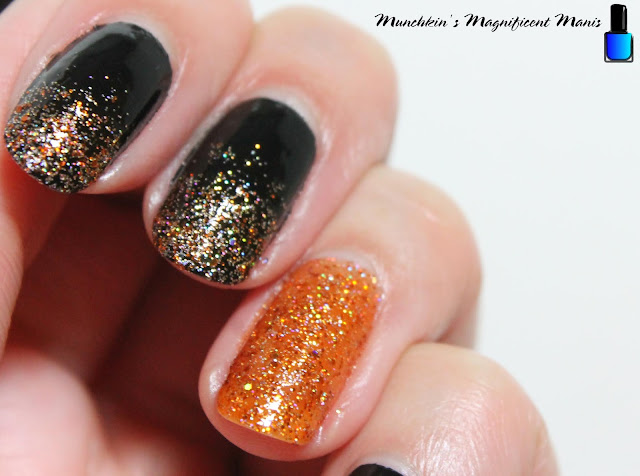
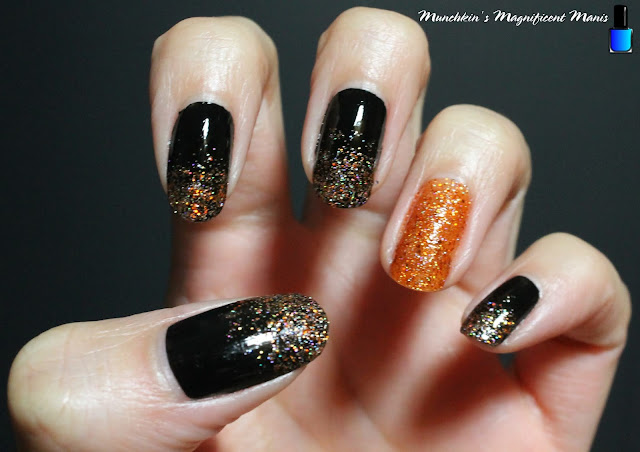
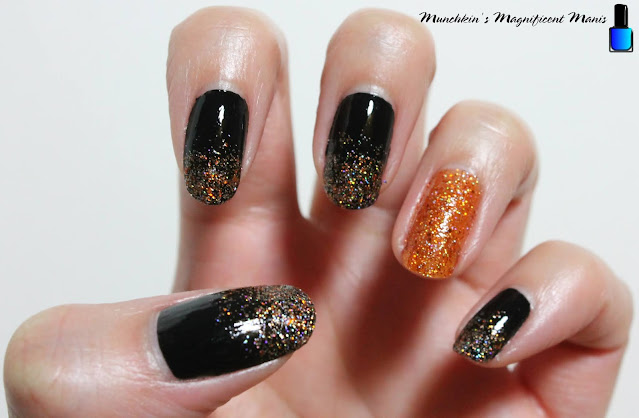
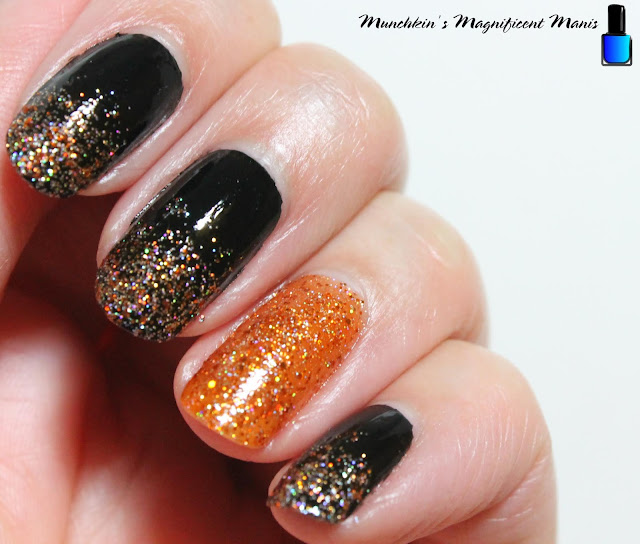
Hello everyone! Today we will be creating another glitter gradient, for the fall. For this gradient we will be using a Holo Taco's Zyler the cat. I remember in one of Simply Nailogical's video's, Cristine had said that Zyler's polish doesn't get much love, so I wanted to show this polish some love by creating a glitter gradient with it. Also this orange glitter polish is perfect for a fall glitter gradient or a Halloween design even though Halloween is over with. 

Fall Glitter Gradient

Here are the polishes and nail art tools used to create this fall glitter gradient:


Base and top coat- CND Stickey Base Coat and Revlon Extra Life No Chip top coat.

Polishes- Sally Hansen- Hard as Nails- Black Heart and Holo Taco- Zyler the cat.

Nail art tools- Just a makeup sponge. 

Fall Glitter Gradient

Fall Glitter Gradient

Apply a base coat to clean dry nails. 

Let that dry.

Polish- 

Thumb, index, middle, and pinky- a black creme polish.

Ring finger- Orange glitter polish (Holo Taco- Zyler the cat) 

Let that dry.

Fall Glitter Gradient

Fall Glitter Gradient

Once your base polish has dried. Take your orange glitter polish and polish a very thin layer on the tip of your nails, focusing most of the polish on the tip of the nail and a little going up the nail.

Do this on all the nails except the ring finger nail, unless you decided to create this gradient on all the nails.

Fall Glitter Gradient

Fall Glitter Gradient

Now take a makeup sponge and polish some of the orange glitter polish on the sponge, then dab the sponge on to just the tip of the nails.

Do this on all of the nails again.

For this polish I did take the polish brush and went over the glitter part one more time, just to add a little more in the middle of the nails, that way it looks like a gradient. 

Fall Glitter Gradient

Fall Glitter Gradient

Now that your fall glitter gradient is done apply a top coat to seal in your design and to help it to last. 

Fall Glitter Gradient

There you go a simple and fun fall nail design, that you can create anytime of the year or just change up the colors of glitters. I have done quite a few glitter gradients on this blog and they are always a fun and simple way to jazz up your nails.  

Hope all of you are enjoying the fall season here in the US. Also hope you enjoy this fall glitter nail design!

See you next time for more nail fun!  

Wednesday, October 27, 2021

Happy Bloody Halloween- Nail Design

Hello everyone! Happy Halloween! Well early Halloween. Anyone have any plans for halloween this year? Not me, the most I do is of course create a fun nail design and eat candy, that pretty much it. Anyways this year we will be kind of recreating a design that I created back in 2018, with a few of the nails having a fake blood splatter on them, and of course changing it up by adding a pumpkin on the thumb nail and a spider web on the pinky nail. 

Halloween Nail Design


Here are the polishes and tool used to create this spooky/ gross nail design:


Base and top coat- CND Stickey Base Coat, Revlon Extra Life No Chip top coat, and - OPI- Matte Topcoat.

Polish- Holo Taco- Electrostatic- Electric Holo Collection, and Essie Coconut Cove.

Acrylic paint- red, black, yellow, white, and brown. (mixed red and yellow to make orange.) 

Nail art brushes- thin detail and stripper brush, and a medium flat brush.

Water to clean up your nail art brushes and the big mess you will make on your fingers. 

Halloween Nail Design

Apply a base to clean dry nails.

Let that dry.

Polish- 
Thumb and pinky- black holographic or creme polish 
Index, middle, and ring- an off white polish. 

Let that dry.

Halloween Nail Design

Halloween Nail Design

Fake Blood Splatter on the index, middle and ring finger nails:

Now time for the messy part!

*For this part use paint and not nail polish! Also wait to polish your other hand last, this step is very messy and your other hand will be all red at the end! Also make sure to have something down on your surface that you do your nails, I use a nail mat.*  

First we need to make our fake blood take a red paint and add the smallest amount of black to it, or until your red looks blood like. This time I added a little more black to make the red look darker, last time it was a little to bright red. 

Then water down your red paint/ fake blood, so it is very watery! this will make it easier to splatter. Take a flat brush and make sure your brush is soaked with the red paint/ fake blood, then with your other hand and one finger, flick your brush at your nail to make the blood splatter, your will need to do this step a few time to have the right amount of splatter.

Halloween Nail Design

Spider Web and Spider on the pinky nail: 

For the spider web make three long lines on the right hand corner of the cuticle. Then staring from the corner, make a curved line in each section.

For your little spider make a large circle and fill that in with white paint for the body. Then make three curved lines on each side of the circle for the legs. 

Halloween Nail Design

Pumpkin and Spider Web on the thumb nail:

* I always jump around from nail to nail when doing nail art that way you are not setting their waiting for each part to dry.*

On the thumb nail we will make the pumpkin first and then the spider web. First make a white oval, with a small square at the top, in the middle of the nail. Let that dry, then fill in the white oval with orange, you will need to do this a few time to be opaque. To add some light to the top of the pumpkin, add a little bit of yellow paint to the top. 

Let that dry. Then add a few curved liens to your pumpkin. Also fill in your stem/ small square at the top of your pumpkin with brown paint.

For the pumpkins face make two triangles, then fill that in with black paint, then make a curved line for his smile and and some squares for teeth, fill that in as well.

Halloween Nail Design

Halloween Nail Design

Once your nail are Halloween ready apply a top coat to seal in your design and to help it to last through all of your trick or treats. Also on the nails that we did the blood splatter apply a matte top coat, after the gloss top coat has dried. 

Hope all of you enjoyed this Halloween nail design. I enjoyed creating a design similar to this a few years ago and just wanted to do a similar design again, with of course some differences. Even though this design is very messy!

Check out my last design that I created. things-are-going-to-get-messy-halloween

Hope all of you have a bloody good Halloween!

See you next time for more nail fun! 👻 🎃

Thursday, October 29, 2020

Jack Holo Lanterns- Halloween Nail Design

Hello everyone! Happy Halloween! This year Halloween for many people/ kids will be very different, but I feel like even before everything that has happened this year  Halloween just has not been the same. I remember when I was a kid and would go out trick or treating that I would get so much candy and now not really any kids go out anymore (even in past years.) So this year we will  keep things simple, we will be creating holographic pumpkin's or Jack O Lanterns on our nails, with a few of the polishes from the Holo Taco line and some other polsihes as well.

Halloween Nail Design


Here are the polish and nail art tools used to create this holo pumpkin nail design.


Base and Top coat- - CND Stickey Base Coat and Revlon Extra Life No Chip top coat.

Polishes- Color Club- Black Magic- holo, Holo Taco- Zyler the cat, and Holo Taco- Orange Drink- Rainbow Collection.

Acrylic paint- black and green.

Nail art brushes- Thin detail and stripper brush.

Small glass cup of acetone to clean off your nail art brushes and a cup of water as well.

Halloween Nail Design

 Apply base coat, let that dry.

Polishes- 

Thumb nail- Holographic orange. (I used Holo Taco- Orange Drink)

Index, middle, and pinky finger nail- holographic black. (I used Color Club- Black Magic)

Ring finger nail- Holographic glitter orange. ( I used Holo Taco- Zyler the cat) 

Let that dry.

Halloween Nail DesignHalloween Nail Design 
 
Halloween Nail Design
 Halloween Nail Design
 
Full Pumpkin on the index, middle and pinky nails:
 
On the index, middle and pinky finger nail we will create a circle/ full pumpkin on the tips of our nails. 
 
First take a thin detail brush with an orange holo polish and make a circle near the tip of the nail and fill that in, then let that dry. 
 
Once that is dry take a detail brush with black paint on it and make two triangles for the eyes and then with your stripper brush make a thin curve for the smile.
 
Lastly make a thick green line or a small square on top of your pumpkin for the steam.   
 
Halloween Nail Design
 Halloween Nail Design 
 
 
Pumpkin face on the thumb and ring finger nail:
  
For an even simpler option on the thumb and ring finger nail we will just make the Jack O Lanterns face.   
 
Take a thin detail brush with black paint on it and make two triangles kind of near the tip of your nails for the eyes, then make a small triangle under the two eyes for the nose. Then take a thin stripper brush with black paint on it and make a curved line for the smile, then make two flat line above the curve and leave an empty space in between that for the pumpkin's tooth, also don't forget to fill in each shape with black paint as well. 
 
Halloween Nail Design
Halloween Nail Design 
 
Once you have your Halloween nails the way you like apply a top coat to seal in your design and to help your nails to last through all the candy and scary movies that you will be watching this Halloween, or like me just help your nails to last though all the candy eating.
 
Hope all of you enjoyed this holographic pumpkin nail design!
 
Happy Halloween!
 
See you next time for more nail fun!