Hello everyone! Today I have some cool polishes that we will be creating a tutorial with. The two main polishes we will be using are from the indie brand Pretty & Polished, one looks like frosting and sprinkles on a donuts, and the other one looks like chocolate truffle. So I thought what would be better then creating a cool dessert themed nail design.

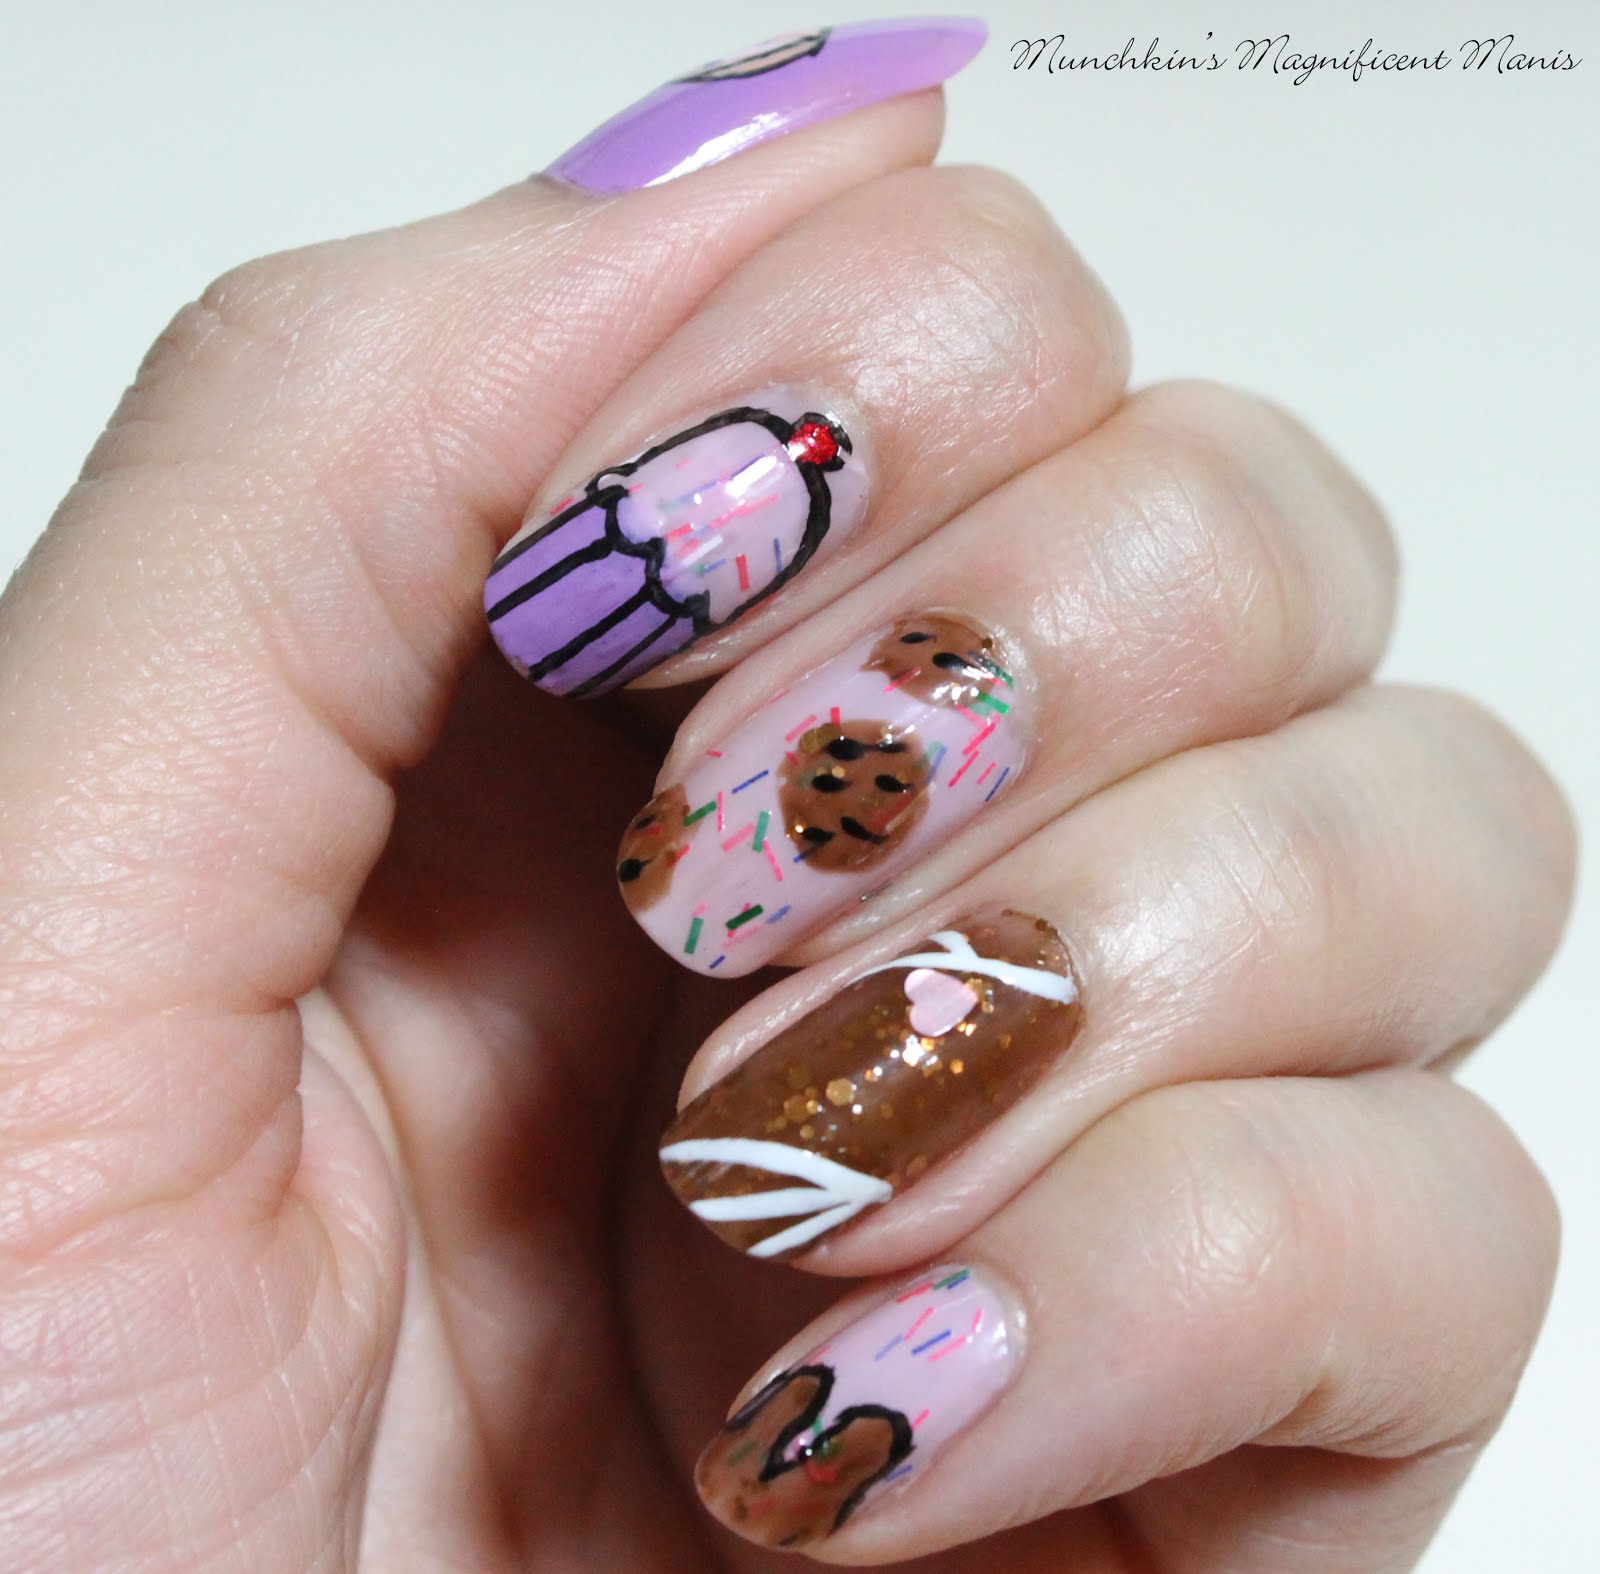
Final Dessert nail design, Yum!
The nail polish and tools used for this design will be right next to the images as we go.
The skill level for this dessert nail design is:
Beginners to Intermediate
This design has both easy and hard parts to it. Most of the design actually does not require much tools just the brush in the polish bottle, and one nail art brush. The part that makes this a little bit hard is if you outline some of the items, which is not a must.
Let's start this yummy design, this design is going to look good enough to eat!
CND Sticky Base Coat
1. Start off with a base coat to protect your nails. As you can see I am once again giving a new base coat a try, the CND Sticky base coat, and so far so good!
Polishes used- Sally Hansen- Hard as Nails - No hard feelings, Pretty& Polished- Donut Ever Let Me Go, and Pretty& Polished- Double, Double, Toil and Truffle.
2. Paint your thumb nail with a light purple, your index, middle and pinky nail with Donut Ever Let Me Go or a light pink with colorful glitter pieces in it, and then your ring finger with Double, Double, Toil and Truffle or a brown with gold glitter in it.
NYC- Fashion Safari
3. Once your base colors has dried we will start to make a donut on the thumb nail. Just take the brush that is the bottle an make an O shape, you may need to go over the O shape a few time to make it opaque enough.
Kiss nail art stripper- White
4. As we will are donut dry we will move on to the chocolate on the index nail. This one is simple with just a few lines of white chocolate drizzle. Take your white nail art stripping polish and make two lines near the cuticle and three near the nail tip.
5. Now we have another simple one, on the pinky nail we will make some dripping chocolate over the pink frosting. Once again just take the brush that comes in the polish bottle and swipe a large line, a small, then a large line, or just make three different size drips for the chocolate.
Tools and polish used- Black acrylic paint, Sally Hansen- Hard as Nails - No hard feelings, Nicole by OPI- Love your life, and Winsonia 3 stripping brush.
6. As for the other nails on the index nail we will make a cupcake, the middle some chocolate chip cookie, and just to finish off the chocolate piece on the ring finger you can take a heart shaped glitter and place one on the nail or just leave it as it.
Staring off with the cupcake, first take a light purple and swipe it from the tip of the nail part way up the nail for the cupcake wrapper. Then with your small stripping brush with black paint on it, we will outline the cupcake shape first.
Next we will make some chocolate chip cookies on the middle finger. Take the brush in Double, Double, Toil and Truffle bottle and make a small circle in the middle of the nail, then a half circle near the cuticle and the tip of the nail.
7. Lastly we need to add frosting to our donut. Take the brush that came in your nail polish, Donut Ever Let Me Go and swipe that over the tan/ peach color, you may need to do this a few time to make it opaque enough. I suggest stopping here with the donut, in the final photo I outline the donut in black, which I wish I didn't do because it looks better as is.
 Final Dessert nail design on the left hand
8. For some final touches on the cookies, with a black nail art stripping polish make small dot for the chocolate chips. For the cupcake you can add a cherry on top with a red polish,and add some black lines on the cupcake wrapper for a little bit of detail. An option step is to outline the chocolate drip on the pinky and the donut (which I wish I didn't do, but oh well.)
Dessert design on the right hand
Above is a photo of the same design on my right hand, where I did not outline the donut and I personally like it better.
Anyways as always once you have finished your design apply a top coat to seal in a protect your yummy dessert nails. As always I used Revlon Extra Life No Chip top coat.
If you like the two main polishes used for this design, I purchased them on the website Live Love Polish.
Unfortunately when I went to type up this post, this polish is currently sold out, but keep looking it should be back in stock soon.
This was the first time I ordered from Live Love Polish, and I will be doing a review of these two polishes, along with two other that I purchased very soon.
Hope all of you enjoyed this yummy dessert nail tutorial!
See you next time for more nail fun!