Showing posts with label Dotting tool. Show all posts

Saturday, November 16, 2019

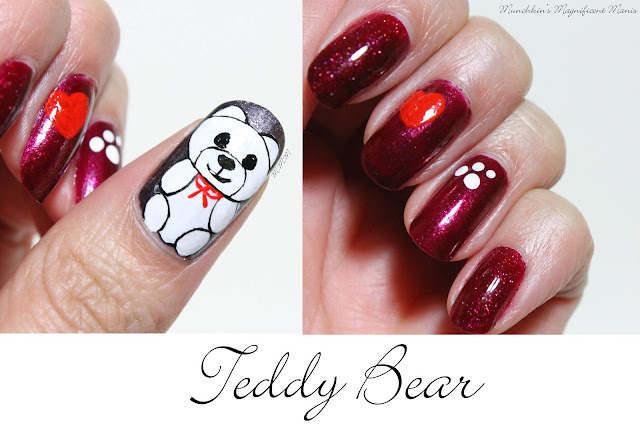
Teddy Bear Nail Design

Hello everyone! Today we will be creating a teddy bear nail design, just for fun, this design can be great for any time of year. I did choose some darker more holiday colors for the base colors, but really this design can be done at any time. 
 
Teddy Bear Nail DesignTeddy Bear Nail Design

 Here are the polishes and nail art tools used to create this cute teddy bear design:


Base and top coat - CND Stickey Base Coat and Revlon Extra Life No Chip top coat.

Nail polishes-  Zoya- Urban Grunge- Troy, Zoya- Blaze, and Zoya- Marjorie- Red book Trio.

Acrylic paint- black, white, and red.

Nail art brushes- thin detail brush, a thin stripper brush and a dotting tool.


Teddy Bear Nail Design
 Teddy Bear Nail Design
Teddy Bear Nail Design

Apply base coat

Polish colors-
Thumb nail- a dark grey toned sliver, Zoya Troy.
Index and pinky finger nail- a holographic burgundy color, Zoya Blaze.
Middle and ring finger nail- a shimmery burgundy color, Zoya Marjorie.

For this design I will just go over how to create the bear on the thumb nail. As for the middle finger nail I just put a heart on the upper right hand corner and on the ring finger nail and a paw print also on the upper right hand corner. 

 Teddy Bear Nail Design
  Teddy Bear Nail Design
 Teddy Bear Nail Design

For the teddy bear take a thin detail brush with white paint on it, make a oval shape near the tip of the nail for the bears head and two ears on the top of the head. Then make two ovals on the sides for his arms, another larger oval for his tummy and then two more smaller ovals for his feet. You will need to go over this a few time to be opaque.

Once you have your bears outline done we can make his features. Take a dotting tool with black paint on it, make two dots in the middle of his head for the eyes. Then with a thin detail brush make a small oval shape for the nose, take a thin stripper brush make a small line down the middle of the nose and then a large curved line for the smile. 

For his red bow, take your thin stripper brush with red paint on it make a line on his neck then two loops, then two line from those two loops. 

Now for the hard part outlining your bear, if this step is to hard you can skip this step, I just feel like it makes it look better. If you would like to outline your bear, take a thin stripper brush with black paint on it and starting with the head begin to outline the whole bear. Also don't forget to add the oval shape around his nose and mouth. 

Teddy Bear Nail Design     Teddy Bear Nail Design
Teddy Bear Nail Design

Once you have your teddy bear nail design the way you like apply a top coat to seal in your design and to help it last. 

Here is the practice version of the teddy bear design.

Hope all of you enjoyed this teddy bear nail design!

See you next time for more nail fun!   

Friday, March 29, 2019

Minnie Mouse Nail Design

Hello everyone! Today we will be creating a Minnie Mouse nail design. In the past I have created two Mickey Mouse nail designs, so today we will show Minnie Mouse some love as well. Growing up and still now I have always loved Mickey and Minnie, but Mickey has always been my most favorite. How about all of you which one is your favorite or do you love both Mickey and Minnie the same? 


Minnie Mouse Nail Design
Minnie Mouse Nail Design 

Here are the nail polishes and nail art tools used for this Minnie nail design: 


Base and top coat- CND Stickey Base Coat and Revlon Extra Life No Chip top coat.

Nail polishes- Zoya- Renee- Redbook trio, Glitter Daze- Let's have a Waikiki, and Sally Hansen- Hard as Nails- Black Heart. 

Acrylic paint- Black, white, red, and peach.
(Using paint for nail art makes things so much easier, if you mess up you can always wipe it off, as long as the paint has not dried.)  

Nail art tools- large dotting tool, thin detail and liner brushes, and a very small thin detail brush.

a small cup of water to clean off your nail art brushes.


Let start this Minnie Mouse nail design!  

Minnie Mouse Nail Design 
Minnie Mouse Nail Design

Apply a thin layer of base to clean dry nails, to help protect your nails and to help your Minnie design to last.

Let that dry.

Then polish your index, ring, and pinky nail with a red creme polish, then polish your middle finger nail with a black polish, lastly polish your thumb nail with a glitter pink polish. 

Let that dry as well.


Dots on the Index and Pinky Finger nail:

Once your polish has dried we will start the nail design, first off we will create the dots that are on the index and pinky nail. This is done simply by taking a large dotting tool with white paint on it and make a line/ row of dots, I started from the bottom right hand corner near the cuticle and then went up the nail, still staying in a row, that way the dots look neat. 

Minnie Mouse Nail Design 
Minnie Mouse Nail Design

This time I wanted to kind of start off with the hard part first, after all this was the nail that I started off with when I did this design. I  do jump around a lot when I do my nails, just to let parts dry on each nail. 

This design is basically the same as the Mickey Mouse nail design, you just need to add a bow and eye lashes. But of course I will go step by step through the process of making Minnie.   

Minnie Mouse on the Thumb nail:

On the thumb nail we will start off with Minnie's face shape, we will be using peach acrylic paint for this part, first make kind of a heart shape at the top for her head and then make to half circles on the sides for her checks. You will need to go over this a few times to be opaque.  

Then on to her ears and the side of her face. For the side of her face just follow the outline of the top of her head, but just make this part is kind of thick. Then make two circles on top of her head for her ears. 

* I actually ended up making her head a little to big and had to squish her ears in, but I still think Minnie turned out good, so make sure if you create this that you don't make her head to big and give yourself enough room for her ears.*   

Then on to Minne's face. We will first make her eyes, take a thin detail brush with white paint on it and make two long ovals right next to each other, then fill them in with the white. Once that is dry make two smaller black ovals in the white oval for her pupils.

For her nose, first make a large arch right under her eyes, then under that arch make a oval for her nose and fill that in with black.
 
For the final touches for Minnie's face we need to make her smile, take your very small detail brush with black paint on it make a large curved line, then two small curved lines at the end of each of the larger curved line.

Right now our Minnie is looking more like Mickey, to change that we need to add lashes and a bow on top of her head. For her lashes take your very small detail brush with black paint on it and above her eyes make three lines for her lashes.

For Minnie's bow, on top of her head make a red circle right between her ears, then on each side of that circle make kind of a side ways heart shape for the bow it's self. You will need to go over this a few time to be opaque. 

Once her red bow has dried take the smaller end of your dotting tool and make some small white dots on her bow. 

Now the hard part is over and you have a cool looking Minnie Mouse on your thumb nail. 

 Minnie Mouse Nail Design 
Minnie Mouse Nail Design

Now on to the more easier parts of this design, the Mickey Mouse shapes, that are actually upside down for the photos (oops!) and Minnie's bow.

Mouse Head shapes on the Ring Finger nail:

For your mouse head shapes take a large dotting tool with black paint on it and dot one large dot for the head and two more on the side for the ears, do this a few more time all around the nail, I did this three times. 

Repeat this same step for the white mouse head shapes, and it is okay if the white and black shapes over laps some. I also did this three times as well.  

 Minnie Mouse Nail Design 
 Minnie Mouse Nail Design
  
Minnie's Red Bow on the Middle finger nail:

Lastly we will be creating Minnie's iconic bow on the middle finger nail. This will be the same as the small bow that we made on Minnie on our thumb nail, just bigger. 

With a detail brush with red paint on it, make a big red circle in the middle of the nail, then on each side of that circle make kind of a side ways heart shapes for the bow it's self. You will need to go over this a two time to be opaque. 

Then let the red bow dry, then with your dotting tool with white paint on it make a few white dots on the bow.   

Minnie Mouse Nail Design
 Minnie Mouse Nail Design

For this design because we used a lot of red and red's are know for smearing, I suggest waiting longer for this one to dry before top coating, the last thing you want to do is to smear your design that you worked so hard on. 

When top coating first start off with the nails that are not red, like Minnie and the bow, then with a lot of top coat on the brush kind of glide over the red nails to try to make sure they don't smear. 

 
Also here is the practice version of the Minnie design as well.  


Hope all of you enjoyed this Minnie Mouse nail design!

Also if you have not checked out my recent Mickey Mouse nail design don't forger to check that one out as well. happy 90th birthday mickey mouse

See you next time for more nail fun!

Friday, March 22, 2019

Leopard Nail Design

Hello everyone! Today I decided that I wanted to create another leopard print nail design. A few years ago I created a blue and silver leopard design on this blog, but this time I wanted to have a more realistic color palette, plus is seems like in fashion leopard print has become popular, so this would be great to have on your nails with your favorite leopard print outfit.

This design is very simple to create and great for beginners, the only nail art tool you need is a dotting tool. 

Leopard Print Nail Design 
Leopard Print Nail Design

Here at the polishes and nail art tools that you will need for this leopard design:


Base an top coat - CND Stickey Base Coat and Revlon Extra Life No Chip top coat.

Polishes- Left hand; OPI Hawaii- Do you take Lei Away and Cirque- Madder.
Right hand; Revlon- Gold Coin, Zoya- Renee- Redbook trio, and Nicole by OPI- That's Just Plain Nuts!  (for the brown spots)

Acrylic paint- Black and brown- hot cocoa.

Nail art tools- large dotting tool (that is all!) 


Leopard Print Nail Design
  Leopard Print Nail Design

As always start off with clean dry nails and apply a thin layer of base coat, then let that dry.

For this design I used two different types of polish on each hand. I always like to have two different polish colors on each hand, to make it more fun! As always you can just go with one or the other for your color choice as well. 

On your left hand polish your thumb, middle and ring finger with a nude/ tan polish (I used  OPI- Do you take Lei Away) and then your index and pinky nail, polish those nails with a red holographic polish ( I used Cirque- Madder.) 

 Leopard Print Nail Design
  Leopard Print Nail Design

On your right hand polish your thumb, middle, and ring finger with a gold polish (I used
Revlon- Gold Coin) and then your index and pinky nail, polish those with a red creme polish (I used Zoya- Renee.) 

Let your base polishes dry.

 Leopard Print Nail Design
 Leopard Print Nail Design
 Leopard Print Nail Design
 
Now on to the leopard print, which will go on the tan/ gold nails. For the leopard print only put a few of the larger prints, try not to make to many and make sure to leave some of the tan/ gold showing, other wise the nails might look to cluttered.

Take your dotting tool and dip it into your brown paint, for your left hand and then for your right hand use a darker brown polish. On each nail make different random shaped dots to start your leopard print.

For both hands take that same clean dotting tool with black paint on it, and on each large dot make a curved shape on some of the sides, on some of the dots I put two and some I put three curved shapes.

Then to finish off your leopard print make some small black dots in the blank areas, also make sure to only make a few.

That is all that is to it for this leopard design. 

Leopard Print Nail Design 
 Leopard Print Nail Design

Leopard Print Nail Design 
 Leopard Print Nail Design
 Leopard Print Nail Design

Leopard Print Nail Design 
Leopard Print Nail Design
 
Once you have your leopard print the way you like, apply a top coat to seal in your design and to help it to last. 

Hope all of you enjoyed this simple leopard print nail design! 

See you next time for more nail fun!
Friday, February 8, 2019

The Polar Bear Vortex- Polar Bear Nail Design

Hello everyone! This past week, at least where I live has been supper cold, in the teens and in the negatives, and even now it is still very cold. So I thought it would be cool to make a cute polar bear nail design to help us all get through this cold weather/ polar vortex.

Polar Bear Nail Design  
Polar Bear Nail Design 

Here are the polish and tools used to create this cute polar bear design:


Base and top coat - CND Stickey Base Coat and Revlon Extra Life No Chip top coat.

Polishes- Colors by llarowe- Arturo and Color Club- Halo's- Crystal Baller.

Acrylic paint- black, white, and red.

Nail art brushes/ tools- medium or large dotting tool, thin detail brush, thin stripper brush, and a very small detail brush. 

A small cup of water to clean off your brushes.

What is the best way that you keep warm in the winter? with a fuzzy blanket, a nice cup of tea, coffee, or hot chocolate? 

Polar Bear Nail Design

Start off with clean nails, with no polish on them, and apply a thin layer of base coat to all of your nails.

Let that dry.

Polish all of your nails with a light blue polish/ a light holographic blue polish. 

Let that dry.

Then on to the nail art, we will first start off with the easy part the snowflakes on the index, middle and pinky finger nail. For the larger snowflakes we will just make a simple star shape, an X with a few lines going through it, on each nail you can do a different amount. After that take a larger dotting tool with a little bit darker holographic polish on it and make random dots around the nail, this is for the smaller snowflakes.

 Polar Bear Nail Design
 Polar Bear Nail Design
Polar Bear Nail Design

Next we will make a the polar bear that is kind of peeking out from the tip of the nail on the ring finger nail. Take a thin detail brush with white paint on it and make a large circle near the tip of the nail, and then two smaller circles at the top of the head for his ears. You will have to go over this a few times to be opaque. Then take a large dotting tool with black paint on it and make two dots for his eyes and then with your detail brush make a small oval shape for his nose right under his eyes.     

Also on this nail I did add some dots above the bear for some snowflakes. 

Polar Bear Nail Design
 Polar Bear Nail Design
Polar Bear Nail Design 

Last by not least is the polar bear him self on the thumb nail. Take a small detail brush with white paint on it and make a circle near the tip of the nail for his head, then make another circle that is attached to his head for his body, fill in both of those. Then make two small arms and two circles for his feet, for the small detail on his paws, just make two lines on each paw and for his feet make a small circle and three little dots above that. 

For his face take your dotting tool with black paint on it, and make two circles for his eyes an then make an oval for his nose, and right under that draw a small line and two curved lines for his smile. For his ears make two half circles with black paint on the white part of his ears. 

To finish your little polar bear, we will add a scarf. Take that same detail brush with red paint on it and make a thick line around his neck and then two lines coming down from that line.
         
Polar Bear Nail Design
 Polar Bear Nail Design 
Polar Bear Nail Design

Once you have your polar bear nail design the way you like apply a top coat to seal in your design to help it last through this cold weather. 


 Polar Bear Nail Design

Here is the practice version of this design as well. 


Hope all of you enjoined this polar bear nail design and try to stay warm if it is cool where you live at.   

See you next time for more nail fun!

Friday, January 18, 2019

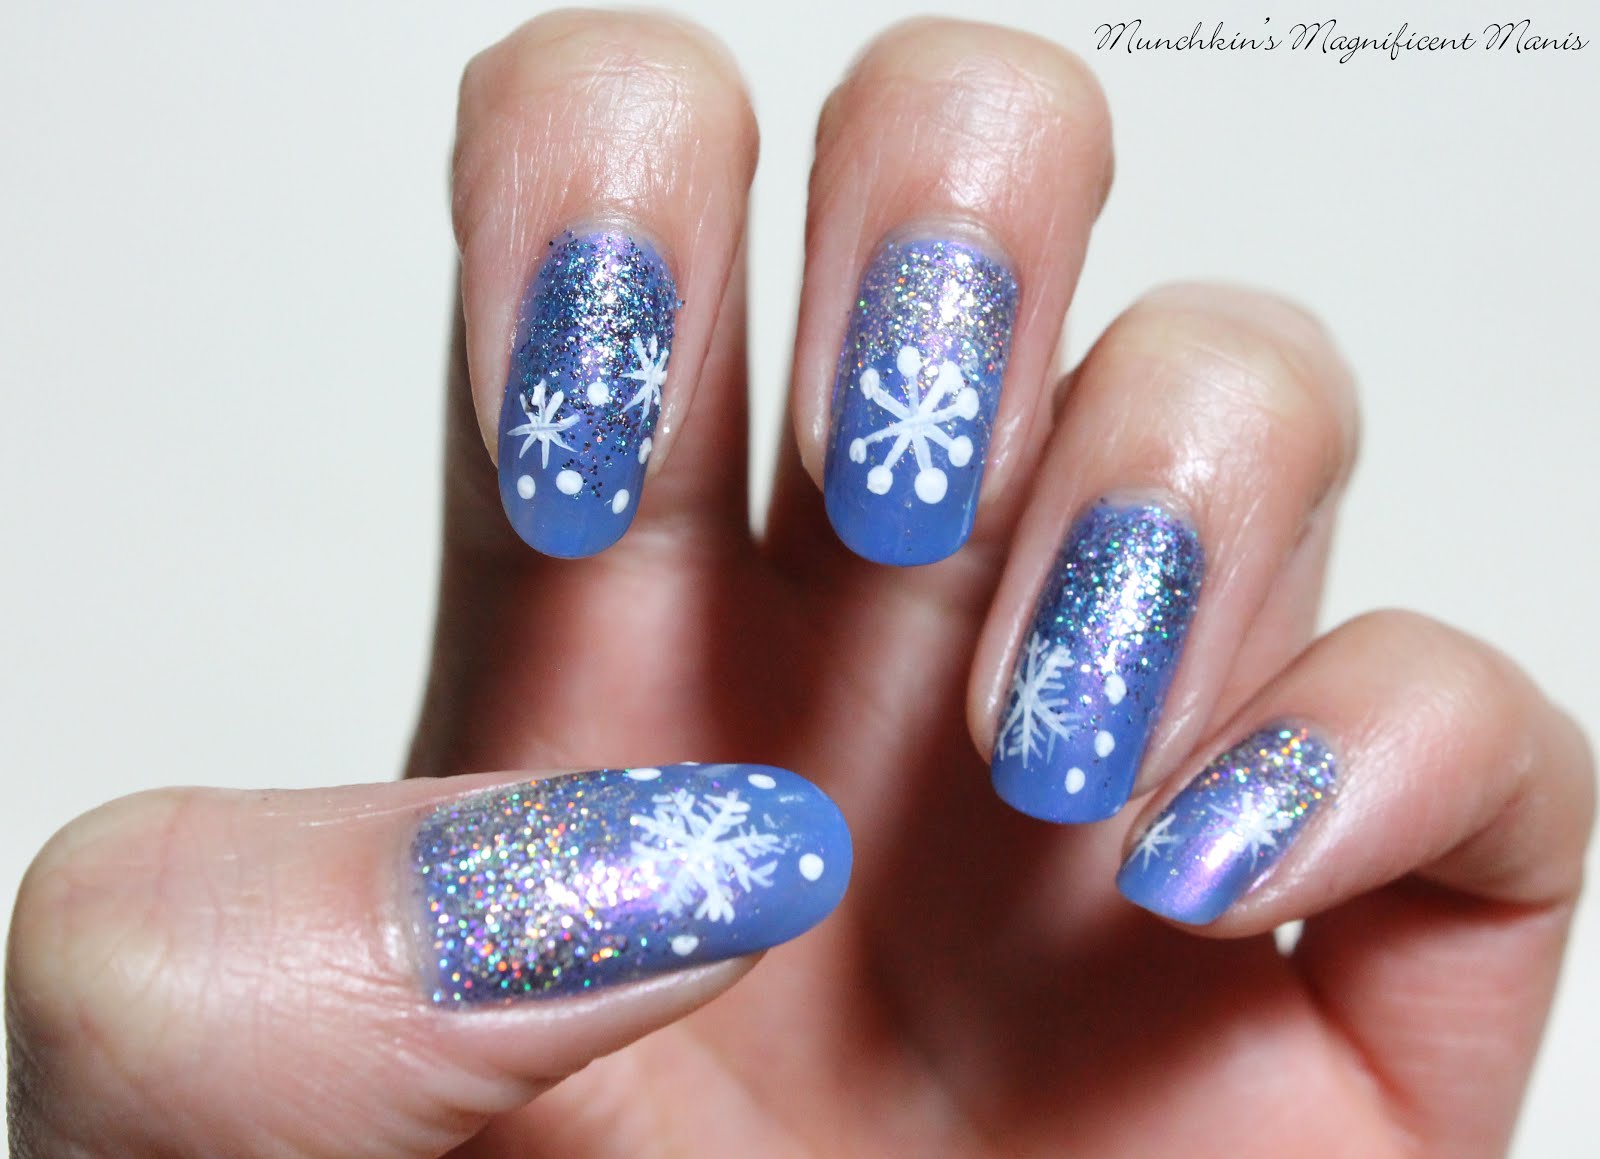
Snow day- Glitter Gradient and Snowflake Nail Design

Hello everyone! Happy New Year well a little late in the month, but still not to late. Sorry I have not post anything in a while, I have been a little bit busy/ tired. Anyways today we will be creating a winter nail design, a glitter gradient with some snowflakes. So far in the area I live winter has been kind of mild not much snow, which I am perfectly fine with, but I thought because it is still winter it would be cool to make a winter/ snowy nail design. 

Glitter Gradient and Snowflake Nail Design  
Snow day! Winter nail design

Here are the polishes and nail art tools used to create this winter nail design: 


Base and top coat- CND Stickey Base Coat and Revlon Extra Life No Chip top coat.

Nail polishes- Your base color Zoya Enchanted- Saint, for the glitter gradient Color Club- Mini- Silver Glitter and blue and purple glitter. 

Acrylic paint- white

Nail art tools- Thin stripper brush and small dotting tool.

Other- Makeup sponge for glitter gradient, and a small cup of water to clean off nail art brushes. 

 Glitter Gradient and Snowflake Nail Design
 Glitter Gradient and Snowflake Nail Design
 Winter nail design

Start off with clean nails and then apply a thin coat of base coat to make your polish last. 

Let that dry.

Then on all of your nails, polish them with a periwinkle blue (I used Zoya - Saint.) 

Let that dry as well.

Then on to the glitter gradient, for this you will need a makeup sponge. For me I found it easier to first take the polish and the brush it came in, and polish the gradient on first and then sponge on more of the glitter. 

For this gradient we will start from the cuticle and then go down the nail. For the glitter gradient most of the glitter will be focused/ mainly be near the cuticle and then faded in to less glitter as we go down the nail. 

As stated above I first took the brush and polished the glitter on and then I took a makeup sponge putting some of the glitter polish on to the sponge and dabbed it on to the nail. 

Glitter Gradient and Snowflake Nail Design  
Winter nail design

Once you have your glitter gradient the way you like on to the snowflakes, to make this more of a winter design. On my left hand I did put snowflakes on all of the nails and on my right hand I only put snowflakes on three nails. 

For each nail you can make each snowflake different. Some nails I put one snowflake the other nails two with some small dots. 

For each snowflake they all start off with a X and then look kind of star shaped, some of the flakes you can leave as is or add more lines to make them different. Then once you have the larger flakes you can take a dotting tool and make small dots for very small snowflakes. 

Glitter Gradient and Snowflake Nail Design 
 Winter nail design, on thumb nail 

Glitter Gradient and Snowflake Nail Design
 Glitter Gradient and Snowflake Nail Design 
Winter nail design

Once you have your winter nail design the way you like apply a top coat to seal in your design and to help it last thought your next snow day, or just a regular day. I don't know about you but I am fine with a mild winter with little snow, it was much better when we where kids and had actually snow days, now we don't get snow days we still have to go to work no matter what.

Glitter Gradient and Snowflake Nail Design  
Glitter Gradient and Snowflake Nail Design
Winter nail design, on my right hand 

Glitter Gradient and Snowflake Nail Design
Glitter Gradient and Snowflake Nail Design 
Winter nail design, on my right hand 

Here is the practice version that I did a well. 
 
 
Hope all of you enjoined this winter glitter gradient nail design, and I hope all of you are having a great start to the new year and stay warm if it is cold where you are at. 
 
See you next time for more nail fun !