Showing posts with label Fall Nail Design. Show all posts

Saturday, October 15, 2022

Pumpkin Season- Pumpkin Nail Design

Hello everyone! Today we have another fall nail design, a pumpkin themed design. It's that time of year again where we have pumpkin spice everything, which I don't mind, I love pumpkin flavored things. Even thought I don't care for fall nail colors, I did still want to create some fall themed nail art with out the boring neutral nail polish colors. Also just a note I do get most of my inspiration from Pinterest and then make it my own.

Pumpkin Nail Design

Here are the polishes and nail art tools used to create this pumpkin nail design:

Base and top coat- CND Stickey Base Coat and CND Super Shiney Top Coat.

Polishes- Milani- Quick Teal (don't think this is made any more, this is a very old but still good polish that I have), OPI Hawaii- Is Mai Tai Croooked, and Holo Taco- Zyler the cat.

Acrylic paint- red, green, yellow, and brown.

Nail art brushes- thin deal, liner and stripper brush.

Other- water and acetone to clean off your nail art brushes. 

Pumpkin Nail Design

Apply a base coat, let that dry.

Polish- 

Thumb- a light orange (OPI Hawaii- Is Mai Tai Croooked) 

Index, middle, ring and pinky finger nail- A teal polish (Milani- Quick Teal, this is a very old polish that I am sure that don't make, but you can use any kind of teal polish)

Let that dry.

Pumpkin Nail Design

Small Pumpkin Design on Index and Ring Finger Nails: 

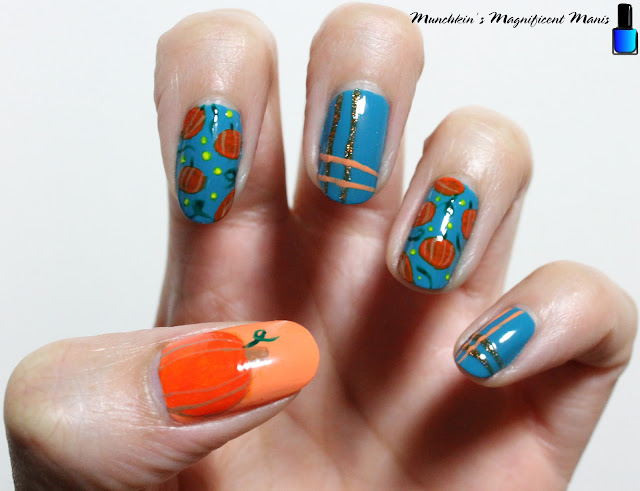
Starting off with the small pumpkin shapes on the index and ring finger nails. First make an oval shape for a full size pumpkin with orange paint, you will need to go over this a few times to make them opaque enough. On my nails I only made a few full size pumpkins, two on the index and one on the ring finger nail, the rest where just half size. 

Also repeat this step a few time for the half shapes of the pumpkins, just make a half oval. Then for the stems, make a small thin line at the top of the pumpkin. Let your pumpkin dry and then, take a brown paint and make a few curved lines on your pumpkins for some more details.

For the final touches for some vines, take your thin stripper brush and make some curved lines and some lines with some loops in it. Also for you can add some yellow dots around the nails as well. 

Pumpkin Nail Design

Pumpkin Nail Design

Line Design on the middle and pinky finger nails: 

For the lines on the middle nail first take your thin stripper brush with a light orange polish (OPI Hawaii- Is Mai Tai Croooked) and make two lines near the tip of the nails. Then take a glitter orange polish (Holo Taco- Zyler the cat) and make two line going up the nails on the left hand side. Try and get the lines to be straight, which is still hard for me to do as well. 

On the pinky finger nail just switch the polishes that you used and repeat the same steps, or you can keep them the same.

Pumpkin Nail Design

Larger Pumpkin on the Thumb Nail:

Last we will make a pumpkin on the thumb nail, Take an orange paint on a liner brush and make an oval near the cuticle, then fill that in with that orange, you will need to go over this a few time to be opaque. 

Then take a brown paint and make a thick line or small square at the top of the pumpkin for the stem, this will also give some time for your pumpkin to dry. 

Once it is dry, take a brown paint on a thin stripper brush and make some curved line n your pumpkin and also you can outline the pumpkin as well. 

Lastly you can make a green stem or leaf on your pumpkin, make a curved line with a loop in it. 
Pumpkin Nail Design

Once your pumpkins are ready to be picked, apply a top coat to seal in your design and to help it to last though all of your yummy pumpkin treats.

Hope all of you enjoyed this pumpkin nail design!

See you next time for more nail fun!  

Wednesday, October 12, 2022

Apple Orchard- Apple Nail Design

Hello everyone! Happy Fall, if you like this time of year. I personally just like pumpkin everything and the chaining of the leaves, not that it is starting to get colder, at least where I live. Today we will be creating a fall themed nail design, a red apple nail design, that is actually quite simple to create. 

Apple Nail Design

Here are the polishes and nail art tools used to create this apple nail design:


Top and base coat- - CND Stickey Base Coat and CND Super Shiney Top Coat.

Polishes- Finger paints- Tiffany Imposter, Colors by llarowe- Arturo, and Zoya- Renee- Redbook trio. 

Acrylic Paint- Red and green.

Nail art brushes- Thin detail and stripper brush.

Other- water to clean off your nail art brushes, also some acetone to also clean off your nail brushes.

Apple Nail Design

Apply a base coat, let that dry.

Polish- 

Thumb nail- Light blue holographic polish (Colors by llarowe- Arturo)

Index, middle, ring, and pinky finger nails- Light blue polish (Finger paints- Tiffany Imposter)

Let that dry.

Apple Nail Design

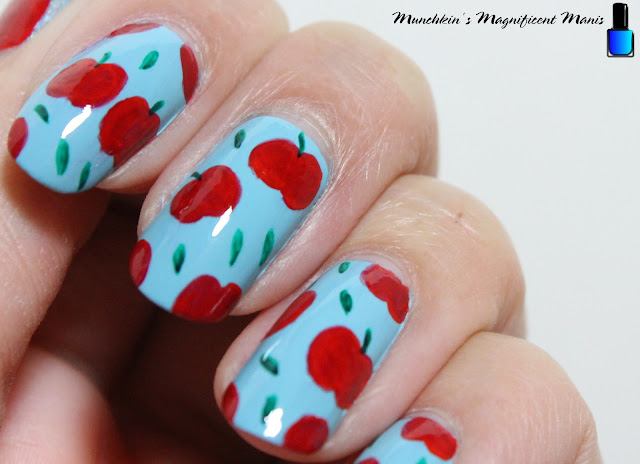
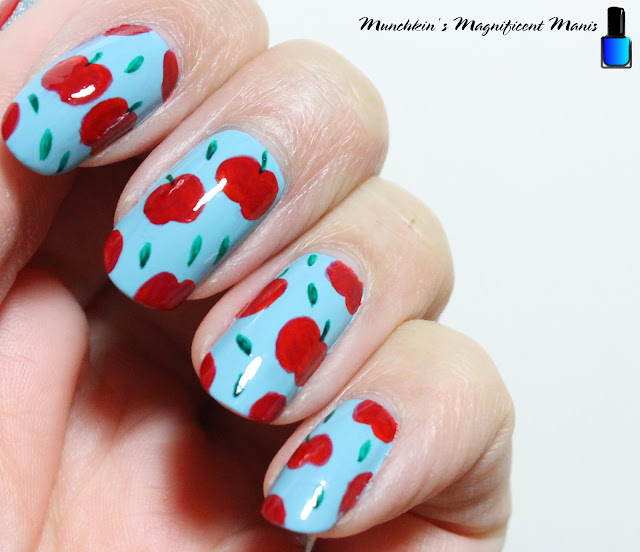
On all of the nails for the apple shape, start off by making a half circle than another half circle right next to each other to make an apple shape. I first stared off using red acrylic paint to get the shape just right then once that dried I went over that with red polish. 

On each nail you can make just a few whole apples, then a few on the sides for half an apple. Depending on the size of your nails will most likely determine the amount of apples that can fit on the nails. 

Apple Nail Design

Apple Nail Design

For final touch to all of the apples that you made, make a thin small green line at the top of your apples, then lastly make some small leaves on the blank areas of the nails. 

Apple Nail Design

For the thumb nail, we will make a larger apple that will cover most of the nail. Once again I did the shape with acrylic paint then went over it with red polish. Take your small detail brush with red paint then make a two half ovals that come together and then fill that in. Also if you want you can just go straight in with red polish. 

Lastly for the final touch, with green paint make a small thin line from the top of the apple than two curved lines for your leaves. 

Apple Nail Design

Once you have your apple nails ready for picking, apply a top coat to seal in your design and to help it to last.

This design is actually simple to create with you a basic shape, also you can make this even more simple by just making some apples on a few nails and just leaving a few nails with just polish/ blank. Also if you want you can make different colored apples as well; green and yellow, whatever colored apples you would like.

Hope all of you enjoyed this apple nail design. Next time we will be creating another fall nail design, pumpkins.

See you next time for more fall fun nails!

Saturday, October 19, 2019

Fall Leaves- Nail Design

Hello everyone! Happy Fall! Today on the blog we will be creating a simple leaf design on our nails. Also sorry that it has been a while since I last posted, I got a new job at a T-shirt company and I have been busy try to get use to that new job. 

Fall Leaf Nail Design
Fall Leaf Nail Design 

Here are the polishes and nail art tools used to create this fall design:


Base and top coat - CND Stickey Base Coat and Revlon Extra Life No Chip top coat.

Nail polishes- Milani- Quick Teal and  Wet n wild- Glitter orange.

Acrylic paints- Black, red, green, yellow, brown, and orange.    

Nail art brushes- Thin detail brush and a thin stripper brush.


Fall Leaf Nail Design
 Fall Leaf Nail Design 

* From now on I want to try and simplify my post, sometimes I fell like I go into to much detail and type way to much for each design.*

Apply base coat, let dry.

Polishes-  
Thumb, index, middle, and pinky- a teal polish.
Ring finger- a glittery orange.

Let that dry.

 Fall Leaf Nail Design
 Fall Leaf Nail Design
 Fall Leaf Nail Design

Paints need for leaves-
Green, light green, yellow, orange (mixed red and yellow), and brown

Index nail design- 
Use a thin detail brush to make a maple leaf shape near the cuticle. Then make half of a leaf on the side of the nail. Once dry, take a thin stripper brush and outline the shapes of your leaves and add small detail by making lines for the leaf veins. 


Middle finger nail design- 

Just like the last nail make a more pointed shaped leaf in the middle of the near the cuticle and one more next to that leaf, make the larger one green and the smaller one yellow. Then repeat that same step as before by outline and adding details.  

Fall Leaf Nail Design
Fall Leaf Nail Design 

Thumb nail design- 

This design is similar to the index nail, just make a larger maple leaf with two colors orange and brown. Then make to smaller leaves a red one at the tip of the nail and a green on off to the side of the nail. Once again outline the leaves and add the vine details. 

Fall Leaf Nail Design
 Fall Leaf Nail Design
 Fall Leaf Nail Design 

Once you are happy with your fall leaf design apply a top coat to seal in your design and to help it last.


Fall Leaf Nail Design
 Fall Leaf Nail Design
Fall Leaf Nail Design 

Also here is the design I did on my right hand, with just the design on the thumb and ring finger nail.  


Along with the practice version.


Hope all of you enjoyed this design and have a nice fall.  

See you next time for more nail fun! 

Monday, December 3, 2018

Glittery Fall- Fall Tree Nail Design

Hello everyone! Today we have one more fall nail design, this design I felt like it would be a nice way to transition into winter. I have stated in other blog that I don't care for fall nail designs or fall polish colors, so for this design the leaves will be glittery and not like normal fall designs. As all of my nail designs I get inspiration from Pinterest and make it my own, I saw a glitter fall nail design like this one and thought that was a cool way of doing a fall design without the boring colors, like browns and neutrals.  

Fall Tree Nail Design 
Fall Tree Nail Design

Here are the polishes and nail art tools used to make this glittery fall nail design:   


Base and top coat- CND Stickey Base Coat and Revlon Extra Life No Chip top coat.

Polishes- Julep- Hazel- Boho glam, Revlon- Gold Coin, Fun Lacquer- Million Dollar Dream, Color Club- Mini- Silver Glitter, Color Club- Mini- Green glitter, and Cover Girl- Boundless color- Disco dazzle. 

Nail art tools- thin detail brush and a thin stripper brush.

Small glass jar with acetone in it to clean off nail art brushes.

Fall Tree Nail Design   Fall Tree Nail Design    Fall Tree Nail Design

Start off with a thin layer of base coat to protect your nails and to help your design to last, then let that dry.

Then polish all of you nails with a shimmery purple polish, once again let that dry.

Fall Tree Nail Design 
Fall Tree Nail Design

Now on to the design, for this design you can put the trees on all of your nails or just a few of the nails, for the photos above I put the tree design on all of the nails. 

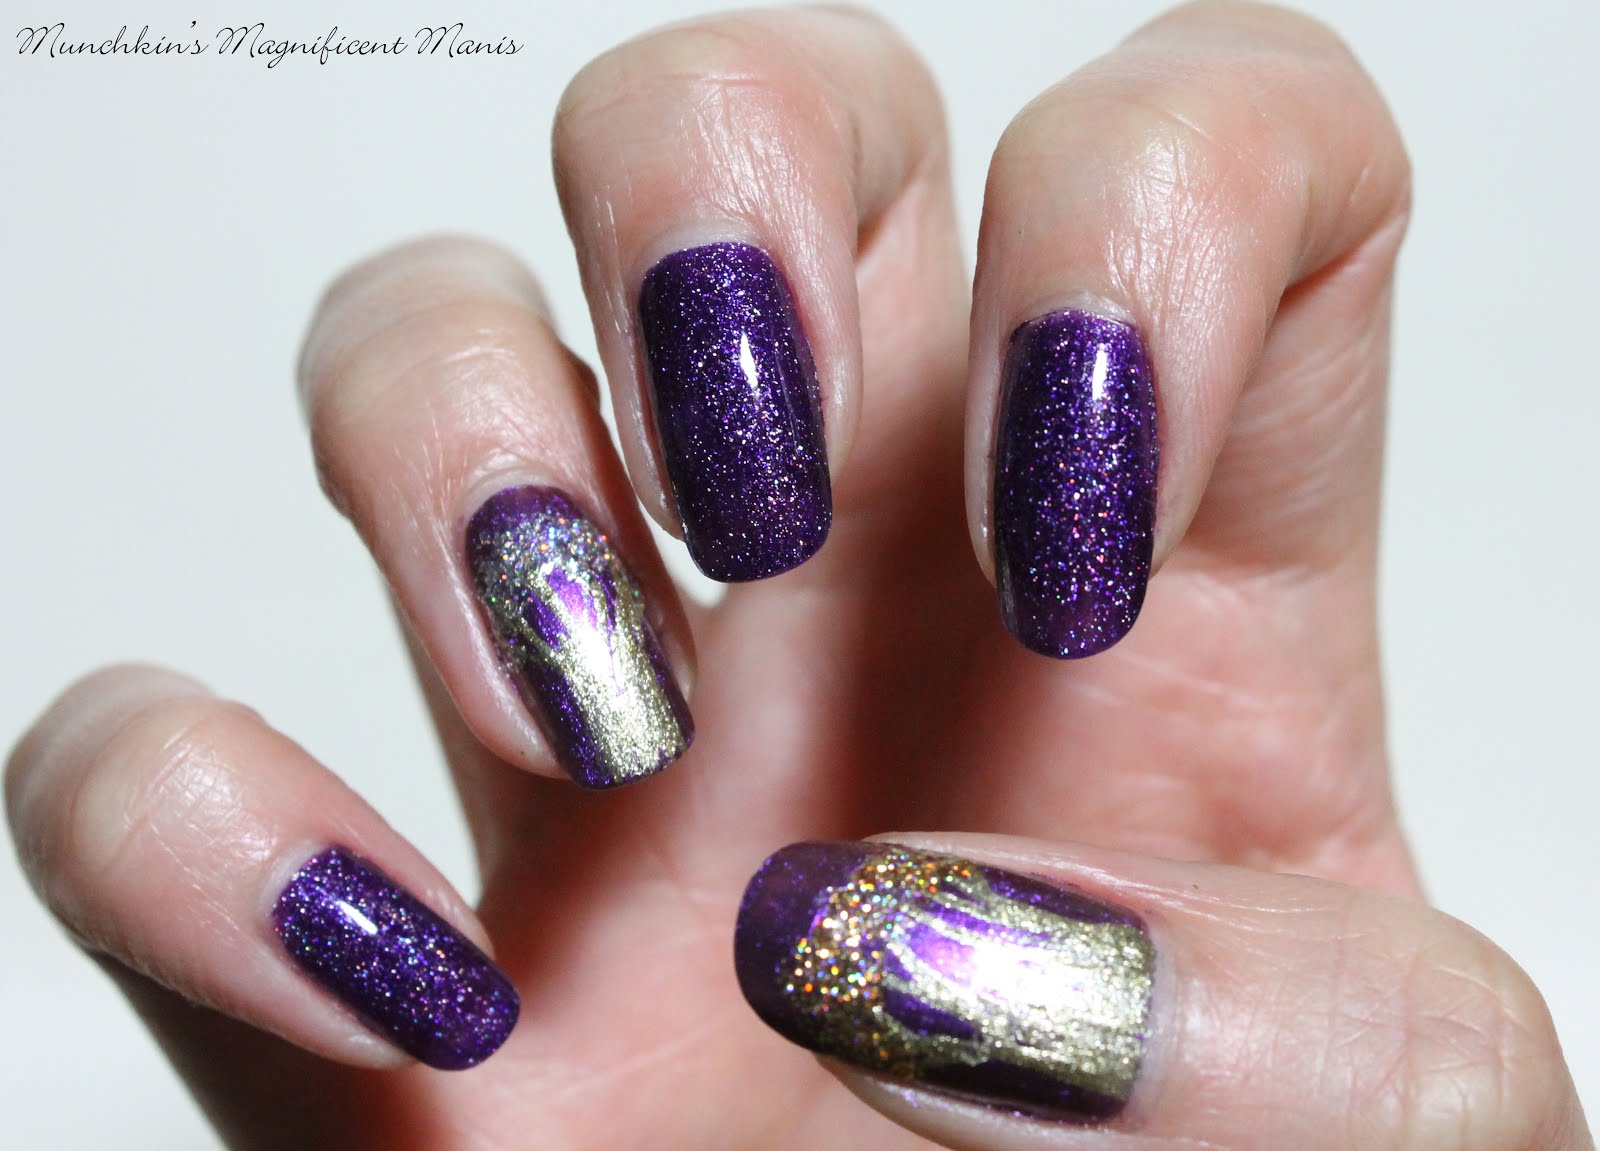
First we will start off with the tree trunk, take a thin stripper brush with gold polish on it and make two curved lines on each side of the nail to make the shape of the tree trunk, then in the middle of those lines start to make some random lines going different directions for the branches, also on the tree trunk make sure to fill that in with gold polish as well.   

Once you have finished that part take a few different glitter polishes (I used a gold, sliver and green) and kind of blob them on to the nail on the tree branches. I used a nail art brush to blob the leaves on, you can also just use the brush that is in the bottle.

Fall Tree Nail Design 
 Fall Tree Nail Design, on the thumb

Fall Tree Nail Design  
Fall Tree Nail Design

Then once you have your fall glittery trees the way you like apply a top coat to seal in your nail design and to help it to last. 

Fall Tree Nail Design 
Fall Tree Nail Design

Want an even simpler design? You can just put the tree designs on a few nails, on my other hand I only did the design on my thumb and ring finger and then the other nails I used a purple holographic glitter from Zoya called Finley. 

Hope all of you enjoyed this very simple fall to winter nail design and I hope all of you enjoyed the fall and have a nice winter and try to stay warm as well, unless you are luck and live a warm place.

See you next time for more nail fun!   
Friday, November 17, 2017

Crisp Fall Day- Fall Nail Design

Hello everyone! Hope everyone is having a nice fall, I know in the area I live, it seem like it just started to fell like fall. Fall is not really my favorite time of the year because it is staring to get cold and for nail polish colors as well. The only nice thing about fall is when all of the leaves change color, it looks kind of pretty. So for today's nail design we will incorporate the nice part about fall with some fall colors, along with a cute fox.  


Fall Nail Design
  Fall Nail Design

Here are the polishes and nail art tools we will use for this design:


Base and Top coat - CND Stickey Base Coat and  Revlon Extra Life No Chip top coat.

Nail polishes- Revlon- Gold Coin and Zoya- Marjorie- Redbook Trio.

Acrylic paint- black, white, blue, red, green, and yellow.

Nail art tools- thin detail brush, thin linear brush, small detail brush, and a medium size dotting tool.

Other- cup of water to clean off your nail art brushes.


Let's start this fall nail design, that will be great for a crisp fall day!

Fall Nail Design  Fall Nail Design

As always start off with a thin layer of base coat.

Once your base coat has dried polish your thumb, middle, and ring finger nail with a gold polish. Then polish your index and pinky nail with a burgundy or plum colored polish. 

Let that dry, then we will make some leaves on our middle and ring finger nail. Starting with our ring finger nail, with a thin detail brush with brown paint on it (if you don't have brown paint mix yellow, red and blue to make brown) make a large leaf shape with two points on each side and one in the middle. Once that dries paint over that with red and orange paint. 

For the three yellow leaves, first make the shape with white paint, that way it will show up.Then go over that with yellow paint and some orange as well. 

Near the cuticle make another leave, this leaf will be red and orange.

Just for an added touch make a few small different colored dots that are together, with your dotting tool. 

*For this design I actually found that is looked kind of better if you didn't wipe off your brush between colors, it kind of helps the fall leave colors to blend together.*

Fall Nail Design 
 Fall Nail Design

On to the middle finger nail,we will make some more fall leaves. For this design the leaves will be on some branches. Make a few random brown lines for the branches. Then make some different leaf shapes on the branches, I made five leaves, some where the same shape other where different. Just like the ring finger nail go over the leaves a few times to make them multiple colors. Also once again add some colorful dots on the branches.

Fall Nail Design, Fox 
   Cute fox on the thumb nail

Next we will make the cute fox on the thumb. I always like to make the characters on the thumb nail because of this nail being the largest nail and their being more space to create.
For the shape of the fox, we will first start off by making the outline with white paint. Make a large circle for his head, then his body, and the on the side a half of his tail. For the white part of the fox's face make that part more of an opaque white. 

Once the white outline has dried go over the top of the head, body, and tail with orange paint. For his face make a black oval for this nose in the middle and then two circles for his eyes. Then on his ears make two brown triangles.Near the cuticle make to brown circles for his paws. On his tail paint just the tip white.          

The fox I was a little afraid it was going to look a little like a cat, but is ended up turn out just right and super cute. 

Fall Nail Design
 Practice fall nail design 

Sometimes I like to share my practice version of my nail design. I really liked how this one turned out and thought it was worth sharing. The fox I ended up doing twice and the second time (shown about) turned out good, and turned out well in the final design as well. 

Fall Nail Design 
Fall Nail Design on black background 

Fall Nail Design 
   Fall Nail Design on white background 

Once you have your cute fall nail design the way you like, apply a top coat to protect your nails and to help them last through this crisp fall weather. 

Hope all of you enjoyed this cute fox and fall leave nail design. I really was happy with how cute the fox turned out for this design!

Also hope all of you have a wonderful Thanksgiving (which is quickly approaching, next week!) 

See you next time for more nail fun!