St. Patrick's Day Nail Design
Here are the polishes and nail art tools used to create this lucky nail design:
Base and top coat- CND Stickey Base Coat and Revlon Extra Life No Chip top coat.
Nail polishes- OPI Hawaii- My Gecko Does Tricks, China glaze mini- Grinch- Grinchworthy, and Fun Lacquer- Million Dollar Dream.
Acrylic paint- black, red, blue, yellow, and green.
Nail art tools- medium dotting tool, and a thin detail brush.
A small cup of water to clean off your nail art brushes.
St. Patrick's Day Nail Design
Start by removing any old polish that you might have on your nails. On clean dry nails, apply a thin layer of base coat.
Let that dry.
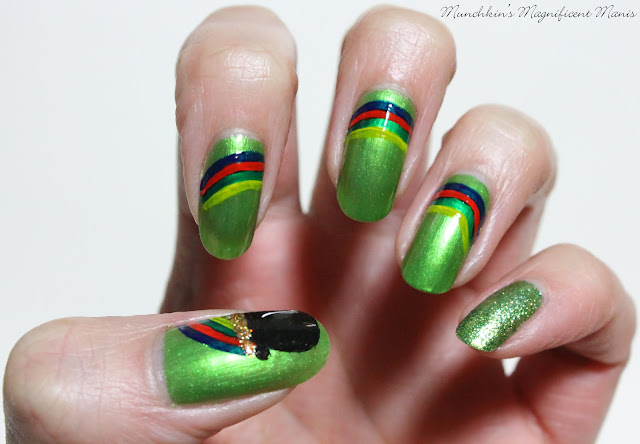
Once your base coat has dried polish your thumb, index, middle, and ring finger nail with a shimmery green polish (I used OPI My Gecko Does Tricks), then for your pinky finger nail polish that with a glittery green polish (I used China Glaze- Grinchworthy).
Let that dry as well.
 St. Patrick's Day Nail Design
Once your polish has dried we will first be creating the rainbow that will go across most of the nails on the index, middle, and ring finger nail, the rainbow we also will be on the thumb nail as well. For the pinky nail I decided to leave it as is with just green glitter polish, but you can always make the rainbow go on to the pinky nail as well.
Rainbow Design:
Starting off with the index nail, take your thin detail brush with blue paint on it and make a curved line near the cuticle staring on the side of the nail.
On the middle finger nail, take that same blue and make a arch near the cuticle.
Then on the ring finger nail, once again with that same blue, make another curved line that will end at the other side of the nail.
Repeat this step for each color; red, green, and yellow. When you are done it should look like a rainbow that is stretched from all three of your nails, along with the thumb later on.
St. Patrick's Day Nail Design
Rainbow and the Pot of Gold:
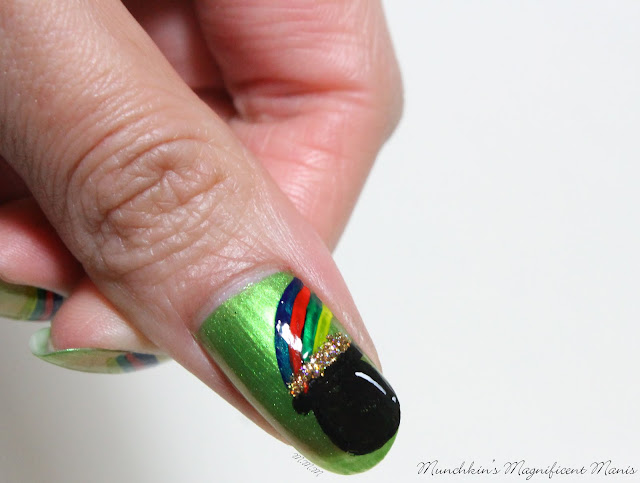
Lastly is the lucky part of this nail design, the pot of gold at the end of the rainbow.
First we will make the pot of gold at the end of the rainbow. Take a thin detail brush with black paint on it, near the middle of the nail and off to the side make a thick line that is curved on each corner, this is for the top of the pot. Then make a circle that is attached to the line you just made for the top of the pot.
Also we need to complete the rainbow that will be coming out of the pot/ the end of the rainbow. For this step once again repeat the steps to make the rainbow, make sure the rainbow is near the cuticle and off the side of the nail.
For the final touches take a gold glitter polish (I used Fun Lacquer- Million Dollar Dream) I then used a dotting tool to place the glitter, or you can just place the glitter with the polish brush on to the pot of gold.
I also added a curved line and a small dot on the side of the pot as well, just for that small bit of detail.
St. Patrick's Day Nail Design
Once your St. Patrick's Day design is all done and ready to bring you luck, apply a top coat to seal in your design and help it to last.
Hope all of you enjoyed this St. Patty's Day nails design, and have a safe and Happy St. Patrick's Day if you celebrate this holiday.
See you next time for more nail fun!


No comments:
Post a Comment