Monday, October 30, 2023

Boo Happy Halloween Nail Design

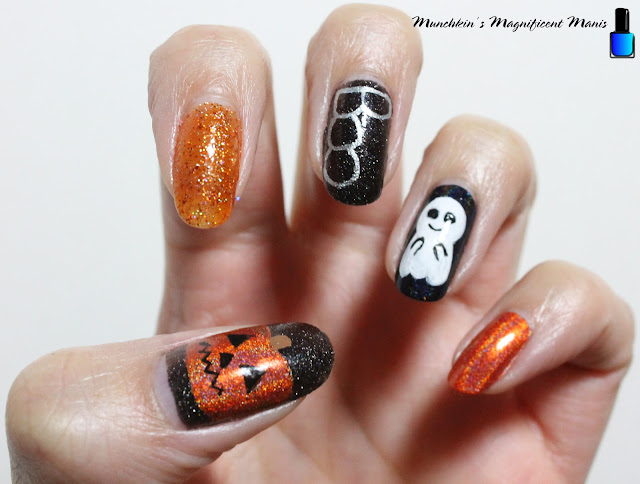
Hello everyone! Happy Halloween! Today on the blog we will be creating a cute Halloween design with a ghost and a pumpkin, just in time for your treat or treating or Halloween parties.

Halloween Nail Design

Here are the polishes and nail art tool used to create this cute Halloween nail deign.


Base and top coat- CND Stickey Base Coat and CND Super Shiney Top Coat.

Polishes- Holo Taco- Double Dare- Cristine's  Bday Polish, Holo Taco- Zyler the cat, Holo Taco- Electrostatic- Electric Holo Collection, Holo Taco- Orange Drink- Rainbow Collection, and Holo Taco- World's First- Chorme Collection. 

Acrylic paint- Black, white, and brown.

Nail art brushes- Thin detail brush and stripper brush.

Other- Water and acetone to clean off your nail art brushes.

Halloween Nail Design

Apply a top coat to your nails, let that dry.

Polishes- 

Thumb and middle finger nails- Black polish (Holo Taco- Double Dare)

Index- Orange glitter polish (Holo Taco- Zyler the cat)

Ring- Black holographic polish (Holo Taco- Electrostatic)

Pinky- Orange holographic polish (Holo Taco- Orange Drink)

Let that dry.

*With all of the nail art that I create I go back and fourth between the nails, to let each part dry before staring another part of that design.*

Halloween Nail Design

Halloween Nail Design

Ghost on the Ring Finger Nail

First we will start off with the ghost on the ring finger nail. Take a small detail brush with white paint on it and near the cuticle make a circle, then make two lines going down the circle you made for the body and then make three curved lines for his "feet". Then fill in your ghost with the white paint, you will need to go over this a few time to be opaque. 

Once your ghost has dried, we can make his cute little face. Take a detail brush or a dotting tool with black paint on it and make two eyes. Then with your thin striper brush make a small curved line under his eyes for his smile.

Lastly we will make his little hands, take that same detail brush and make curved lines on each side of his body for this little nub arms. 

Halloween Nail Design

Halloween Nail Design

The Word Boo the the Middle Finger Nail

Next we are on the the harder part, writing the word boo on the nail, first we will make the outline with white paint, I find it easier to make an outline first that way if you mess up and the paint has not dried you can still wipe it off and try again. Then when you have your outline the way you like you can then go over it with silver chrome polish. 

Halloween Nail Design

Pumpkin on the Thumb Finger Nail 

With the pumpkin I also first make an outline of the shape of the pumpkin first with a thin stripper brush with brown paint on it. Then take an orange holographic polish and fill in your outline.

Let that dry, and then we will make the pumpkins face. Take a thin detail brush with black paint on it and make two triangles for the eyes, then a small triangle under the eyes for the nose, the for the mouth make a zig zag line. 

Lately take your thin detail brush with brown paint on it and make a small square on the top for the stem. 

Halloween Nail Design

Once you have your cute Halloween nail design they way you look apply a top coat to seal in your nails and help them to let though all of your trick or treats.


Halloween Nail Design
Here is the practice version, for some reason I couldn't get the ghost little smile to look the same, but the final design still turned out cute.

Hope all of you have a safe and Happy Halloween, and hope you enjoyed this Halloween design!

See you next time for more nail fun! 

Saturday, October 14, 2023

MM Galaxy Using Orly Kelli's Galaxy Collection

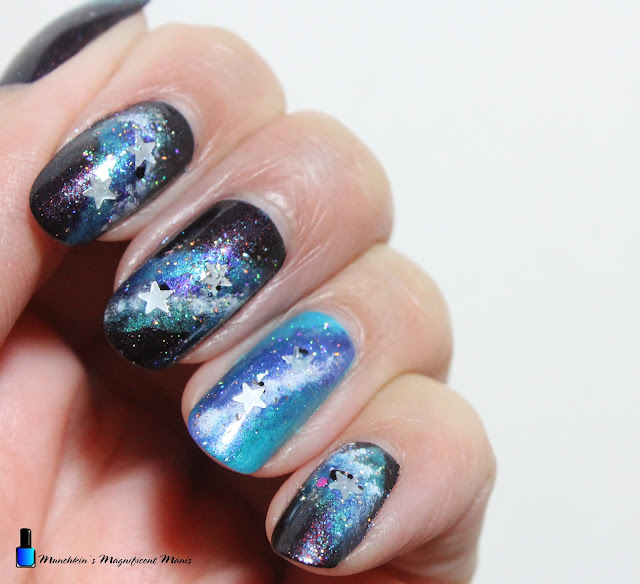
Hello everyone! Today on the blog we will be creating a very simple galaxy nail design using the polishes from the Orly Kelli's Galaxy collection. This collection did come out a few months ago, as of doing this post these polishes are still available on the website. When this collection came out and I punched it, right away I wanted to do a galaxy design, it just took me a while to do said design, and of course Kelli Marissa bet me to it. Also I do want to give Kelli Marissa some credit, I did get this idea from her and made it my own in some way. 

Galaxy Nail Design

Here are the polishes and nail art tools used to create this little galaxy on your nails.


Base and top coat- CND Stickey Base Coat and CND Super Shiney Top Coat.

Polishes- Orly- Kelli's Anti- Matter, Kelli's Galaxy, Kelli's Solstice (All 3 polishes from Kelli's Galaxy Trio/ Remix Trio), Sally Hansen- Hard as Nails- Hard to get, Holo Taco- Flakie, and Funky Fingers- As If. 

Nail Art tools- Makeup sponge and some tweezers (not show above.) 

That's all you will need for this nail design.

Galaxy Nail Design

Apply a top coat to clean nails and then let that dry.

Nail Polish- 

Base color polishes- 

Thumb, index, middle and pinky- A black polish that has red and blue shimmer in it, of just a plain black polish. (I used Orly- Kelli's Anti- Matter) 

Ring finger nail- a light blue (I used Kelli's Solstice) 

Let your polish dry.

Galaxy Nail Design

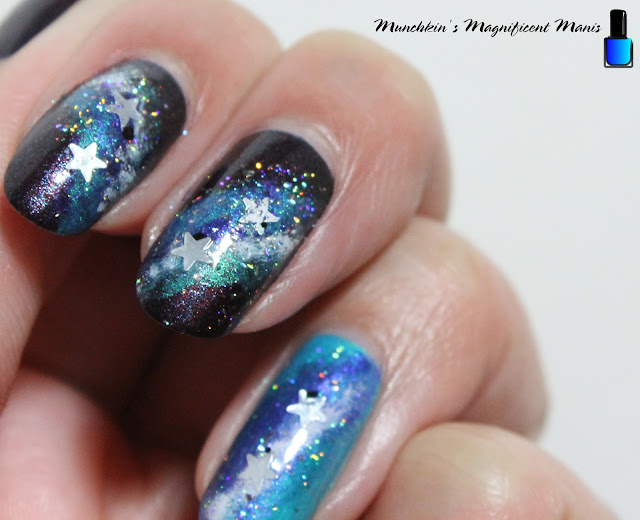
For this galaxy design we will be creating a dark galaxy design on most of the nail and a light design on the ring finger. 

We will first start off with the dark galaxy design.

Galaxy Nail Design

Galaxy Nail Design

First we will need to take your makeup sponge and tweezers and tear off very small pieces to make our galaxy. I had about ten small pieces just in case. 

On the thumb, index, middle and pinky nail take the dark purple polish, Kelli's Galaxy and pour it on to a nail mat or a plastic bag. 

Then take your small piece of sponge with the tweezers and dab the sponge into the polish and dab a line going across the nail from one end to the other of the nail. On each nail I switched the direction of the way I started my galaxy.   

Then take another piece of sponge with your tweezers and pour a small amount to the light blue polish, Kelli's Solstice, dab that on the sides of Kelli's Galaxy, so that you can still see that polish in the middle. If needed you can always add more of the Kelli's Galaxy if that was covered up to much. 

Next take another small piece of sponge with your tweezers and pour a small amount of white, then dab that on one side of the Kelli's Solstice that we just put on the nail.

Galaxy Nail Design

For the light version of galaxy repeat the same steps as the dark design, first using a white polish down the middle and then Kelli's Galaxy on each side of the white.

For the final touch we will take Holo Taco Flakie topper, polish this mainly on the galaxy we just made, it is also ok if we do get some on to the black part, but mainly focus the flakie topper on the galaxy. 

Lastly we will add some star glitter on the the nail, place the glitters on the nails before the Holo Taco Flakie polish dries, then right away take your top coat and apply a small amount to the stars. This help the stars to stay on the nails. 

Galaxy Nail Design

Once your galaxy nails are ready for your next space adventure, apply a top coat to seal in your nails and to help your design to last. 

Here it the practice version. 


Hope all of you enjoyed this galaxy nail design!

See you next time for more nail fun!  

PS. If you didn't notice in the title of this post I called this design MM Galaxy, that of course stand for Munchkin's Magnificent Galaxy. 😊