Merry Christmas and Happy Holidays!
Here are the polishes and nail art tools use for this design:
Base and top coat- Revlon Extra Life No Chip top coat and CND Stickey Base Coat.
Nail Polishes- Zoya- Dream, Zoya- Urban Grunge- Alicia, Snowman rainbow glitter- frosty, and Funky Fingers- As If (for the stars in the polish.)
Acrylic paint- white paint
Nail art tools- a thin stripper brush
Other- a glass jar (or a cup) with water in it to clean off your nail art brush, and a toothpick to pick up the glitter.
Let's start this snowy Christmas design!
Snow covered Christmas tree on the index finger nail.
As always start off with a thin layer of base coat to protect your nails.
Then paint all of your nails with a holographic or a glittery/ shimmery blue polish, I used Zoya Dream. This polish I thought went perfect for the winter snowy theme because the scattered holo looks like snow.
* For this design we will be creating it on three of the nails, the index, middle, and ring finger nail, the thumb and pinky nail will just stay plain blue, well holo blue.
Once that has dried, on the tips of the three nails app a sliver holographic or glitter shimmer polish, this is for the snow on the ground. I sponged this on but once I did that I felt like that was not completely necessary, you can just polish the silver part. You may need to go over this three time to be opaque enough.
Once that has dried we will start to make our trees. On the ring and index finger nail we will make one large tree on the sides of the nail. On the middle we will make two trees a medium and a small size tree next to each other.
For all of the trees with white acrylic paint and a stripper brush make a long line, then small arrow lines starting from the top, each smaller line should be just a little bit longer then the last line to form a tree. On each of those lines I put a few smaller lines on the ends to give it kind of a pine tree look to it.
Snow covered Christmas tree on the ring finger nail.
Once that has dried, the trees on the index and ring finger nail we will make into Christmas trees. This is done by taking a rainbow glitter polish, and with a toothpick picking out the glitter polish, just a few pieces and placing them on the tree like ornaments.
Now to add the star on top. If you have a glitter polish with stars in it you can place it on top of the tree just like the ornaments, by fishing it out of your polish with a toothpick. If you don't have a polish with star glitters in it, you can always use the same glitter that you placed on the tree.
Snow covered tress on the middle finger nail.
For your middle finger nail design, you can leave this one with no glitter ornaments or you can have all of your trees be decorated, it is up to you.
Final Snowy Christmas Nail Design
Once everything has tried apply a top coat to protect and seal in your design.
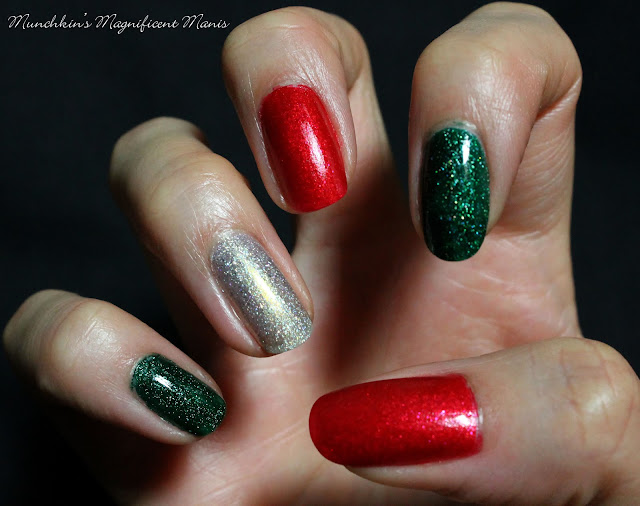
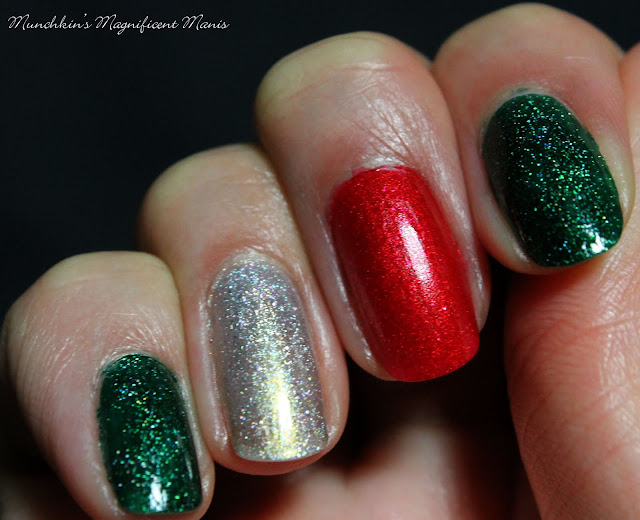
The Christmas colored polishes on my right hand
Just for fun on my right hand I decided to keep things simple and just paint my nails with some Christmas colored polishes. If you have trouble painting a design on your other hand this can also be an alternative to doing a design, or if you just fell like doing a design on one hand, and who cares if your nail don't really match that's the fun part about doing your nails!
Here are the polishes I used on my right hand Zoya- Amal- Matte Velvet (I applied a glossy top coat for a shinny look.), Zoya- Urban Grunge- Merida, and Zoya- Urban Grunge- Alicia (as an accent nail.)
Hope all of you have a wonderful Holiday/ Christmas! No matter what Holiday you celebrate hope it a great one and filled with bright and fun nails! Also of course enjoy time with all of your families and friends!
See you next time for more nail fun!


No comments:
Post a Comment