

Nail 'D It! Nail polish design.
Here are the polishes and tools used for this design:
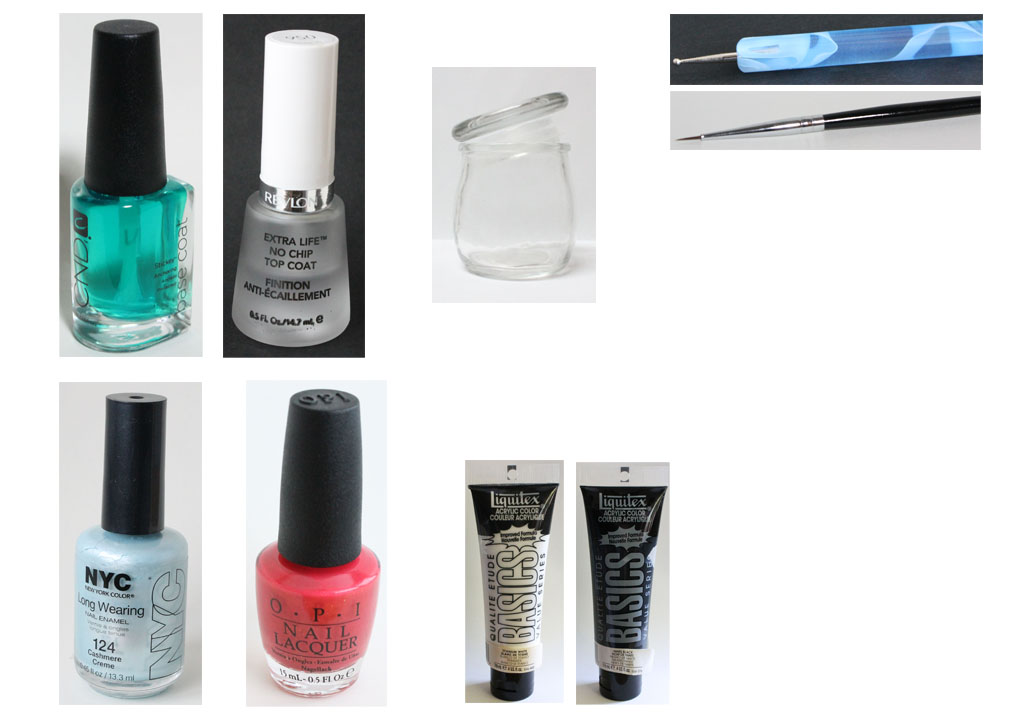
Base and Top coat- CND Stickey Base Coat and Revlon Extra Life No Chip top coat.
Nail Polishes- NYC- Cashmere Creme and OPI Hawaii- Go with the lava flow.
Acrylic paint- white and black paint.
Nail art tools- medium dotting tool and a thin detail brush.
Other- small jar with water in it to clean off your nail art brushes.
Let's Nail this design!
As always start off with a thin layer of base coat to protect your nails.
Once your base coat has dried, apply a light blue polish to all of your nails and let that dry, I used NYC Cashmere Creme.

Thumb nail design, nail polish bottle
We will first start off with the thumb nail design, a bottle of polish. Take a thin detailed brush with black paint on it and start to make the shape of a nail polish bottle, by starting at the bottom with a curved line, then making two lines on the sides and then one at the top. Then make a small square at the top of the bottle.
For the clear white part at the bottom of the polish, just paint a white line at the bottom of the bottle, then outline that part with black.
Once your outline has dried take any colored polish you would like and fill in the bottle. When I was practicing this design I used a dark blue, but the color seem to be to dark and when I outline the bottle it seem to get lost, so I ended up using OPI Go with the Lava Flow it ended up looking better.
After you have filled in the bottle, at the top just paint a blob coming out of the polish bottle, like the polish has spilled.
Once you have let your polish dry, you may need to re-outline your bottle.

Index, middle, and ring finger Nail Polish design
Next we will be doing the simple part of the design that is on the index and middle finger nail, the polish splatter. You can just take the brush in the bottle and just make random blobs or take some polish on a dotting tool and make the blobs that way.
After you have your polish blobs, we will go on to the ring finger nail where we will paint Nail 'D It! This part is kind of tricky, I did have a little trouble keeping my hand from shaking so that the letters would look smooth. For this one you have to try and keep you hand flat on the table and paint your words.
 Ring finger polish brush design
The last part of this design is the polish brush with polish spilled. Take your thin detail brush with black paint on it and make a small rectangle near the tip of the nail, then a smaller rectangle on top of that. Then with polish make the small bristles of the brush and then once again make a blob of polish above the brush.
 Final Nail Polish Nail Design
Once all of your nails have dried, apply a top coat to protect your design.
Hope all of you enjoyed this Nail 'D It nail polish design!
Some of you may wonder now that I am a professional/ licensed nail tech, what does this mean for the M.M.M blog. I do plan on still continuing this blog for a long time, even when I start work in a salon. I enjoy creating fun and bright nail design with all of you and don't want to stop do that.
See you next time for more nail fun!
No comments:
Post a Comment