Showing posts with label Glam Polish The Child. Show all posts

Thursday, June 11, 2026

Mandalorian and Grogu Nail Design

Hello everyone! Sorry it has been a while since I have posted, there has been a lot going on. A couple of months ago I got into a bad car accident that totaled my car. I was driving to work and was very close to work and some guy turned right into my Herbie, I was hurt and my dream car was destroyed. 😭 I was out of work for a week and a few days, I am much better now, but that was the most terrifying thing that has ever happened. I just wish people would just pay attention and slow down, I am far from a perfect diver, but what happened could have been avoided if that guy was paying attention. 

Also last month we also moved into a new home, are last apartment we had been at for a long time and it was time to go, it was old and the place did not want to do updates. Anyways now things are better and we our now settling in our new place. This also means soon I will have a room that I can do my nails in and no longer have to do them in the kitchen like I have been for years now. Anyway today we will be creating a Mandalorian and Grogu nail design to celebrate the new movie that has been in theaters since May 22. I just got a chance to create and design and I thought it is still ok to share, the movie is still in theaters as of typing this post. 

Mandalorian and Grogu Nail Design

Here are the polishes and nail art tools used to create this Mando and Grogu design:


Base and Top coat- CND Stickey Base Coat and CND Super Shiney Top Coat.

Polishes- Glam Polish-Mando Collection-The Child, OPI Holiday 2017- Ornament to Be Together, and Starrily- Northen Lights- Geomagnetic Storm Sights- Magnetic. 

Acrylic paint- White, black, mix black and white to make two shades of grey, green (mix green and white to make a light green), brown, and peach. 

Nail art brushes- Thin striper, detail, and linear brush, and a small dotting tool.

Other- water to clean off your nail art brushes. 

Mandalorian and Grogu Nail Design

Apply a top coat to clean dry nails, let that dry.

Polishes-

Thumb- a light green (Glam Polish-Mando Collection-The Child, Had to use the Grogu polish)

Index, middle, and pinky nails- a mutichrome polish ( Starrily- Northen Lights- Geomagnetic Storm Sights- Magnetic) 

Ring finger nail- a silver polish (OPI- Ornament to Be Together)

Let that dry.

Mandalorian and Grogu Nail Design

Galaxy Nails, on the Index, Middle and Ring Finger Nails: 

Let's star with the easy part on the nails that you polished with a mutlichrome polish, this is like a galaxy in a bottle and a easy way to have galaxy nails.To make them look more like a galaxy we just need to add star. To make the bigger stars, take a thin striper brush with white paint on it and make two large stars, by making a cross shape and then with a dotting tool with white paint on it make a dot in the center. 

With the smaller end of the dotting tool make small dots all around the nails. Then you have a simple galaxy nail design. 

Mandalorian and Grogu Nail Design

Mandalorian and Grogu Nail Design

Mandalorian on the Ring Finger Nail: 

Now on to the harder nails, let's create Mando on the ring finger nail. First if you don't have a light and dark grey, you can mix more white and a very small amount of black for the grey color, then mix a little more black in to your light grey to make a little bit darker grey, keep these to separate. 

To make Mando's helmet outline, take a linear brush with a light grey paint near the cuticle make a half oval shape and then a long rectangle under that half oval, fill that in with the light grey, then make two line down the nail and once you get near the tip of then nails square off each side for the bottom of the of his helmet. 

Next we will make his eyes, take a detail brush with black paint on it and make a thick black line going across his helmet, then down the sides make tow slanted lines, fill in that area with black, then going down the center make a thick black line, where I guess his mouth would be? 

On the lower corner of his helmet make two half triangles shapes on both sides, with a striper brush with the darker grey paint on it.  

Next we will outline Mano's helmet, take a striper brush with dark grey paint on it then outline the outer part of his helmet, on the top part of the helmet make two lines going down the center, then outline the rectangle above his eyes. 

Mandalorian and Grogu Nail Design

Grogu on the Thumb Nail:

Last by far form lest is our favorite green dude, Grogu, Baby Yoda, The Child, on the thumb nail. For Grogu's body color if you don't have a light green mix mainly white and a little bit of green to make very light green. 

In the middle of the nail make an oval shape for Grogu's head fill that in, then make two ears on the side of his head.  

For the center part of his ears take a detail brush with a peach colored paint on it and make a triangle shape in the ears.

For his face first make his nose, by making a small curve with a striper brush with dark green paint on it (I made his nose first to know where to place everything else, like his eyes). Then make a small curve under the nose for his little smile. Then make a few lines on his forehead for his little wrinkles. 

Next make two small ovals for his eyes and fill that in with black paint. Then make two smaller white dots for his pupils.

For part of his rope, make a small rectangle with brown paint under his head and fill that in, and then take that peach color paint and make a small line in the middle of his robe. We are just going to make this part of his rope to kind of keep it simple and to have a floating Groug head. 

For the final touch you can also outline your Grogu with a dark green paint. 

Mandalorian and Grogu Nail Design

Once your nails are all ready to see the new Mando and Grogu movie, apply a top coat to seal in your nails and to make them last. 

Practice version of Mando and Grogu

Hope all of you enjoyed this Mando and Grogu nail design along with the movie, we did see the movie, my hubby and I on Friday May 22. I liked the movie I am a Grogu fan and I loved every scene that he was in he is so cute. I do recommend seeing Mando and Grogu in theaters and was a good movie for any long time Star Wars fans our just Grogu fans. 

See you next time for more nail fun! 

Saturday, December 3, 2022

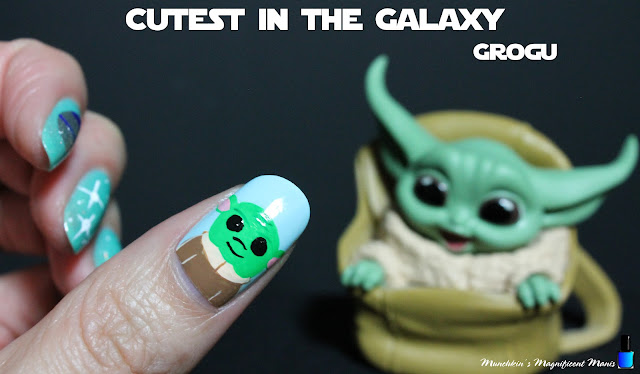
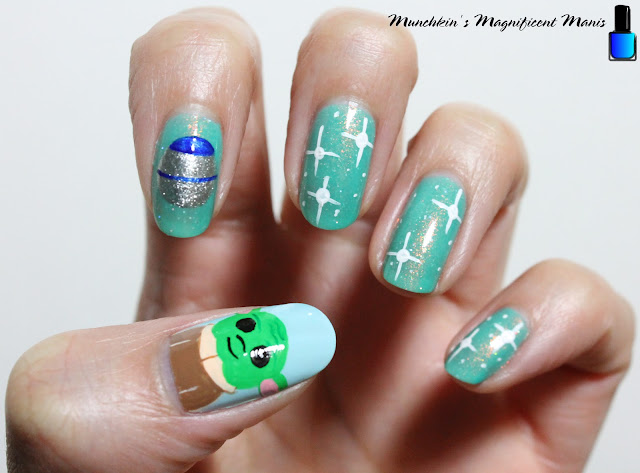
Cutest in the Galaxy- Grogu Nail Design

Hello everyone! Today on the blog we will be creating a cute Grogu, The Child (Baby Yoda) nail design. This design I decided to do for fun, The new season of the Mandalorian does not start until March 2023. But why not create a cute Grogu design now. I have created another Grogu design before we knew what his name was, before on the show he was just know as the child, or by fans Baby Yoda. From the very being I fell in love with this cute little dude and my love for Grogu just keeps growing, I mean how can you not love that cute face! 🥰

Grogu Nail Design

 Here are the polishes and nail art tools used to create this cutest in the galaxy nail design: 


Base and top coat- CND Stickey Base Coat and CND Super Shiney Top Coat.

Nail polishes- China Glaze- Chalk Me Up!, Glam Polish- The Child- Mando Collection, and Sally Hansen- xtreme wear-Celeb city.

Acrylic paint- Green, yellow, white, black, blue, red, peach, and brown.

Nail art tools- detail and striper brush, and a large dotting tool.

Grogu Nail Design

Grogu Nail Design

Apply a base coat to clean nails.

Let that dry.

Polish- 

Thumb- Light blue polish (China Glaze- Chalk Me Up)

Index, Middle, Rings and Pinky- Shimmery light green polish (Glam Polish- The Child) of course we have to use the Grogu polish. 😊

Let that dry. 

Grogu Nail Design
Grogu Nail Design

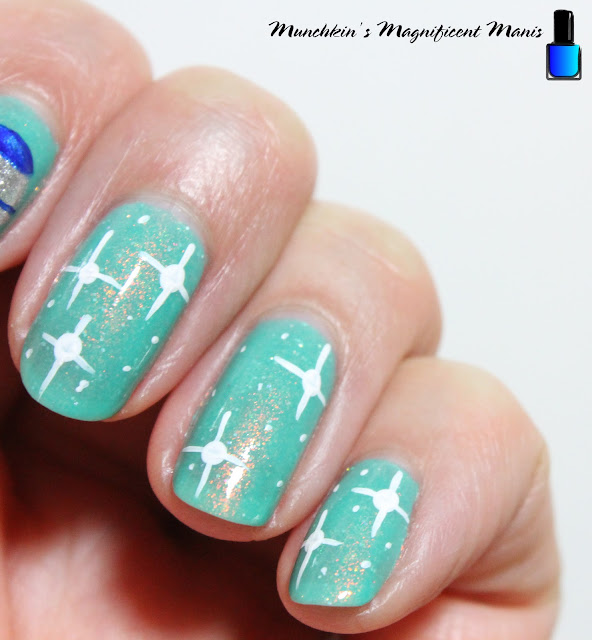
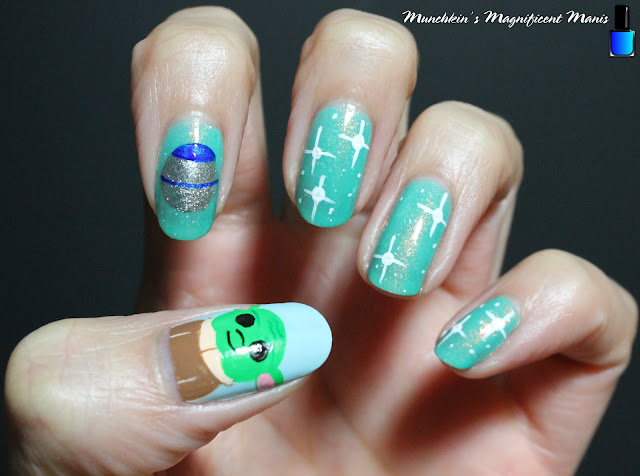
Stars on the Middle, Ring and Pinky Finger Nail- 

First we will start with the easier part the stars. Take a dotting tool with white paint on it make two dots on the pinky and ring finger, and then three dots on the middle finger, or do as many as you would like for the stars.
 
Then take a striper brush with white paint on it, on the dots that we just made make two lines going through that dots for your stars. 

Lastly for our stars we will make very tiny dot on random parts of the nails. 

Grogu Nail Design

Grogu Nail Design

Grogu's Ball/ Razor Crest Shifter Knob Design on the Index Nail- 

Next we will be making Gorgu's Ball or the Razor Crest Shifter knob that Mando gave Grogu from his ship. Grogu loves to play with this "ball" so I thought it would be good to add this to the design.

For Grogu's ball, take a detail brush with silver polish on it make a circle in the middle of the nail. You may need to go over this a few time to be opaque. 

You will need to let this dry before adding more details.  

Once the silver ball has dried. Take a striper brush with blue paint on it make a line in the middle of the ball. Then with a detail brush with that same blue paint, make a half circle on the top of the silver circle. 

Grogu Nail Design

Grogu Nail Design

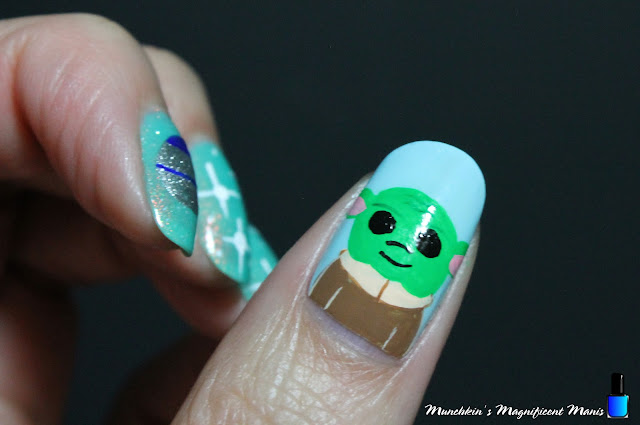
Grogu On the Thumb Nail- 

Now we will make the star of the design, Grogu. 

For Grogu I did need to mix some paint to try and make his color, I still feel like Grogu should be a lighter green, it would be best to just have a light green, but this was what I had. The paints I used is a Darker green, yellow, and white paint mixed together. Also keep a little bit of dark green for the lines on his face.

For Grogu's head make a large circle in the middle of the nail, for the chin make three curved lines in a M shape. Fill in his head, you will need to go over this a few times.

Grogu has very large ears, so will will only show a little bit of the ears. For the ears just make a half oval that will go right off the sides of the nail, then for the inner part of the ear just add a little bit of pink (I needed to mix red and white for the pink.)

Next Grogu's robe, we will first make the sherpa part that is around his neck. We will first start off with a peach colored paint on a detail brush. This is a little hard to describe, but I would say when it comes to the shapes two rectangles with a rounded sides.

For the rest of the robe take a brown paint on the same detail brush, make a large square shape and the two curved lines on the sides for his arms. 

As an added detail I did outline his robe with peach and brown paint, if this step is a little too hard you can always skip this step.

Grogu Nail Design

Lastly we will make Grogu's cute little face. Take your detail brush with black paint on it and make two large circle for his eyes, then fill that in.

Make a curved line for his nose, then another small curved line for a little smile.

Then for lines on his face (He may be a baby in species, but Grogu is actually 50 years old) take a thin striper brush with the dark green paint, make two curved lines for the eye brows and then two squiggly lines on his forehead.   
 
Grogu Nail Design
Grogu Nail Design

Once your nails are the cutest in the galaxy apply a top coat to seal in your design and to help it to last, though all of your space adventures. 

Also I have create a darker/ with black polish Grogu, the child design, If you have not checked that out here is a link to that deign. 

Here is the link to my first design: Baby-Yoda-Child-nail-design


Hope all of you enjoy this nail design! 

See you next time for more nail fun! 

Monday, May 30, 2022

Easy Gradient- blue and green gradient

Hello everyone! Happy long Memorial Day weekend! Today on the blog we will be creating a very easy gradient nail design, this is ocean like and great for Spring and Summer time. For  this simple nail design, all you will need is nail polish and the brush that comes in the polish, no make up sponges. We are using two light colored polishes from Glam Polish; the child a light green polish and sandy toes anything goes a light blue polish. 

Gradient Nail Design

All you need is two nail polishes, no tools:

Glam Polish- Sandy Toes Anything GoesGlam Polish- The Child
 
Glam Polish- Sandy Toes anything goes and The Child. 

Gradient Nail Design

Apply a top coat. 

Let that dry.

Then on to the gradient.

Gradient Nail Design

When I polish my nails I always start with the pinky nail, then end with the thumb nail. If you do the same then starting with the pinky nail or whatever finger nail you start off with when you polish. 

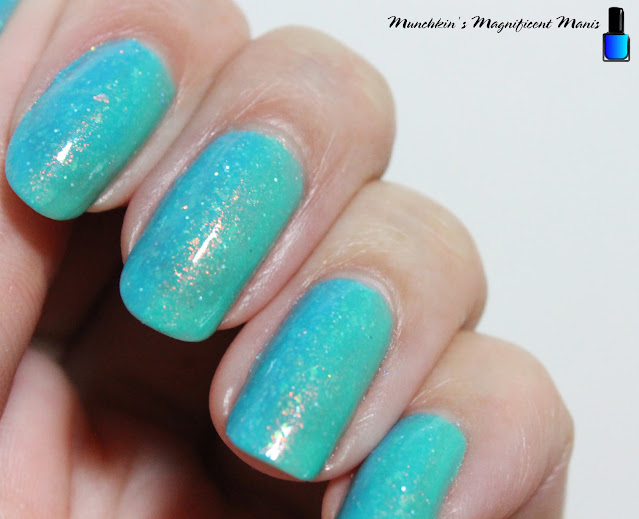
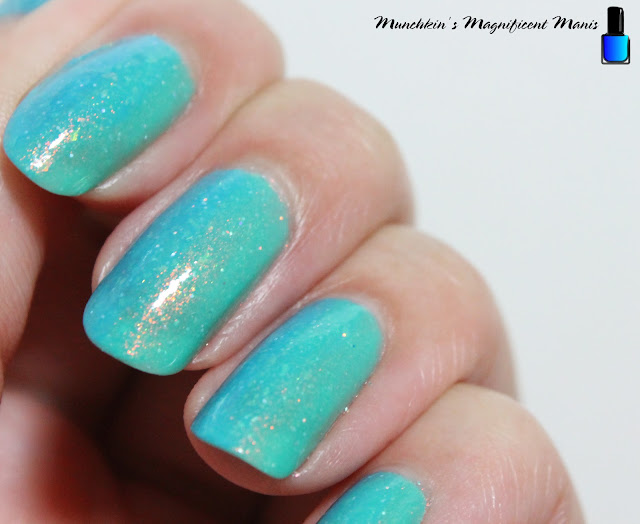
First open both of your polishes, take the light green polish (The Child) and polish one side and then take your light blue polish (Sandy Toes Anything Goes) polish the other side by overlapping the green polish. 

Just make sure to over lap the two polishes when you are polishing the nails to blend the polishes together. 

Repeat this step on all of the nails, for this light colored gradient I did have to apply three coats, each time making sure to overlap the colors so they can blend together, even if you have to slightly go over the polishes again just to bend them. 

Gradient Nail Design

More of a look at the light green side, Glam Polish The Child

Gradient Nail Design

More of a look a the blue side, Glam Polish Sandy Toes Anything Goes.

Gradient Nail Design

Gradient Nail Design

Once you have your gradient nail design just right apply a top coat top seal in your design and to help it to last. 

That is all that is to this easy nail design. For this gradient I did try it with the make up sponge but I could not get it to work, so I found this way to work best with the two light colored polishes. I am not sure how well this will work with darker colored polishes, it works great with light colored polishes. I actually learned this method from Simply Nailogical Cristine, she did a gradient with her recent Holo Taco collection this way, she just called it a lazy gradient. 

If you have trouble with gradients maybe this might be an easier method on creating a gradient.

Hope all of you enjoyed this easy spring/ summer gradient!

See you next time for more nail fun!  


Friday, March 18, 2022

How Did I Not Know About This Polish? Glam Polish Review

Hello Everyone! Sorry that it has been while, I just started a new job and trying to get use to that and finding time to do this blog has been a little tuff and then a few weekend ago I was not feeling well, now all is good. Anyways this year I kind of would like to try out different polish brands. Today we will be giving the brand Glam Polish another try, I have tried out their polish before and really enjoy it. So today we will not technically be try out a new brand, but in the next coming week we will. The brand Glam Polish is an indie brand polish that is made in Australia, that is hand mixed/ mixed into small batches. They do have a warehouse in the US along with Australia. 

Today we have a polish that I am super excited about because of the name of the polish.   

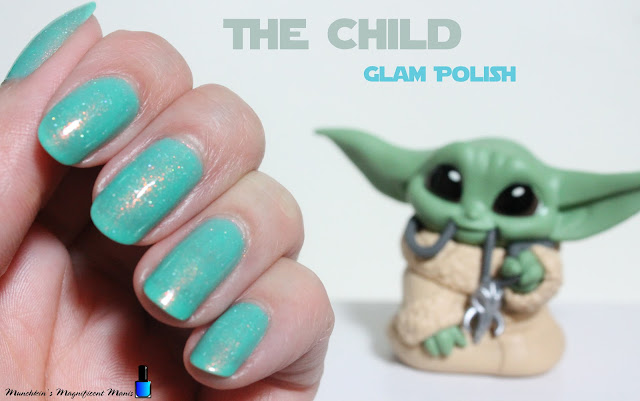
Glam Polish The Child

Glam Polish The Child

That Polish is the Child from The Mandalorian (Star Wars). I just happen to go on the Glam Polish website and saw that they had a Mando trio collection! I was so surprised and was thinking how did I not know about this trio, I love Grogu (The Child) he is so cute and the only reason why I am even interested in The Mandalorian. 
This trio came out sometime in 2020, and has three polishes The Child, This Is The Way and I Have Spoken. Unfortunately I could not get the whole trio just The Child, the other two are sold out and this trio is limited edition. I am still glad that I was able to get my favorite Grogu (The Child) polish. 

I did purchase two other polish one is from a Star Wars inspired collection and then one that is beach themed. 

Glam Polish Review

Let's take a look at the three polishes. 

Glam Polish The Child

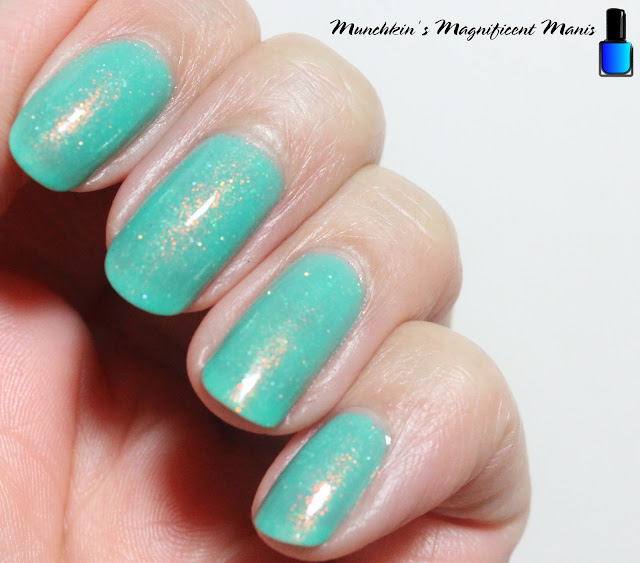
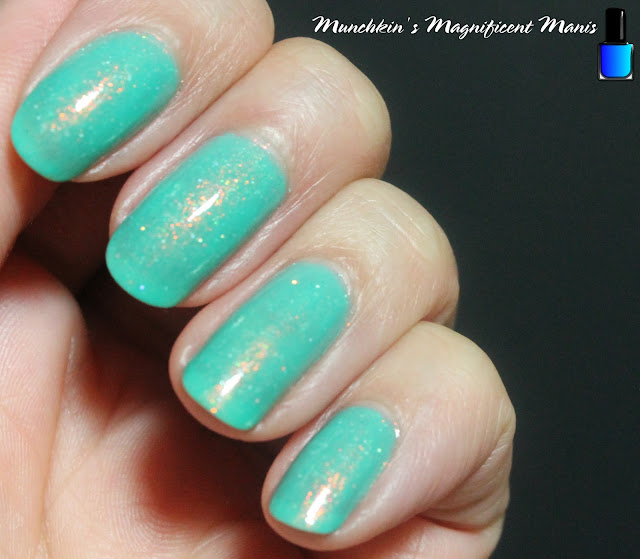
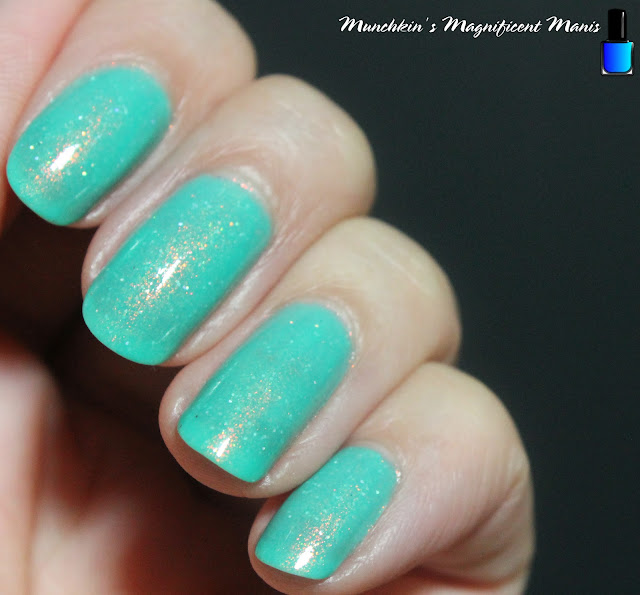
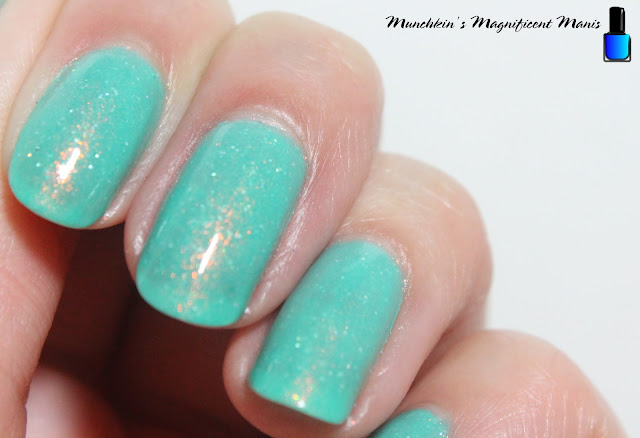
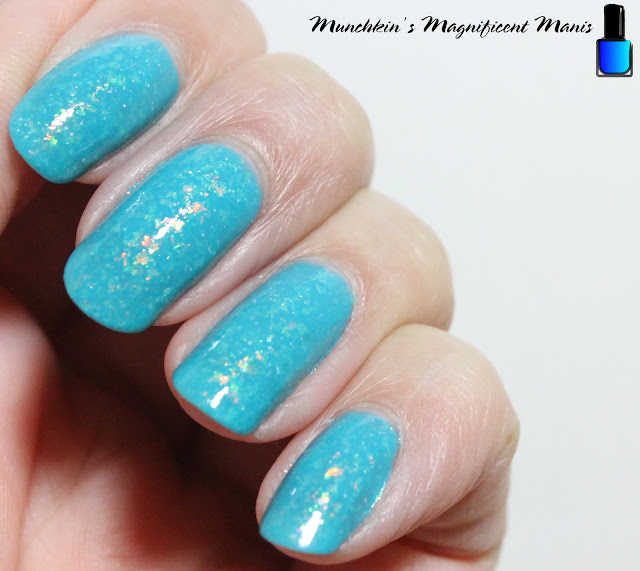
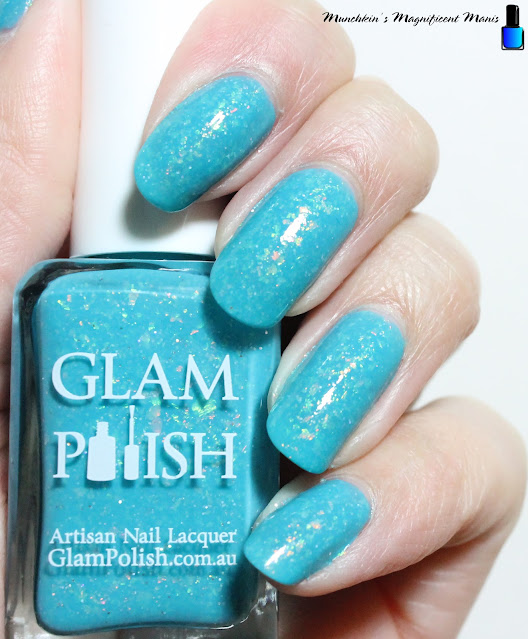
First we will go over my fav, well when it comes to name, The Child this is a light sea foam green polish, with some shifting shimmer and small holographic glitter. This polish is on the sheer side it took three coat for me to get it to be opaque. I do have trouble polishing lighter colored polishes and I did have some trouble with this one. 

Glam Polish The Child

The Child is still available on the Glam Polish website for $10.00 USD
collections/mando/products/the-child-limited-edition

Glam Polish Obi- Wan

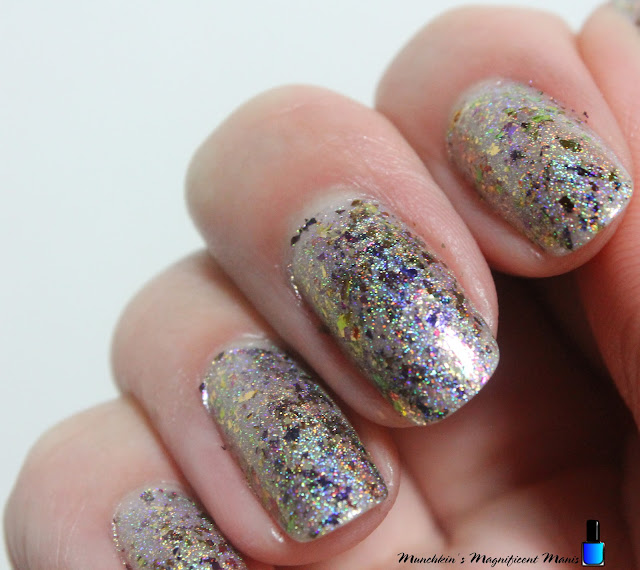
Next we have Obi- Wan this is from the Star Wars inspired collection A Galaxy Far Far Away. This polish has a holographic copper/gold base, with a lot of multi-chrome flakes, some glitter, this polish has a lot going on in it and is so pretty and unique. This polish was opaque for me in two coats. This polish did look kind of similar to the photos that I seen online of the polish This is The Way from the Mando trio, so that is why I picked out this one.

Glam Polish Obi- Wan

Obi- Wan is also still available on the Glam Polish website for $12.50 USD
a-galaxy-far-far-away/products/obi-wan-limited-edition

Glam Polish Sandy Toes Anything Goes

Lastly we have Sandy Toes Anything Goes form the Beauty and the Beach collection. This polish was just a random one that I picked out, unlike the last two that are Star Wars themed. Anyways Sandy Toes Anything Goes is an aqua blue polish, with iridescent flakes in it, along with some small holo glitter. This polish was opaque for me in three coats. 

Glam Polish Sandy Toes Anything Goes
 
Sandy Toes Anything Goes is available on the Glam Polish website for $12.50 USD 

Glam Polish Obi-Wan

In conclusion Obi- Wan was actually my favorite polish when it came to the polish it's self. This polish applied the best for me and is just super unique, you don't really see polishes that look like this everyday. 

Glam Polish The Child

Second we have to be The Child because Grogu, I love this little green dude. The polish is pretty, I just had a little trouble polishing this one. The first time I wore this it just didn't look good, it was probably just me, it did end up looking much better the sound time around.

Glam Polish Sandy Toes Anything Goes

Third would be Sandy Toes Anything Goes. I love blue polishes and the beach theme is always a plus. For some reason this polish the first time I wore it to, just did not look right/ good, once again I gave it another go and it looked better. Once again maybe it was just me?

Hope all of you enjoyed this review of some polishes from Glam Polish. In the next few weeks I will have a review of, a new to me brand that I was just curious to try that I saw on Facebook, this polish is a brand, that is suppose to be a better for you polish that is made in Hawaii, So we will see how that goes.

See you next time for more polish fun!