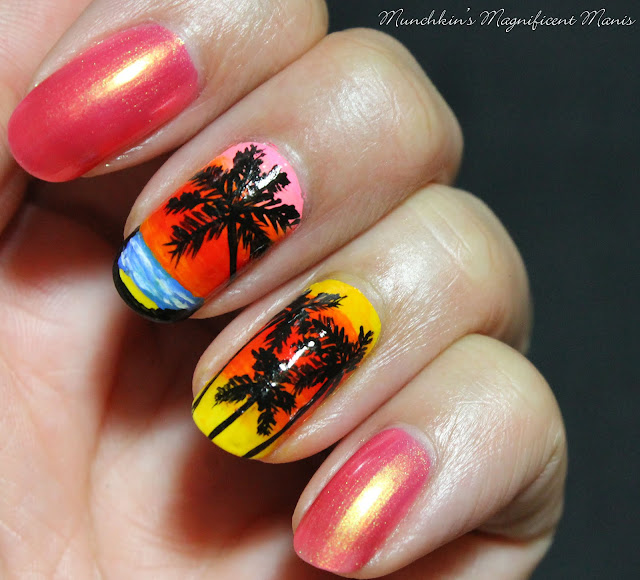
Tropical Nail Design
Here are the polishes and tools used to create this bright and fun nail design:
Base and top coat- CND Stickey Base Coat and Revlon Extra Life No Chip top coat.
Nail polishes- Finger paints- Legendary Lore and Sally Hansen- Triple Shine- Lemon Shark.
Acrylic paints- black, white, red, blue, yellow, and bright pink.
Nail art brushes- thin detail brush and a thin stripper brush.
A cup of water to clean off your nail art brushes.
Tropical Nail Design
As always start off with clean dry nails that are free of old polish, and apply a thin layer of base coat.
Let that dry.
Once your base coat has dried polish your thumb, index, and pinky nail with a shimmer pinkish, gold polish (I used Finger paints- Legendary Lore). Then the nails that we will be doing the nail art, the middle and ring finger polishes those yellow.
Let that dry as well.
Tropical Nail Design
We will first start off with the design on the middle finger nail.
The Sky and Ocean
For the sky you will need a bright pink, orange, red and yellow (yellow is for mixing).
Starting near the cuticle on a detail brush paint a strip of bright pink, under that an orange, red, orange again, under that leave some of the yellow polish showing. You will need to go over this about three time, each time you go over the colors start to blend them together so it looks like a gradient. I did use some yellow paint over the yellow polish to help with the blending.
*Just a Note: For this design I went back and forth between the two nails just to make sure each part was dry before starting another part. *
Once that has dried on to the water/ ocean. For the ocean I took some darker blue and white and mixed them together to make a lighter blue, then just dab the paint on with the detail brush. Then once that has dried just make some small white lines and blend them into the water, for waves.
The Palm Tree and Land
For the big palm tree coming form the side of the nail.Take your thin stripper
brush with black paint on it, from the right hand corner make a long line for the tree trunk.Then make six curved lines and one
straight line form the top, for the outline/ shape of the palm tree, then you just add small
lines to the branches for the palm leaves.
For the land on the tip of the nail make a thick black curved line and two hill shapes on each side.
Tropical Nail Design
The Orange, Red, and Yellow Sky
Now on to the design on the ring finger. For the sky on this nail we will first need to leave some of the yellow polish showing and then have orange under that, red and then orange again, then leave some of the yellow polish showing near the tip of the nail as well.
Then repeat the same steps that we did for the the middle finger nail.
Three Palm Trees
For this nail we will make three palm trees, two tall trees on the sides of the nail and a short one in the middle.
Once again repeat the same steps that we did for the palm tree on the middle finger nail. Just make then going straight up the nail.
Tropical Nail Design
Once your tropical design is vacation ready, apply a top coat to seal in your design and to help your nails to last.
Also here is the practice design that I did as well.
Hope all of you enjoyed this bright tropical nail design!
See you next time for more nail fun!


No comments:
Post a Comment