

Cherry Nail Design
Here are the polishes and nail art tools to create this cute cherry nail design:
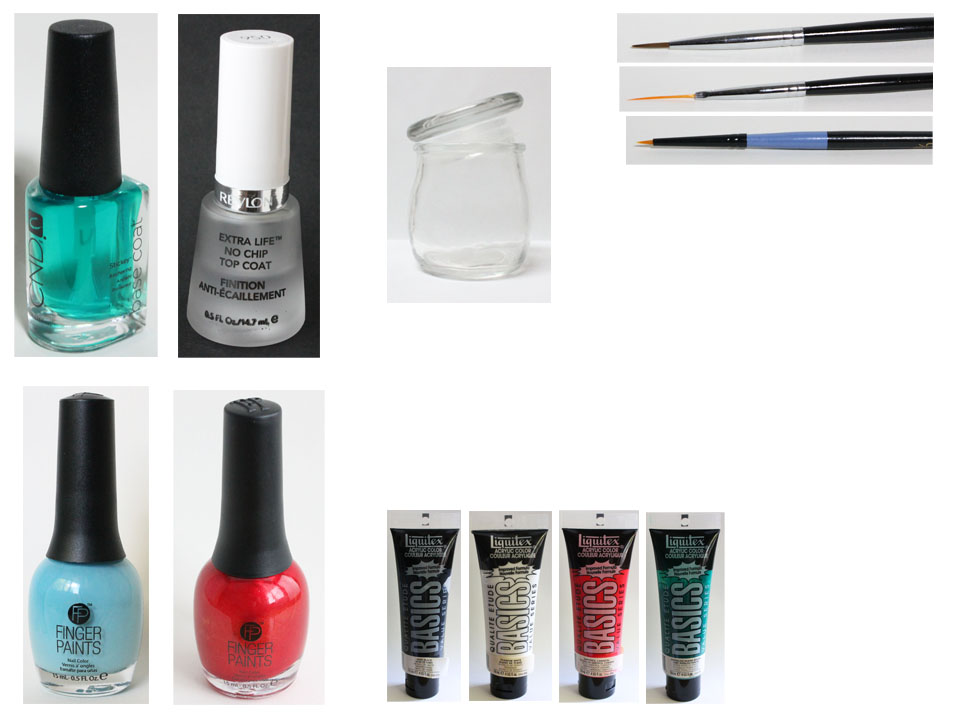
Base and top coat- CND Stickey Base Coat and Revlon Extra Life No Chip top coat.
Nail polishes- Finger paints- Tiffany imposter, and Finger paints- Cubism Crimson.
(Just two polishes that is all you need, the rest is done with paint.)
Acrylic paint- black, white, red, and green.
Nail art tools- thin liner brush, thin stripper brush, and a very small thin detail brush.
A cup of water to clean off your nail art brushes.

Cherry Nail Design
Start off with clean nails, with no polish on them, then on your dry nails apply a thin layer of base coat to help your design to last and to protect them as well.
Let that dry.
Then polish your thumb, middle and ring finger nail with a light blue, these are the nails that we will be doing the nail art on. Then on your index and pinky nail polish those two nails with a shimmer red polish, those two nails will just stay red.
Let that dry as well.

Cherry Nail Design
Once your base polishes has dried, we will create the cherry nail art on our thumb, middle and ring finger nails, you also can always do this design on all the nails or even just one, it is up to you.
For the cherries I did use two different colors of red, the red paint that I already had, and then I added a very small amount of black to the red a well, to make the red a little bit darker, although when I used the two colors on the nail it was a little hard to see the different in color.
For the cherry shapes, take a liner brush with red paint on it and make random circles on the nail, making sure to leave a good amount of blue/ background around the nail. As stated above I did use two different reds, so make sure some of the cherries are a lighter/ brighter red and some are a darker red.

Cherry Nail Design
Also for the cherries you can make some of them overlap like I did more so on the thumb, and some that are just one cherry.
Then on to the steams of the cherries, take a thin stripper brush with green paint on it and from the red circles/ cherries we just made make a green line. On the cherries that are overlapping make the green lines connect, also on some of the steams make some smaller lines for leaves.
For a small added touch I added a few very small leaves in the area around the cherries, most of the nail I just put three leaves.
For are very last small detail we will add a very small white line on the cherries for the refection. Take your very small detail brush with white paint on it and on the corner of your cherries make a very small curved line.

Cherry Nail Design
Once you have your cherry design the way you like and ready for spring/ summer, apply a top coat to seal in your design and to help it last.
Hope all of you enjoyed this cute and simple cherry nail design, that is really good for beginners.
See you next time for more nail fun!
No comments:
Post a Comment