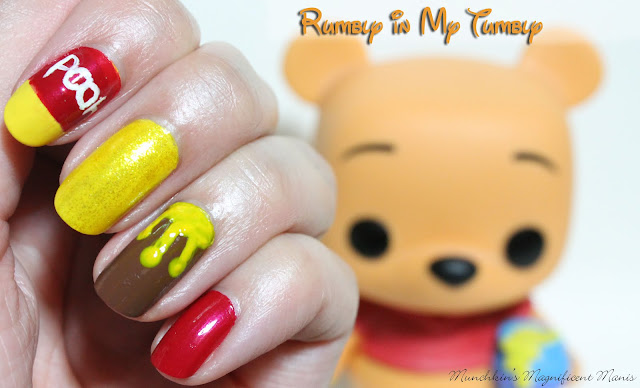
Pooh Bear Nail Design
Here are the polishes and tools used to create this Pooh Bear nail design:
Base and top coat- CND Stickey Base Coat and Revlon Extra Life No Chip top coat.
Polishes- Zoya Mini- Lillian, Sally Hansen- Triple Shine- Lemon Shark, Color Club- Daisy Does it, Nicole by OPI- That's Just Plain Nuts!, and OPI Red.
Acrylic paint- yellow, red, white, and black.
Nail art tools- thin detail and liner brush and very very thin/ tiny brush, and a large dotting tool.
A cup of water to clean off your nail art brushes.
Let's begin this hundred acre wood adventure with Pooh!
Pooh Bear Nail Design
Apply a base coat as always and the let that dry.
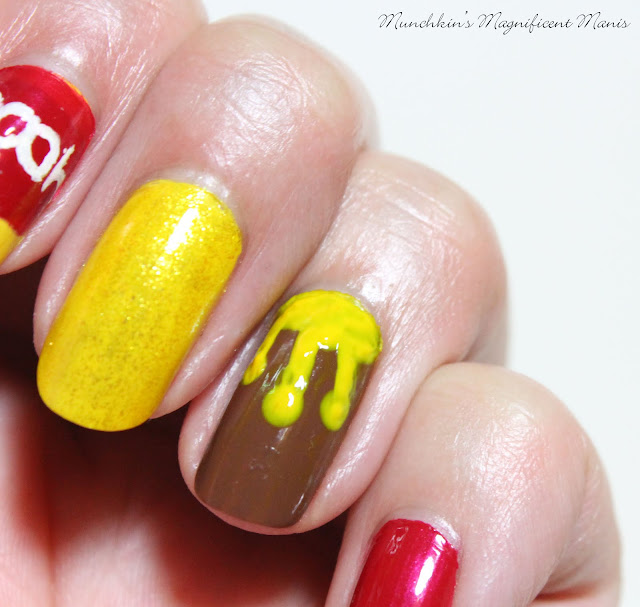
Once your base coat is dry polish your thumb a light blue, your index and middle with a yellow polish, your ring finger nail brown, and your pinky finger nail with a red. Also on your middle finger nail apply a glittery yellow polish over the creme yellow polish as well.
Let that dry as well.
Then on the index finger once the yellow has dried, polish the top part (near the cuticle) of your nail red and leave the bottom part near the tip of your nail yellow, this will be for Pooh's shirt.
Then on to Pooh Bear on the thumb nail. For Pooh himself I mixed paint to make his color, take a lot of yellow paint and small bit of red to make the yellow orange for Pooh Bear. Once you have the yellow orange the way you like (it did take me adding a little more yellow to try and get the color right.) make a large circle shape for his head and then two circles at the top for his ears, then fill that in, you may have to go over your Pooh Bear shape a few time to be opaque, I had to go over it three times.
Then on to his face. For his eyebrows take very small/ tiny brush with black paint on it and make two curved lines near the top of his head. Under his eyebrows make two black circles with a detail brush. Then with that same small/ tiny brush make a curved line right under his eyes, right under that is where his nose goes. Then with a detail brush make a small oval for his nose. Lastly Pooh need a smile, take your small/ tiny brush and make a large curved line for his smile, then two small lines at each end to complete his smile.
Pooh Bear Nail Design
On the middle and pinky finger nail, these two nails will have no nail art on them they will just have the polish color on them. As stated above I just applied a yellow glittery polish over the creme yellow polish, and then the red I left as is.
Pooh Bear Nail Design
Now on to the dripping honey on the ring finger nail. I did this with acrylic paint, it did end up look a little bit thick, but is actually seems okay because it is suppose to be honey and honey is thick. Take a large dotting tool with yellow paint on it and make three or more dots at all different levels on your nail. Then with a liner brush make a glob of honey near the cuticle and make dripping lines that connect to the dots.
After you have finished your dripping honey nail, on to the hard part writing the word Pooh on the index nail, this will be for his shirt. I do have trouble my self writing word on the nail, you just have to slowly write out the word having your hand placed on the table. I did end up not giving my self enough space on the nail and I ended up have to smashing the letters together, so I suggest first make the P and then at the other end make the H and then the O's in the middle, so kind off backwards from how you would normally write.
Once you have your Pooh bear design the way you like apply a top coat to seal in your design and to help it last.
Growing up and even now which Pooh Bear character was your favorite? Mine was Pooh Bear him self, My mom also likes Pooh as well, as for my hubby he has always liked Tigger.
Hope all of you enjoyed this Pooh Bear nail design!
See you next time for more nail fun!


No comments:
Post a Comment