Showing posts with label Valentine's Day Design. Show all posts

Monday, February 13, 2023

Chocolate Covered Strawberries- Valentines Day Nail Design

Hello everyone! Happy Valentine's Day! Today the day before Valentine's Day we will be creating  a chocolate covered strawberries nail design. This nail design is a yummy way to show how much you love chocolate, and to have a different nail design other then just some hearts with pink and red nails.

Valentines Day Nail Design

 Here are the polishes and nail art tools used to create this chocolate strawberries nail design:


Base and top coat- CND Stickey Base Coat, CND Super Shiney Top Coat, and OPI Matte Topcoat.

Polishes- Holo Taco- Red Licorice- Rainbow Collection, Holo Taco- Hot - Wire Pink- Electric Holo Collection, Zoya- Renee- Redbook trio, Nicole by OPI- That's Just Plain Nuts!, and Kiss Nail Art Polish- White. 

Acrylic paint- Green and yellow.

Nail art brush- Thin detail brush.
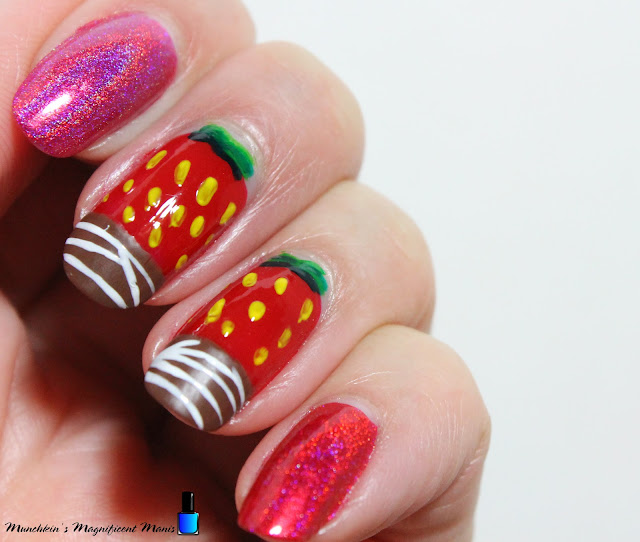
Valentines Day Nail Design

Apply a top coat, let that dry.

Polish-
Index nail- Bright pink holographic polish (Holo Taco- Hot - Wire Pink)

Pinky nail- Red holographic polish (Holo Taco- Red Licorice)

Thumb, Middle and Ring finger nail- Leave this with no polish for now, until we do the nail art.
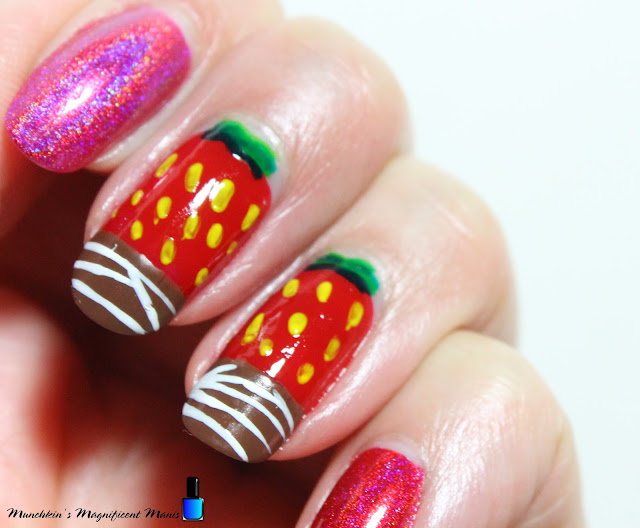
Valentines Day Nail Design


Valentines Day Nail Design

Chocolate Covered Strawberries on the Thumb, Middle and Index Nails:

On the thumb, middle and index nail we will be polish the nails a little different, with a red cream polish on the middle and index we will start near the cuticle, on the thumb near the tip of the nail. 

First polish in a curve shape near the cuticle making sure to leave some blank space or the tip of the nails, then polish down the nail making sure to leave some space for the brown/ chocolate.

Then kind of doing a French manicure, by polish the tip of the nails or on the thumb near the cuticle with brown polish, I go from one end of the nail to the other. 

You will need to go over the red and brown a few time to be opaque. 

Valentines Day Nail Design

Now on to the seeds and stems. Take your detail brush with yellow paint on it and make random lines on your strawberries for the seeds.

For the stems I used two greens a light green and dark green. With that same clean detail brush with dark green, make two curved line on top of your strawberries, then take a light green and in-between the dark green make a few light green curved lines.   

Next go a head and apply a glossy top coat over all of the nails.

Let that dry.
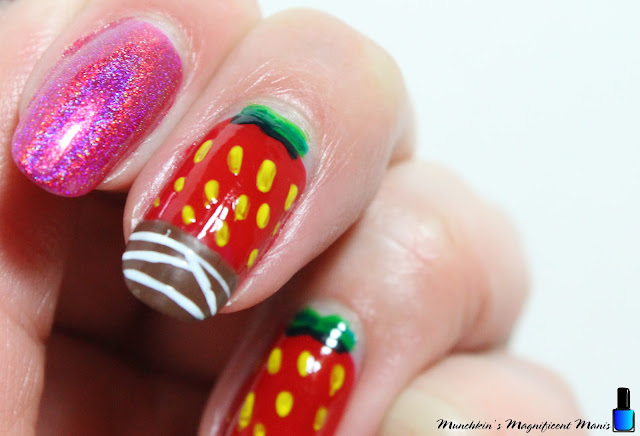
Valentines Day Nail Design

To have the chocolate look, on the brown polish apply a matte top coat.

Then lastly for a final touch we will take a white nail art polish and make a few lines for a white chocolate drizzle look.
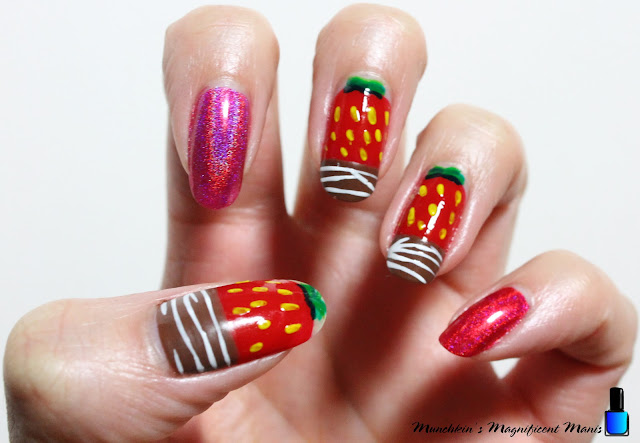
Valentines Day Nail Design

Now you are all done, their is no need to apply any more topcoat. 

Hope all of you enjoyed this yummy chocolate cover strawberries nail design!

Happy Valentines Day! Rather you have someone or not, this day is all about love! 

See you next time for more nail fun! 

Friday, February 9, 2018

Hugs and Kisses- Valentine's Day Design

Hello everyone! Happy Valentine's Day! Today we will be creating a design with a few different holographic polishes, five polishes (I know that is kind of a lot, but you can always just use a few, or all of the polishes.) This design will have some hearts (or course) and the letters XO. This design is great for your V-day date or just for fun even if you don't have a valentines. 

Valentine's Day Nail Design  
Valentine's Day Nail Design

Here are the polishes and nail art tools used for this V-day nail design:


Base and top coat - CND Stickey Base Coat and Revlon Extra Life No Chip top coat.

Nail polishes- Glitter Daze- Let's have a Waikiki, Cupcake Polish- Lord Licorice- CandyLand, Superchic Lacquer- Cherub, Cirque- Madder, and Color Club Halo's- Harp on. 

Nail art brushes- thin stripper brush, thin detail brush, and small detail brush.

Acrylic paint- white and red.

Other- small cup of water, and small glass jar with acetone for cleaning nail art brushes.


Let's start this love filled nail design! 

Valentine's Day Nail Design

Start off with a thin layer of base coat, then let that dry.

Once your base coat has dried polish your thumb with a pink glittery polish (I used Glitter Daze- Let's have a Waikiki), your index nail with a red holo glitter polish (I used Cupcake Polish- Lord Licorice), your middle and pinky nail with a red holo polish (I used Superchic Lacquer- Cherub), and then a dark red holo on your ring finger nail (I used Cirque- Madder.)

Let all of your base colored polishes dry, then we will start the nail designs.

Valentine's Day Nail Design 
Two hearts on thumb nail, left hand     

Valentine's Day Nail Design
One heart on thumb nail, right hand

We will start on the thumb nail, on the left hand I painted two hearts and the right hand I just painted one heart. You can pick out which one you would like to do on the thumb nail. 

Two hearts side by side:

Take a thin detail brush with red acrylic paint, and near the side of the nail make a big heart outline, then fill that in. Then over lapping that heart, make a smaller heart right next to the big heart. 

One big heart:

If you just want to make one heart, do the same thing, just make the heart bigger. First make the outline for the heart and then fill that in with the red acrylic paint.

Valentine's Day Nail Design

For the next part of the design we will paint XO (hugs & kisses) on our index nail. Take a thin detail brush with white paint on it, near the side of the nail carefully paint an X and then right next to the X make a circle shape for the O.

Valentine's Day Nail Design 
 Valentine's Day Nail Design


For the last part of this design, we will make the love raining down on us, on the ring finger nail. Take a thin stripper brush with a silver holo polish (I used Color Club Halo's- Harp on)  and make different size lines, some long and some short, right next to each other. 

Then near the tip of the nail make three small heart, I actually at first made the shape of the hearts with white acrylic paint and then filled them in with the silver holo polish.

On the middle and pinky finger nail, we will just leave those as is, with just the red holo polish.   

Valentine's Day Nail Design
 Valentine's Day Nail Design
 Valentine's Day Nail Design

Once you have your design the way you like/ love apply a top coat to help protect your nails and to make them nice a shinny for your valentines day date.

Valentine's Day Nail Design  
 Valentine's Day Nail Design
 Valentine's Day Nail Design, right hand nail design

Here is the other design that I created on my right hand, this time it was very similar, the only thing that was different was the thumb nail.

Hope all of you enjoyed this Valentine's day, hugs and kisses nail design!

Happy Valentine's Day!

See you next time for more nail fun!

Friday, February 10, 2017

Teddy Bear Hugs- Valentine's Day Nail Design

Hello everyone! Happy Valentine's Day! Well all most Valentine's Day. Today we will be taking a break from the Experiment 626 collection (more to come next week) and we will be creating a cute Valentine's Day design, called teddy bear hugs. This design will have a cute teddy bear on the thumb and a heart shape that will come together on the middle and ring finger nail.

Valentine's Day Nail Design
Happy Valentine's Day!

Here are the polishes and tools used for this Valentine's Day design:


Base and Top coat- CND Stickey Base Coat and Revlon Extra Life No Chip top coat.

Nail Polishes- OPI- Hello Kitty- Look at My Bow!, OPI- Hello Kitty- Charmmy& Sugar, OPI Hawaii- Do you take Lei away, and Glitter Daze- Let's have a Waikiki.

Acrylic paint- red, white, and black

Nail art tools- medium size dotting tool, small detail brush, and Artist's Loft brush 0 (new brush set that I purchase from Michaels art's and crafts store.) 

Other- small jar or cup with water in it to clean brushes.


Let's start this cute teddy bear Valentine's day nail design! 

Valentine's Day Nail Design 
 Valentine's Day heat design

As always start off with a thin layer of base coat, my favorite is CND Stickey Base coat.

Once your base coat has dried polish your thumbnail a tan color (for the bear), your index a light glitter pink, your middle and index nail with a cream pink polish, and your pinky with a silver tone glitter pink.  

After that has dried, we will start off with the heart that will be on two nails and when you put your two nails together they should look like a full heart. 

On both your middle and ring finger nail with a thin brush with red acrylic paint on it, draw the outline of the heart shape, just half of the heart shape on each finger, and try to make sure they line up when you put your finger together. Then fill your heart with the red paint once you have the shape you want.

Valentine's Day Nail Design, Teddy Bear  
  Teddy bear holding a heart on thumb nail

For the more detailed designs like the teddy bear, I like to do that design on the thumb nail rather then the ring finger because the thumb nail is bigger and their is more space to paint.

For the bear you can have the base or background be any color like brown, tan, white, whatever color you would like your bear to be. I choose a tan neutral colored polish, and you know how I feel about neutrals (blah) but if I incorporate them into a design with color I don't  mind it so much. 

Anyways for your bear take a thin brush with black paint on it, first paint the circle for the head. Before the head is completely dry on the lower left hand side of the head with a wet Q-tip wipe of just a little bit of his head, this is where his paw will be.

Then draw his paw on that side of his face, this paw will be up. His other paw will kind of be more toward the side, so you will need to paint the paw a little bit tilted.  

For his body you just add two small curved lines on each side.

Next I painted the heart that the bear will be holding. For the heart first paint the outline and then fill in the heart shape with red paint. 

Once you have your heart, we will go onto the ears. For the ears just make to half circles on top of his head.    

Now on to his cute face, first we will make the white part on his face by just making a oval shape with white paint.This part actully looks better if the white is a little bit sheer.

Then with medium size dotting tool with black paint on it make two eyes and a little nose.

I was going to make a smile and maybe some rosy checks, but I thought the bear looked cute as it. 

Valentine's Day Nail Design, Teddy Bear           Practice version of the teddy bears 

Here is the practice version of the teddy bears, where at first I decided to have a smile and rosy checks on one of the bears. But in the finally design I thought it looked cute as is. 

Valentine's Day Nail Design, Teddy Bear   
Teddy bear Valentine's Day design 

Once your cute Valentine's day design has dried apply a top coat to seal in your design and to protect your nails.

Valentine's Day Nail Design
 Valentine's Day Nail Design
 Valentine's Day design on the right hand

As usual or lately I have a simpler design that I created on my right hand. The bear was quite hard to make on my left hand, I am still trying to get better at draw more cleaner crisper lines which can be hard to do on a nail, but like with anything it takes time and practice. Also I am always on the search for small brushes that might help, which I recently found at Michaels in their paint area.  

For the right hand I decided to just paint a large heart on the thumb nail and the same heart that I did on my left hand. I did have some trouble lining up the two heart pieces, as you can tell.    

Hope all of you enjoyed this Valentine's day Teddy bear nail design!

See you next time for more nail fun!

Next week we will get back to reviewing the Experiment 626, Lilo and Stitch Collection from Glam Polish.