Showing posts with label Picture Polish Salt Water by Nailstorming. Show all posts

Friday, September 22, 2017

Aloha Flowers- Hibiscus flower Nail Design

Hello everyone! Today we will be creating a summer design, even though we are headed into fall. The design we will be creating is a tropical design, a hibiscus flower. During the month of August I wanted to create more tropical nail designs for all of you, but then I had a medical issue that prevented me from do that. So I thought it would still be fun to create a tropical flower design anyways. After all where I live it surprisingly still fells like summer, for now.   

Hibiscus Flower Nail Design  
Aloha Flowers Hibiscus Flowers


Here are the polishes and tools used for this tropical flower nail design:


Base and Top Coat- CND Stickey Base Coat and Revlon Extra Life No Chip top coat.

Polishes- Picture Polish- Salt Water- Nailstorming and Glitter Daze- Let's have a Waikiki.

Acrylic paint- white, red, green, and yellow.

Nail art tools- two thin detail brushes. 

Other- cup or glass of water to clean off your nail brushes.


Let's start this tropical flower nail design, even though summer is coming to an end. 

Hibiscus Flower Nail Design
  Hibiscus flower on the thumb nail

As always start of with a thin layer of base coat to protect your nails.

Once your base coat has dried, polish all of your nails except your ring finger nail with a light blue polish, then polish your ring finger nail with a glittery pink polish.

Hibiscus Flower Nail Design  Hibiscus Flower Nail Design 

Then once your base colors have dried we will start our tropical flower design. On the thumb and middle finger nail we will make a big flower, then on the index and pink we will just make half of the flower, along with some palm leafs on all of the nails.


* For this design I used acrylic paint, I did not have all the colors so I just mixed a few colors to make my own. For the light pink I took mainly white paint and added a little bit of red, then for the slightly darker pink, I just added a little more red. For the green, I used the green I already had and then made a light green by adding some yellow. * 


First we will stat off with the big hibiscus, that we be on the thumb and middle finger nail.We will first make the outline of each petal, starting near the cuticle make two petal shapes, then make the two petals on the sides, and then one more in the middle at the top of the flower. Then fill that in with your light pink paint. You may need to go over this a few times to be opaque.

As we let that dry on to the next flowers, the half hibiscus on the the index and pinky finger nails. For this flower we will make it near the cuticles on opposite sides. Once again make a petal shape in the middle near the cuticle and then one on each side of that petal, their should only be three petals. Then fill that in as well with the light pink paint.

Now that your petals are dried we will add the darker pink to the center. On each petal just make a few line going from the center and going half way down the petal.

Once that has dried we will make the steam or the yellow part that is in the center of a hibiscus. With yellow paint make a curved line from the center of each flower going in different directions, with three small dots at the end. You may also have to go over this a few times to be opaque enough.  

Hibiscus Flower Nail Design  
  Hibiscus Flower Nail Design 

Now on to the palm leaves, on each nail I put one to two leaves going in all different directions and on different places on the nails. For the palm leaves with a dark green paint, make a long thin line that is straight or a little bit curved, then make a lot of small little lines for the leaves going down that long line, making sure to have a little bit of space in between each small line. In between the small dark green leaves, with your light green paint make some more lines to add some detail/ color different in the palm leaf. 

Hibiscus Flower Nail Design  
 Hibiscus Flower Nail Design 

Once you have your hibiscus tropical flower nail design the way you like and you have let it dry, apply a top coat to seal in your design and to help it last.


Hibiscus Flower Nail Design  
Hibiscus Flower Nail Design
  Hibiscus Flower Nail Design, on my right hand

As per usual, I sometime will do the same design on my right hand that is a little bit more simple (or not.) For the design on my right hand, for the most part I kept it the same, with the large flower on my thumb and then on the index and middle finger nail, I just made the half flower, and on the pinky nail I just made a palm leaf.    

 Hibiscus Flower Nail Design with Picture Polish Salt Water
Hibiscus Flower Nail Design with Picture Polish Salt Water 

 Hibiscus Flower Nail Design with Glitter Daze Let's have a Waikiki
  Hibiscus Flower Nail Design with Glitter Daze Let's have a Waikiki

Hope all of you enjoyed this hibiscus flower nail design!

See you next time for more nail fun!

Friday, September 30, 2016

Endless Summer! Polish Review

Hello everyone! Today we have some polishes that are perfect for this time of the year, well not really. Once again back in August I placed an order with Live Love Polish. I ordered three summer colors that I wanted to show all of you. I know it is now considered fall, but why should their be rules on what colors you can wear for a season, why not wear a bright yellow in the middle of fall or winter. Anyways I did still want to share all of these pretty polishes from my favorite season, summer time before it go to much into fall.  

Picture Polish Salt Water and Summer, and Glitter Daze Let's have a Waikiki. 
Endless Summer! Polishes from Live Love Polish; Picture Polish Salt Water and Summer, and Glitter Daze Let's have a Waikiki.

Picture Polish Salt Water by Nailstorming  
 
 Picture Polish Salt Water by Nailstorming 

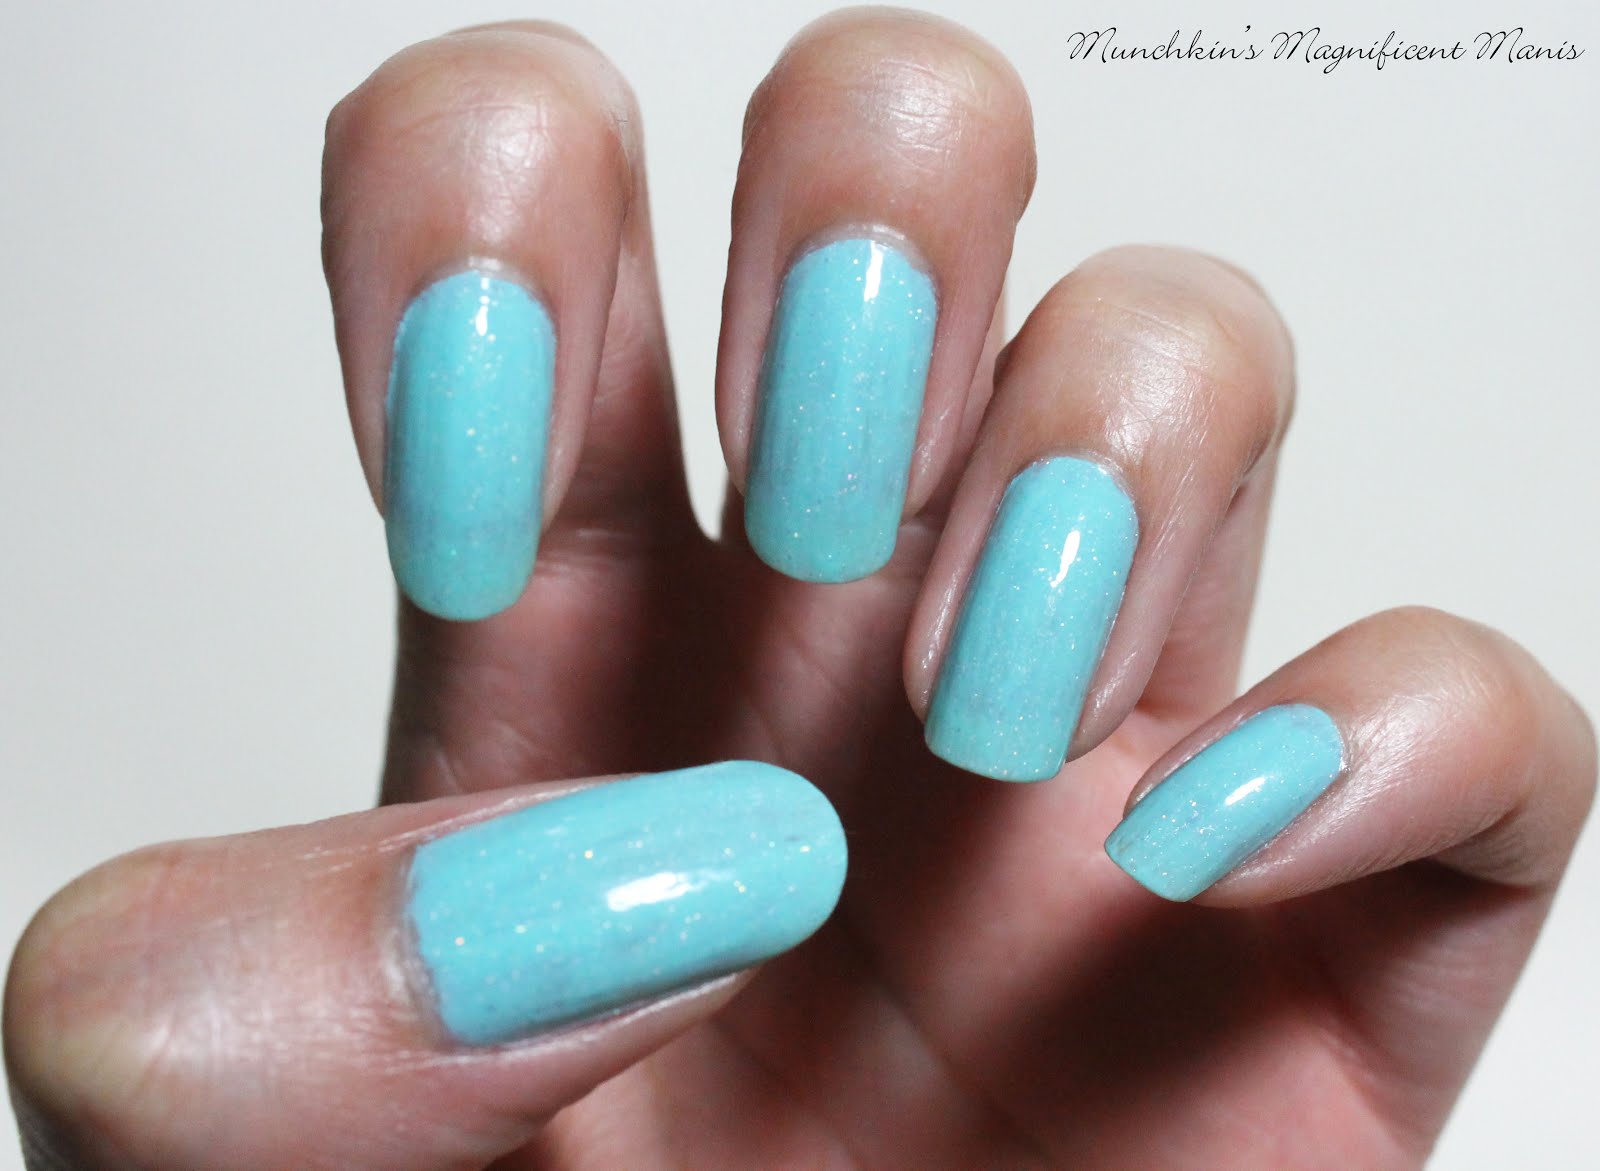
First we will start off with Picture Polishes Salt Water, this is a light blue/ pastel turquoise scattered holographic as described on the Live Love Polish website. This polish was opaque for me in three thin coats, I have read that most people where able to get this opaque in two. This color was a little bit streaky for me, but that was not to big of a deal. I did really like this color, it is very pretty and look great in the sun.

This polish reminds me of the ocean water and that was the one of the reason why I decided to purchase this polish. If you have been following this blog for a while you know I love anything that reminds me of the ocean or Hawaii.

Picture polish does a lot of collaborations with bloggers and YouTube's. This polish was a collaboration with Gianna from Nailstorming  she is a Instagram nail artist that also did have a YouTube channel but I guess she decided not to do her channel anymore, which make me sad I really enjoyed her video's. She does still have her Instagram account though. 

I do remember that Nailstorming really liked light blues and turquoise color's just like this one. She had also described this color as the sun shinning on the ocean. 

picture polish-salt water  is available on Live Love Polishes website for $15.00.

This polish has been very popular and might still be, so if you want this polish you may need to be on the look out for it if it is sold out, currently it is still available.

Picture Polish Summer 
Picture Polish Summer

Next we have another polish from Picture Polish Summer, this is a coral polish with holographic hexes, micro glitter, and scattered holographic. This polish on my nails kind of looks like a rose pink and this color would be good for spring or summer. This polish was opaque for me in two coats, the formula was good and went on smooth. I also really liked this polish as well, it was beautiful and also look great in the sun.

 picture polish-summer is available on Live Love Polish website for $15.00

 Picture Polish Salt Water by Nailstorming
 Love the rubber caps on the Picture Polish polishes

Picture polish is an indie brand that is made in Australia, and as stated above they do a lot of collaborations polishes and polishes on their own. This is the first time I have tried Picture Polish and I really like the polishes, the formula is pretty good, and the polishes are very pretty.    

I also really like the caps for the brushes on the Picture Polish polishes, they are rubber which can make it much easier to open. If you polish your nails a lot, which I am sure you do if you are reading this blog, then you know the struggles of trying to open bottles of nail polish. This and some of Zoya's polishes are the only brands that I can think that have rubber caps. Any other brand if I have trouble opening them I just put a rubber band around the cap, to have a grip to help open the bottles.   

Glitter Daze Let's have a Waikiki 
 Glitter Daze Let's have a Waikiki
 Glitter Daze Let's have a Waikiki

Last but certainly not least is Glitter Daze Let's have a Waikiki this is a pink polish with pink and purple glitter flakies, with holographic and silver micro glitter, as described by Live Love Polish. This polish was opaque in two coats, this polish is loaded with glitter which can make it hard to remove, but for me it was not to hard. This was another polish that I really like, it looked amazing in the sun and is just a beautiful polish.

If you can tell form the name Let's have a Waikiki, I kind of purchased this because of the name and the polish, also it looks so shinny and pretty as well! Waikiki is a city on Oahu, Hawaii and this was the city that we stayed on when my hubby and I got married, along with the first time as a family vacation. This was not a Hawaii collection from Glitter Daze, just a   tropical collection.      
     
glitter daze-lets have a waikiki is available on Live Love Polish website for $12.00.

Glitter Daze polish box  
 Glitter Daze boxes that the polishes come in.

I also wanted to show all of you the cute box that the Glitter Daze polishes come in. I just like this small added touch, and that on the side of the box it says made with love and when you open the box it says have a nice daze!

Glitter Daze is another indie brand that is made in the USA.

This is the third time that I have ordered from Live Love Polish and once again I am impressed with all of the polishes that I ordered, they always have very unique polishes that I really enjoy. As for the polishes I ordered they where all pretty and had good formula and of course gotta love all the holo! 

Here is the website if you would like to order some polishes:

Hope all of you enjoyed this summer polish review. Even though it is actually fall, their is nothing wrong with wearing bright summer colors year round, if you love summer as much as I do. 

See you next time for more nail fun!