Showing posts with label Galaxy Nail Design. Show all posts

Saturday, October 14, 2023

MM Galaxy Using Orly Kelli's Galaxy Collection

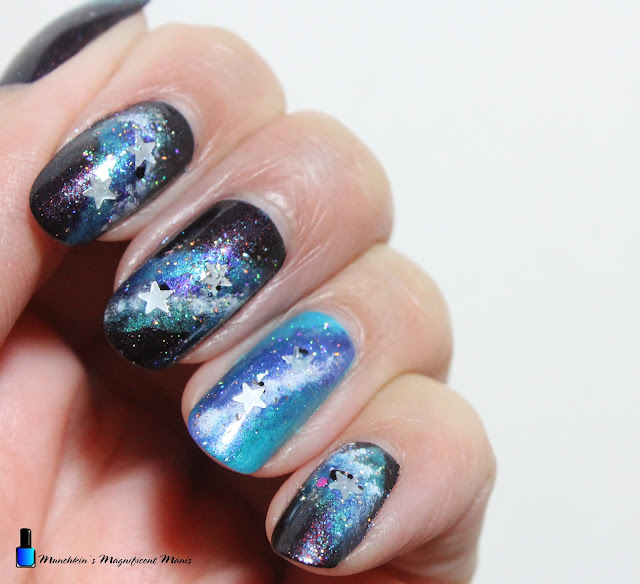
Hello everyone! Today on the blog we will be creating a very simple galaxy nail design using the polishes from the Orly Kelli's Galaxy collection. This collection did come out a few months ago, as of doing this post these polishes are still available on the website. When this collection came out and I punched it, right away I wanted to do a galaxy design, it just took me a while to do said design, and of course Kelli Marissa bet me to it. Also I do want to give Kelli Marissa some credit, I did get this idea from her and made it my own in some way. 

Galaxy Nail Design

Here are the polishes and nail art tools used to create this little galaxy on your nails.


Base and top coat- CND Stickey Base Coat and CND Super Shiney Top Coat.

Polishes- Orly- Kelli's Anti- Matter, Kelli's Galaxy, Kelli's Solstice (All 3 polishes from Kelli's Galaxy Trio/ Remix Trio), Sally Hansen- Hard as Nails- Hard to get, Holo Taco- Flakie, and Funky Fingers- As If. 

Nail Art tools- Makeup sponge and some tweezers (not show above.) 

That's all you will need for this nail design.
Galaxy Nail Design

Apply a top coat to clean nails and then let that dry.

Nail Polish- 

Base color polishes- 

Thumb, index, middle and pinky- A black polish that has red and blue shimmer in it, of just a plain black polish. (I used Orly- Kelli's Anti- Matter) 

Ring finger nail- a light blue (I used Kelli's Solstice) 

Let your polish dry.

Galaxy Nail Design

For this galaxy design we will be creating a dark galaxy design on most of the nail and a light design on the ring finger. 

We will first start off with the dark galaxy design.
Galaxy Nail Design

Galaxy Nail Design

First we will need to take your makeup sponge and tweezers and tear off very small pieces to make our galaxy. I had about ten small pieces just in case. 

On the thumb, index, middle and pinky nail take the dark purple polish, Kelli's Galaxy and pour it on to a nail mat or a plastic bag. 

Then take your small piece of sponge with the tweezers and dab the sponge into the polish and dab a line going across the nail from one end to the other of the nail. On each nail I switched the direction of the way I started my galaxy.   

Then take another piece of sponge with your tweezers and pour a small amount to the light blue polish, Kelli's Solstice, dab that on the sides of Kelli's Galaxy, so that you can still see that polish in the middle. If needed you can always add more of the Kelli's Galaxy if that was covered up to much. 

Next take another small piece of sponge with your tweezers and pour a small amount of white, then dab that on one side of the Kelli's Solstice that we just put on the nail.

Galaxy Nail Design

For the light version of galaxy repeat the same steps as the dark design, first using a white polish down the middle and then Kelli's Galaxy on each side of the white.

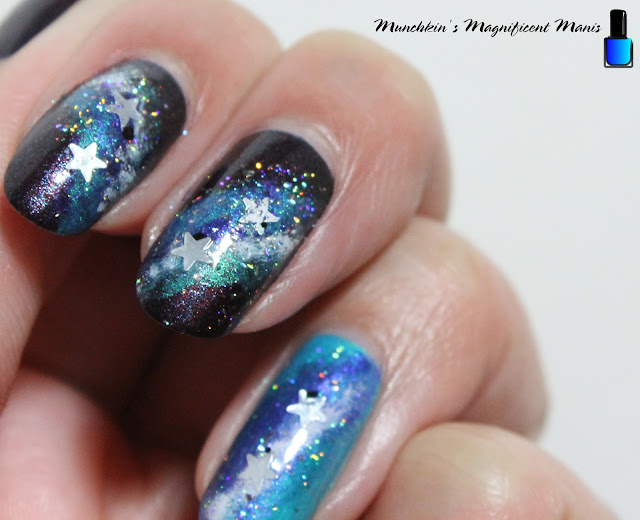
For the final touch we will take Holo Taco Flakie topper, polish this mainly on the galaxy we just made, it is also ok if we do get some on to the black part, but mainly focus the flakie topper on the galaxy. 

Lastly we will add some star glitter on the the nail, place the glitters on the nails before the Holo Taco Flakie polish dries, then right away take your top coat and apply a small amount to the stars. This help the stars to stay on the nails. 

Galaxy Nail Design

Once your galaxy nails are ready for your next space adventure, apply a top coat to seal in your nails and to help your design to last. 

Here it the practice version. 


Hope all of you enjoyed this galaxy nail design!

See you next time for more nail fun!  

PS. If you didn't notice in the title of this post I called this design MM Galaxy, that of course stand for Munchkin's Magnificent Galaxy. 😊

Friday, December 8, 2017

Galaxy Far Away- Galaxy Nail Design

Hello everyone! Today I kind of wanted to recreate a design that I have done before, but change it up a little,that design is the galaxy design. I have been wanting to recreate this design on it's own for a while now, and I final got a chance to do it. I did a similar design like this one, it was a Star Wars design that had a galaxy design in it. For this design it will just be the galaxy no Star Wars, but if you would like to incorporate that in this design for the new movie you can do as well. 

Galaxy Nail Design
Galaxy Nail Design

Also here is the link to my Star Wars Galaxy design May force be with you- Star Wars Nail Design     

Here is the polishes and nail art tools used for this galaxy design, for this recreation I did use some different and some of the same polishes:


Base and Top coat- CND Stickey Base Coat and Revlon Extra Life No Chip top coat.

Nail Polishes- Sally Hansen- Hard as Nails- Black Heart, Zoya- Urban Grunge- Alicia (used on left hand), OPI Holiday 2017- Ornament to Be Together (used on right hand), Zoya- Dream, Zoya- Urban Grunge- Finley, and Cover Girl- Boundless color- Disco dazzle.    

Acrylic paint- white

Nail art tools- Small dotting tool, very small detail brush, makeup sponge  

Other- small cup or jar with water in it to clean of brushes  

Let's start this out of this world nail design! 

Galaxy Nail Design 
Galaxy Nail Design
Galaxy Nail Design, left hand 

Start off with a thin layer of base coat.

As soon as that is dry on all of your finger except your ring finger nail, polish your nails black, then the ring finger nail, polish that with a holo blue polish. On my right hand I polished the ring finger nail with a purple holo polish.   

Once again let that dry, On our thumb, index, middle, and pinky finger nails we will be creating a galaxy. For this you will need a makeup sponge, I cut my sponge into small pieces for this step.

Take a silver holo polish for my left hand I used Zoya- Alicia and my right hand I used OPI- Ornament to Be Together. (This is optional because in the end you really can't tell the different.) Take one of these silver holo polishes, polish it on the sponge then in any random spots sponge on the polish. For example on the middle finger I sponge the silver in the middle and a little on the tip of my nail on the corner. 

Next take another small piece of sponge polish that with the blue holo polish and sponge that on to one of the sides of the silver. For the purple do the same thing but on the other side of the silver.

For each nail it is best to sponge on the polish in a different spot, that way each nail looks different. 
 Galaxy Nail Design
 
 Galaxy Nail Design, right hand 

Once that has dried, take a glitter polish that has small and big glitter pieces and polish that on all of your galaxy nails. This will represent some stars.

For the final touch we will paint some stars on to the nails. Take your very small brush with white paint on it and make a few random X's on the nails, not to many, at most I did three to four little X's for stars. Then take a very small dotting tool and make some random dots as well, making sure not to make to many.

 Galaxy Nail Design
 Galaxy Nail Design
 Galaxy Nail Design,right hand 

Galaxy Nail Design    Galaxy Nail Design
Galaxy Nail Design, left hand  

Once you have your galaxy design the way you liked, apply a top coat to all of your nails to help protect your nails and make your galaxy nice and shinny.

Hope all of you enjoyed this galaxy nail design!

See you next time for more nail fun!