Ladybug Nail Design
Here are the polishes and nail art tools used for this design:
Base and Top coat - CND Stickey Base Coat and Revlon Extra Life No Chip top coat.
Nail polishes- Finger paints- Cubism Crimson, Sally Hansen- Hard as Nails- Black Heart, and Essie- Coconut Cove.
Acrylic paint- black, green, and red.
Nail art tools- large dotting tool, two detail nail art brushes.
Other- small jar with acetone in it to clean off your brushes, and a cup of water to also clean off your brushes.
Let's start this very lady like nail design!
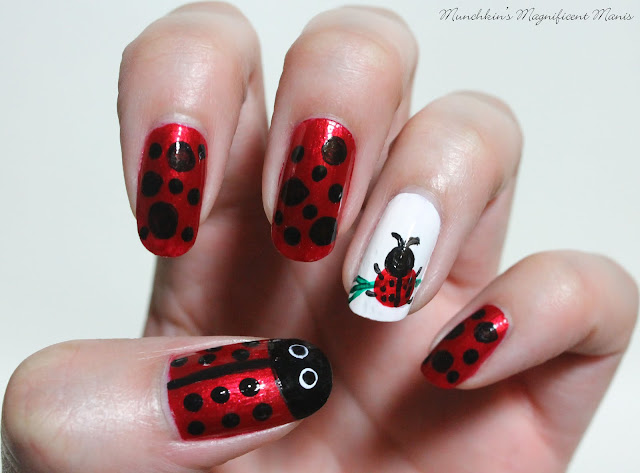
Ladybug Nail design
First start off with a thin layer of base coat to protect your nails.
Once that has dried polish all of your nails red, except for the ring finger nail polish that nail white.
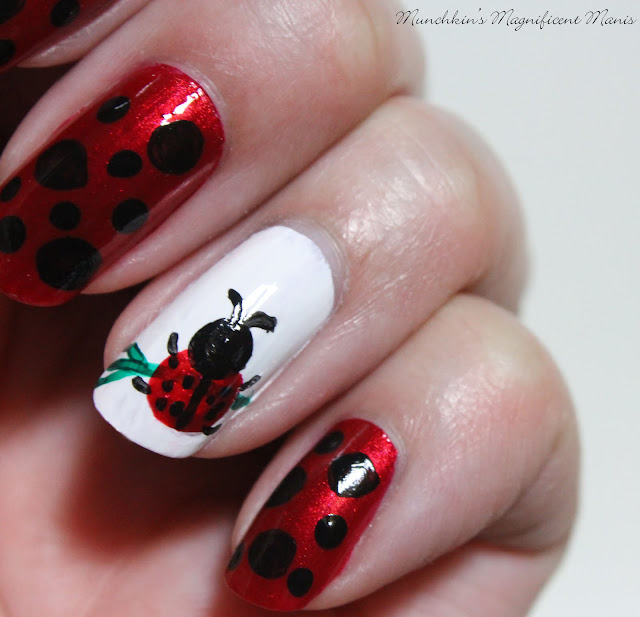
Then once your base colors have dried we will start off with the black spots that are on the ladybugs shell or wings. This is the most simplest part and will be done on the index, middle and pinky finger nails.
First we will make larger dots, with a thin detail brush with black paint make three or more (depending on your nail length you can add more or less spots) large circles.
Then with a large dotting tool fill in some of the area with smaller dots, make sure not make to many dots, leave some of the red showing. The dots can be done with either black paint or polish, I used black paint.
Small ladybug on the ring finger nail-
Next we will make the small ladybug on the ring finger nail. First make make a green line near the tip of your nail, with green acrylic paint, for the branch or leaf that your lady bug will be on.
Then for the ladybug herself first make a small red circle near the side of your nail (I used red acrylic paint to start off), and over the green line you just made. For the head make a small black circle with black paint.
Once the red part of her body is dried, you can also go over that red with the same red polish that you painted your four nails with, or you can always just start off with the red polish.
Now all you need to do is add four little lines for the legs and two antennas on top of her head.
Then once the red polish for her body is dried, just make a black line down the center of her shell and then add a few small black dots.
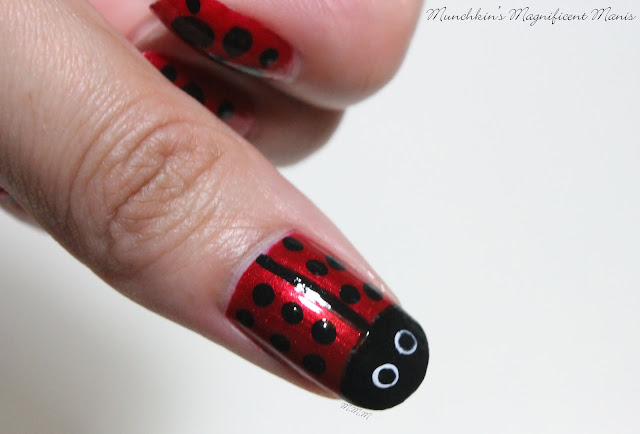
Ladybug design on the thumb nail
Lastly we will be make a larger ladybug on the thumb nail. First with a thin detail brush with black paint or polish make a arch half way up the nail near the tip of the nail, then fill in that part with black polish.
Then with a detail brush with more black paint on it make a line down the center of the nail.
With a large dotting tool and black paint or polish on it make some black dots on the red part of the ladybugs shell.
With that same clean dotting tool and white paint make to eyes on the black arch part. Once that has dried put to black dots in the middle of the white dots.
Ladybug Nail Design
Once you have finished your ladybug nail design and have let is dry apply a top coat to protect your nails and to help your cute design to last.
Hope all of you enjoyed this ladybug nail design, I thought this turned out very cute for spring time.
See you next time for more nail fun!


No comments:
Post a Comment