Wednesday, June 23, 2021

Strawberry Fields- Strawberry Nail Design

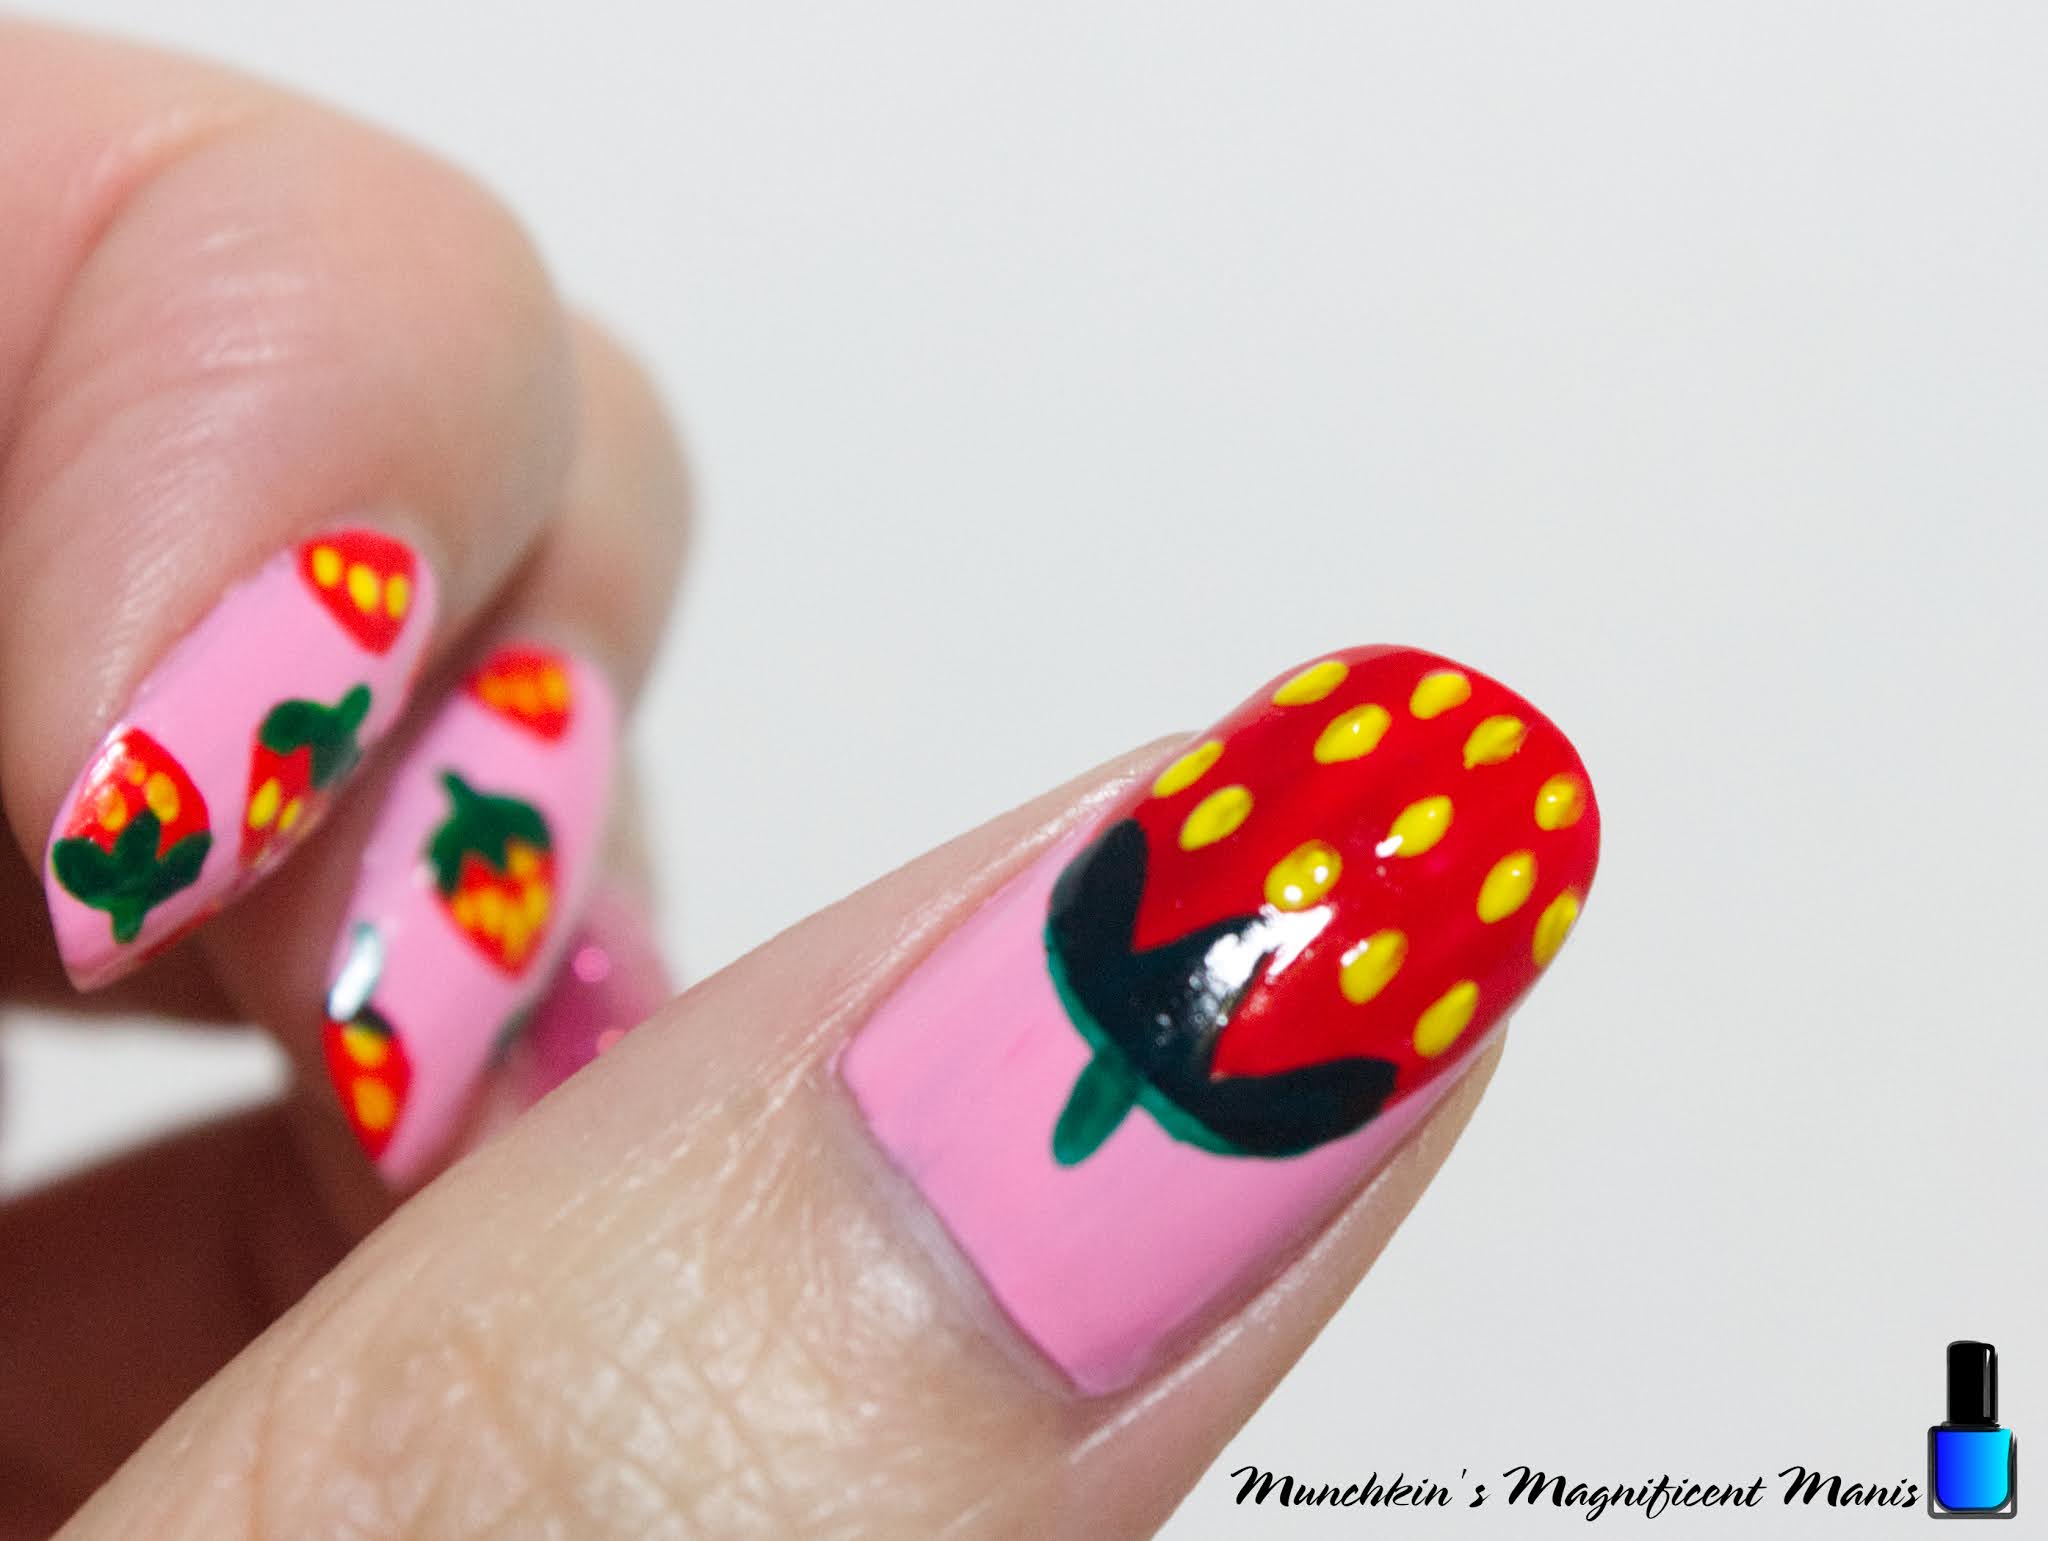
Hello everyone! Today we will be creating a strawberry nail design that I original did for spring, but can also be good for summer time too. Strawberries are one of my favorite fruit besides pineapple. What is your favorite fruit? 

Strawberry Nail Design

Here are the polish and nail art tools used to create this strawberry nail design: 


Base and top coat - CND Stickey Base Coat and Revlon Extra Life No Chip top coat.

Nail polish- OPI- Hello Kitty- Look at My Bow!, OPI- Hello Kitty- Starry- Eyed for Dear Daniel, and Zoya- Renee- Redbook trio. 

Acrylic paint- red, green and yellow

Nail art tools- small dotting tool, thin detail and linear brush.

Other- cup of water to clean off your nail art brushes.

Strawberry Fields

Apply a base coat, then let that dry.

Nail polish- 
Thumb, index, middle, and pinky- a light pink polish (OPI- Hello Kitty- Look at My Bow!)

Ring finger- a pink glitter polish (OPI- Hello Kitty- Starry- Eyed for Dear Daniel)

Let that dry.


Strawberry Fields

Small Strawberries on the index, middle, and pinky finger nails: 

On the index, middle and pinky finger nails we will make small strawberries. Each nail has a different amount of strawberries on each nail, and some have just half the strawberry. 

For the strawberry take a linear brush with red paint on it, make a circle, with a flat top on the top and a point at the other end.

Strawberry Fields

For the leaves take a detail brush with green paint, make three thick lines on the strawberry and then make a thick line on top of the leaves for the steam. 

Lastly take a thin detail brush with yellow paint on it, make small lines for the seeds. 

Strawberry Fields

Strawberry Fields

Thumb Nail Strawberry- 

On the thumb nail we will make a large strawberry that will cover the whole nail/ most of the nail. 

Take a red polish and make a large oval near the tip of the nail, making sure to leave some of the pink polish showing. Let that dry.

Then just like the small strawberries, take a linear brush with green paint on it make three leaves on the strawberry and then a line on the top of the strawberry for the stem. 

Lastly the yellow seeds, take a small dotting tool with yellow paint on it and make small dots all over your strawberry, with theses dots make sure to drag your dotting tool just a little for the dots to look like seeds.

Strawberry Fields

Once your strawberry design looks good enough to eat, apply a top coat to seal in your design and to help your nails to last.


Here is the practice version that I did as well.

Hope all of you enjoyed this yummy strawberry nail design!

See you next time for more nail fun! 

Wednesday, June 16, 2021

Pride Rainbow Nail Design

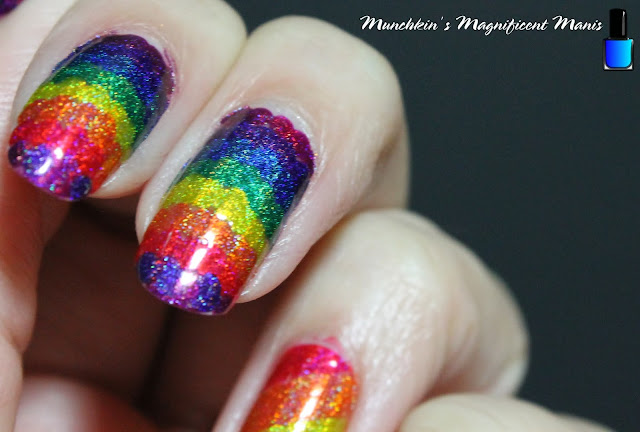
Hello everyone! Today we will be creating a rainbow design for fun and for pride month, even though it it mid of June, but you can do rainbows at any time. For this design of course we will be using the Holo Taco rainbow collection, which has twice the rainbow because of the Holo. 

Pride Rainbow Nail Design

Here are the polishes and nail art tool use to create this rainbow nail design. 

Base and top coat- CND Stickey Base Coat and Revlon Extra Life No Chip top coat. 

Nail Polish- Holo Taco Rainbow collection. 

Nail art tools- large dotting tool and stripping tape and 


For this design, on the index, middle, and pinky finger we will be creating the rainbow with a dotting tool. The ring finger is done with stripping tape and lastly the thumb is larger random dots.

Pride Rainbow Nail Design

Apply a base coat. Let that dry. 

Their is no base color under the rainbow polish.

Pride Rainbow Nail Design

Pride Rainbow Nail Design

Pride Rainbow Nail Design

Rainbow dots on the index, middle and pinky nail:

First poor a very small amount (you don't want to waste the holo) of each color of your polish on a nail polish mat or on a piece of plastic or foil. 

Take a large doting tool staring near the cuticle and make dots in a line across the nail. 

Staring with magenta, purple, blue, green, yellow, orange, and red. If your nails are longer you may need to repeat the colors.

Pride Rainbow Nail Design

Pride Rainbow Nail Design

Rainbow on the ring finger nail:  

On the ring finger nail place four pieces of nail art tape/ stripping tape diagonal going down the nail. Starting at the tip of the nail, polish the first area red, then the next area, orange, yellow, green and lastly blue. Then before the polish dries quickly remove the tape, then polish over the area's that the tape was covering.

Pride Rainbow Nail Design

Pride Rainbow Nail Design

Random large dots on the thumb nail: 

Again poor a very small amount of each color of your polish on a nail polish mat or on a piece of plastic or foil. Do one color at a time for this or if you can do this fast you can poor all 7 polishes. But for me I was too slow so it was best for me to to each color one at a time. 

Take a large dotting tool with one of the rainbow polishes and make a large dot anywhere on the nail. I did one color at a time, for example I made a few red dots, clean the dotting tool off, then made a few blue dots, and just went through the rainbow of colors.

Pride Rainbow Nail Design

Pride Rainbow Nail Design

Once you have your nails the way you like apply a top coat to seal in your design and to help it to last. 

Hope all of you enjoyed this pride rainbow nail design!

See you next time for more nail fun!  

Wednesday, May 19, 2021

Purple Flower Nail Design- Purple Bloom

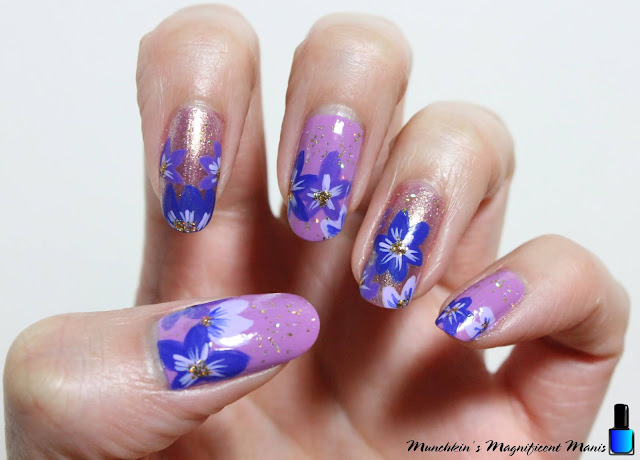
Hello everyone! Happy Spring time! Now that the weather is getting nice it is time for some spring flower nail design. Today we will be creating a purple flower nail design, that is great for spring or even summer time and with all the design I create you can always make the flowers another color it's all up to you. 

Purple Flower Nail Design

Here are the polishes and nail art tools used to create this purple flower nail design:


Base and top coat- CND Stickey Base Coat and Revlon Extra Life No Chip top coat.

Polishes- Zoya Sunshine- Delia, Nails Inc-Dream Dust- Sparkle like a Unicorn duo, Holo Taco- Gold Flakie- Anniversary, and Fun Lacquer- Million Dollar Dream. 

Acrylic paint- Purple, blue and white. 

Nail art brushes- Thin stripper and detail brush, and a medium dotting tool.

Other- a cup of water to clean off your nail art brushes. 

Purple Flower Nail Design

Apply base coats and let that dry. 

Polish-

Thumb, middle, and pinky- Light purple (Zoya Sunshine- Delia)

index and ring- Shimmer pinky/ purple (Nails Inc-Dream Dust)

Let that dry. 

Purple Flower Nail Design

First we need to mix out paint for our flowers, you will need three shades; medium (which we already have),dark and light. Take your medium colored purple as your base color, then mix white for a lighter purple and then take blue for a darker purple.  

For this design I decided to put flowers on all or the nails, you can always just do this design on a few nails or which ever you choose.

Purple Flower Nail Design

For your flowers (example: the middle finger nail) for the first flower in the middle of the nail, take a thin detail brush and make a thick petal shape at the top and then two on each sides, and then lastly two more under that one. That is the basic outline for the flowers that I made and some are just half a flower or just a few petals. 

Purple Flower Nail Design

Then for more detail take a thin stripper brush with the opposite color of the flower and make thin lines in the center of your flower. 

The for your last detail, the gold in the center of the flower. Take a dotting tool with gold glitter polish (Fun Lacquer- Million Dollar Dream) and make a few small dots in the center of your flower.

Lastly for a final touch I decided to add a little bit of gold flakie polish to the background using a little bit of Holo Taco- Gold Flakie. 

Purple Flower Nail Design

Once you have your purple flower nail design just right and ready for spring, apply a top coat to help your design to last and make them nice and shinny. 

Hope all of you enjoyed this purple flower nail design!


Also here is my practice version that I created as well, thought it was worth sharing! 


Also if you have been following/ reading this blog for a while now you may have notice that the M.M.M logo has changed. I recently decided that I wanted to redesign the logo, I just felt like it was time to create a new one. If you don't know I do have a degree in design along with being a licensed nail technician.   

See you next time for more nail fun!

Tuesday, May 11, 2021

Holo Water Marble Nail Design

Hello everyone! Today we will be doing water marble again, back in 2015 I tried water marbling for the first time and it turned out okay for my first try. So today we will try water marbling again. My original idea I got from when I was cleaning up my nails with these same polishes one time and it look really cool on the paper towel, but when I tried to do something similar it didn't work out to well. The whole idea was to blend three polish together, so then I thought water marbling the three polishes together, shown in the photo below, would work out better and that worked out perfectly. 

Holo Water Marble Nail Design


Here are the polishes and tools used to create this water marble design:


Base and top coat- CND Stickey Base Coat and Revlon Extra Life No Chip top coat.

Polish- Color Club Halo's- Harp on, Holo Taco- Blue Freezie- Rainbow Collection, Holo Taco- Magenta Jelly- Rainbow Collection, and Holo Taco- Purple Slushie- Rainbow Collection. 

Not show- A plastic cup of water at room temp to water marble with, toothpicks, tape or liquid latex to put around your finger for easy clean up. 

Holo Water Marble Nail Design

Holo Water Marble Nail Design

Apply base coat, let that dry.

We will just be doing the water marble on the thumb, middle and ring finger nails. But as always you can do this on all the nails. 

For your base colors on the nails that we will be water marbling ( the thumb, middle and ring finger nail) polish with a silver holographic polish. It is best to use a light based color polish for your marbling. 

index nail a blue holographic polish and pinky nail a magenta holographic polish.

Let that dry.  

Holo Water Marble Nail Design

Holo Water Marble Nail Design

Holo Water Marble Nail Design

Tape off all of your finger that are going to be water marbled; your thumb, middle, and ring finger. 

Open all three of your polishes and have them ready to marble. 

Take a cup of water and with a fully loaded brush and dip your polish over the water (without touching the water) and create a bullseye with one of the polishes at a time, repeat this with all three colors. 

Then take a toothpick and and drag the polish to make a pattern, if you mess up on your pattern just clean off your polish in the cup with that toothpick and try again. 

Then once you have a pattern you like quickly dip your finger in the cup and back out again and your marble should come out on your nails.

Holo Water Marble Nail Design

Holo Water Marble Nail Design

Each nail will look different, which is the cool part about water marbling. 

Then once you have finished all the nails that you want to water marble take the tape or liquid latex off to reveal your design and if you still have polish on your fingers can clean that up with acetone and a clean up brush. 

Holo Water Marble Nail Design

Holo Water Marble Nail Design

Once you have your design just right apply a top coat to seal in your design and to help it to last.

I think this water marble did turn out very well and it is great that the Holo Taco Rainbow Holo's do water marble! 

Hope all of you enjoyed this holo water marble!

Also if you want more detailed tutorial check out my first water marble post 

Along with the Unicorn Frap design I did as well that also was a water marble.

See you next time for more nail fun!