Showing posts with label Zoya Estelle. Show all posts

Friday, January 29, 2016

Waddle Waddle- Penguin

Hello everyone! Where I live, as soon as January came it got very cold and snowy, so I thought what better way to beat the winter blue then to create a cute simple penguin/ winter nail design. 

Penguin and Winter nail design 
 Penguin and winter nail design 


The nail polish and tools used for this design will be right next to the images as we go.


The skill level for this penguin and winter design is:

 
   Beginner Basic 

This design is simple and great for somewhat beginners. The design is mainly on the thumb with a penguin and a snowflake on the ring finger nail, and then just solid color. The only part that might be a little bit hard is creating the penguin.  


Bur it's cold outside, let's go inside and create some cute nail art!

 
 Base coat used: Nicole OPI-  3in1- base, top, & strengthener

1. As always start off with a base coat to protect your nails.  

 
Polishes used: Sally Hansen- Hard as Nails- Black Heart, Zoya- Estelle, 
and Finger paints- Tiffany Imposter.

2.  Once your base coat has dried, paint your thumb nail black for the penguin, your index, middle, and pinky nail a metallic blue which will stay as is, and then your ring finger a light blue for the snow. Also for an add touch on the ring finger nail you can apply a glitter over the light blue.

 
 White acrylic paint and a small thin nail art brush

3. First we will start off with the snowflake on the ring finger nail, we will just make one large snowflake and small dots later for small snowflakes. To make the large snowflake take your thin nail art brush dipped into white paint and make a star shape. 

  
4. To add more detail to your snowflake just add small arrow like shapes on the larger lines, just like the photo above. Also make sure to add the small arrow like shapes all around the snowflake. 

 White acrylic paint and a small thin nail art brush

5. Next we will create the cute penguin. First we need to make the white part of the body. Once again take your thin nail art brush dipped into white paint and make an M shape near the cuticle, then kind of outline the shape of the nail, making sure to leave some black all around. Once you have the shape you fill in the body with white, you may have to go over it a few times to be opaque enough. 

  
Black acrylic paint and a small nail art brush

6. Once your penguins body has dried, we will make his facial features. With your thin nail art brush dipped into black paint make two small dots to know where to start to make the eyes, then make them a little bit bigger. 

 
 Yellow and red paint to make orange. 

7. After we finish the eyes we will make the beak. If you don't have orange paint, then you will need to make some orange, which is simple, just mix a little bit of red and yellow together then you have some orange. Once you have your orange, take your thin nail art brush and make a upside down triangle shape, and fill that in.


8. For a final touch we will add a scarf to our penguin. Take the same metallic blue that you used on the other nails and make a long line around your penguin, and then two small lines coming down on one of the sides.    

Penguin and Winter nail design  Final Penguin and Winter nail design

9. For the penguin you can always stop at the last step or add some small feet. If so take the orange paint you made and make a curved line and then three small lines for the feet. 


China glaze- white on white and a medium dotting tool

10. Also for a small touch on the ring finger nail you can add small dots for small snowflakes. With a medium dotting tool dipped into white polish, dot a few dots around the larger snowflake.  

Once your cute penguin and winter nail design has dried apply a top coat to seal in and protect your design. As always I used Revlon Extra Life No Chip top coat.  

Hope all of you enjoyed this cute nail design!

See you next time for more nail fun!   

Friday, January 8, 2016

Zoya Galore! Zoya Haul and Review


Hello everyone! Hope all of you had a fun and safe new year! It is hard to believe that it's all ready another new year, time is going by so quickly! Anyways today on the M.M.M blog I recently got the Zoya Mystery Box, I did a post about it last week if you missed it don't forget to take a look after looking at this post. The Mysteries of Zoya 
Also in the box their was a code for 50% off of $50 or more with free shipping, which is a can't miss deal, so in this post I will be giving a review of the product that I purchased with that code. 

Let's take a look!

Zoya Dreambox the Merry Mattes, Estelle, Blaze, and Zoya 3-in-1 remover   Zoya Dream Box the Merry Mattes, Estelle, Blaze, and Zoya 3-in-1 remover

Here are the items that I purchased with the 50% off discount, Let's take a closer look at each item.

  Zoya Dream Box Merry Mattes

The first item that I purchased is the Merry Mattes Dream Box. This box has full size bottles of Amal, Honor, and Sue. All of the velvet matte polishes come in a nice frosted bottle, to show that the polishes are matte and not glossy. It also came in a black gift box, the box this time was not as nice as last year, last years came in a nice white box with a magnetic closer.

Also all of these polishes are available individually as well.   

Here is a link to the Dream box-  Zoya Dream Box Merry Mattes cost $25

Zoya Merry Mattes; Amal, Honor, Sue 
 Amal on the thumb and middle finger nail, Honor on the index and pinky nail, 
and Sue on the ring finger nail. Naked base coat, no top coat.

As for the colors they are all velvet matte polishes. Which means they are matte but have a shimmery velvet look to them, so they are shinny but matte, if that makes sense.

Zoya Amal 
The first color is Amal a red with a ruby red pearl flecks to it, with a matte velvet finish. This color is pretty and was opaque in one coats, but I applied a second coat to make sure it was opaque enough. Unfortunately when I went to remove this polish their was some staining, it may have been due to the fact that I used the Naked Base coat, but after a lot of scrubbing with nail polish remover it did come off.  
  
Amal Matte Velvet  cost $10 (individually)

Zoya Honor 
Second is Honor a emerald green with a pearl fleck, with a matte velvet finish as well. This is also a pretty color, that is opaque in one coat, but I applied two coats to make sure the nail was fully covered. This is a color that I normally don't gravitate to, but I did like this color after all, it did paired well with Amal and Sue. This one also stained my nails, this one more so then Amal, just like Amal I scrubbed my nails with nail polish remover and it came off, their was just a little near the cuticles.    

Honor Matte Velvet coat $10 (individually)

Zoya Sue    
Third is Sue a champagne gold color with a oyster shell pearl fleck to it, with a velvet matte finish. This was a nice color, it was sheer and took three coats to be opaque. This is another color that I would not have picked if it was not in the Dream Box. According to the website this is a nude color, which I don't like nudes and neutral polishes. But this color is not like normal boring neutral color, their is some gold shimmer in it that makes it a little bit more interesting, which is the reason why I do like this color.   

Sue Matte Velvet  coat $10 (individually)
 
These polishes were all very pretty and went on well, they were more unique to my collection, and I liked the velvet matte look on the nails. These polishes would also look really nice with a glossy top coat, all though I did not try that out, I have seen photos of these with a glossy top coat and they look very pretty. As for wear they wore pretty well for me, just tip wear which is normal for me.

I did wore all the colors with the Naked Base coat, which I am unsure if you are suppose to wear it with color polish. This may have been the reason why I got some staining from the green and red polish.

Also if you are interested the Dream Boxes their are more to choose from on the website, their are ones that are already made and build your own. 
Zoya Dream Boxes and Gifts    

The next items that I purchased where two more nail polishes.

Zoya Estelle and Blaze 
 Estelle and Blaze came in a small box that fits three polishes.

Zoya Estelle
Zoya Estelle 
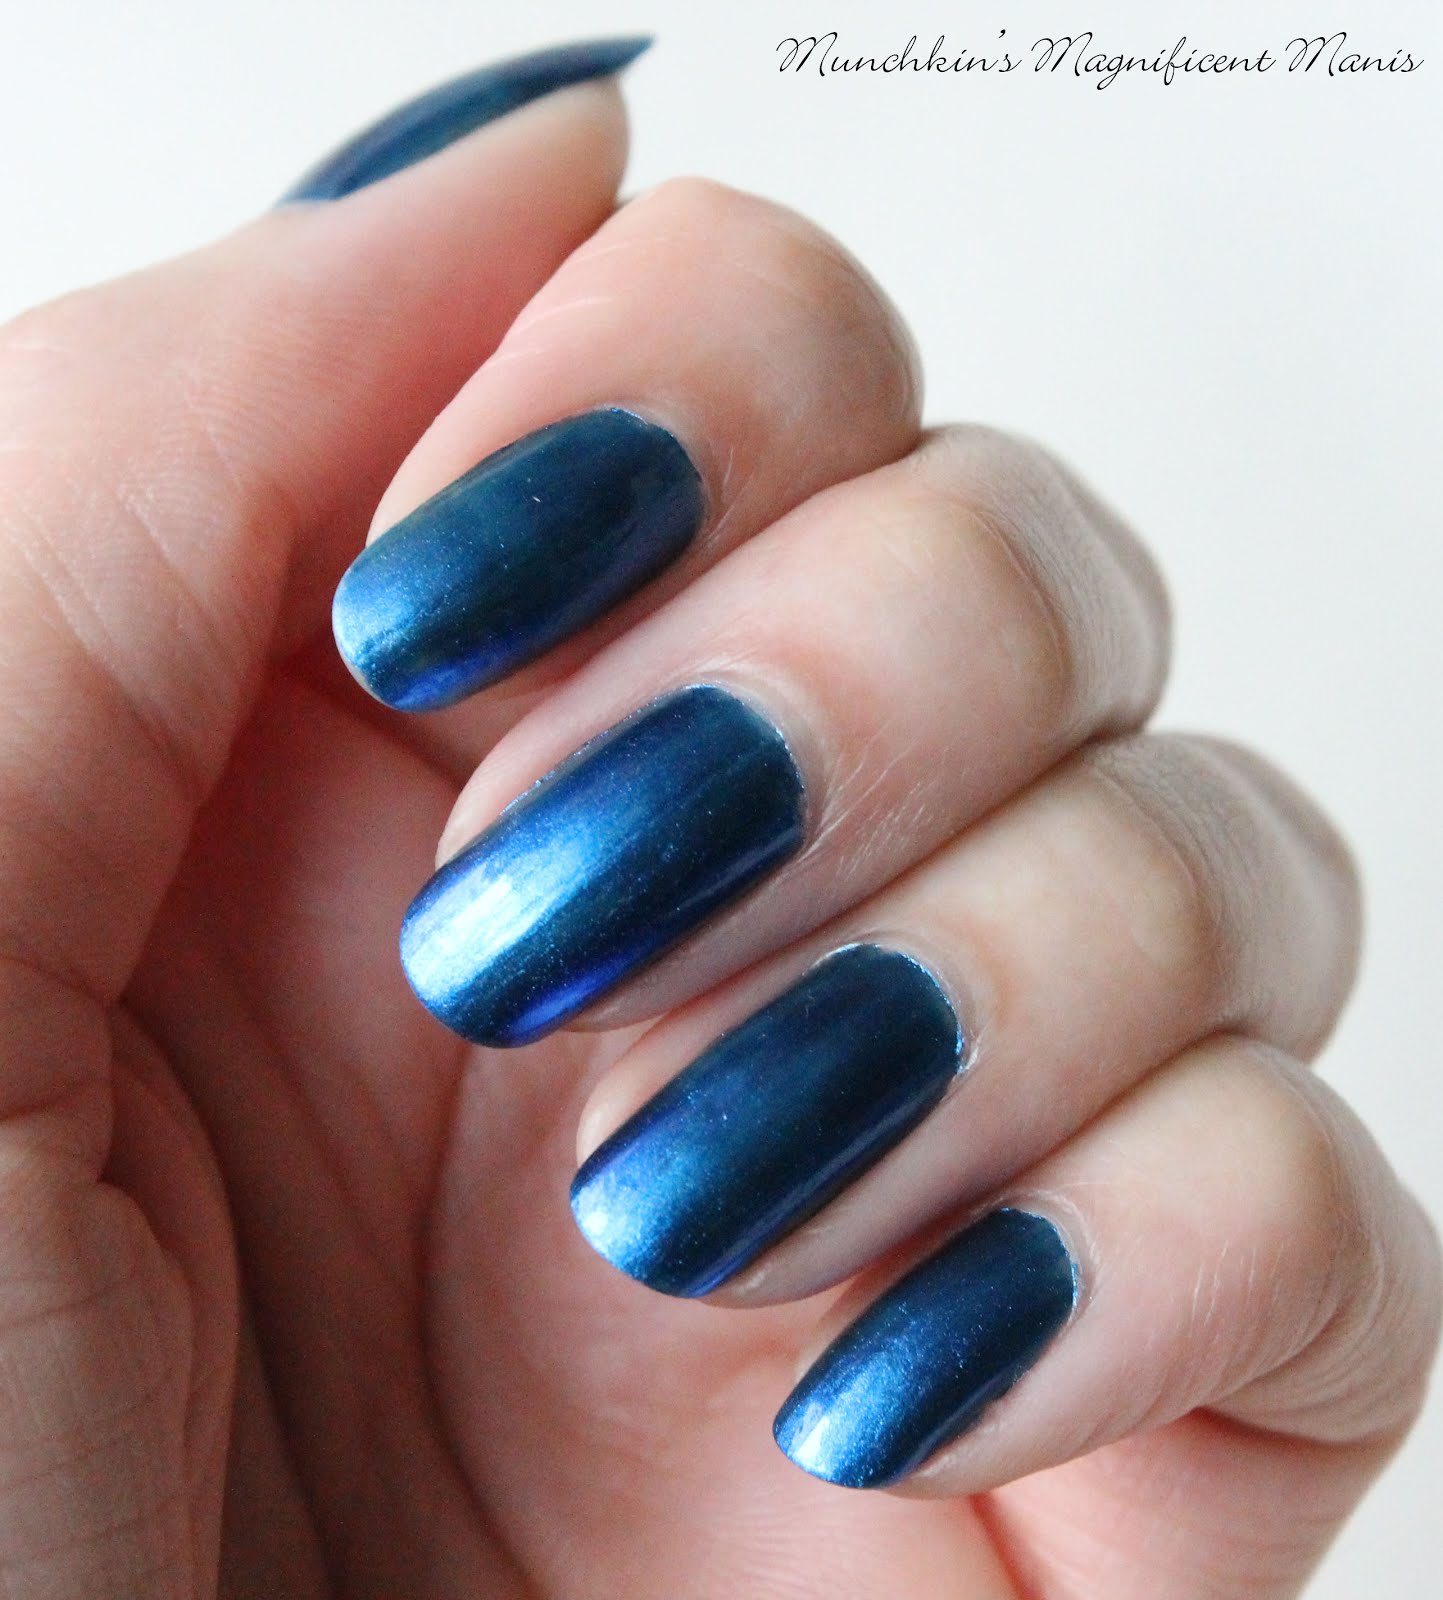
Zoya Estelle on the nails

The first polish I purchase was Estelle which is a metallic blue that has a blackened base. This a very pretty and shinny color, that was opaque in two coats. This is a color I had been eyeing since it came out for the Fall 2015 collection, I was just waiting to get a good deal. Even though this color is part of their Fall collection, I fill like this is more of a winter color, due to it being a shimmery blue metallic color.

Estelle is part of the Fall 2015 collection, this collection has both creams and shimmers.

Estelle cost $9 

Zoya BlazeZoya Blaze
Zoya Blaze on the nails.

The second and last color I purchased was Blaze, this a mulberry red with micro holographic glitter in it. In person and some other photos I have seen, this polish look like a burgundy, but when I took a photo of this it look more red. This polish is also very pretty and before I purchased this polish it reminded me a lot of my two favorite Zoya polishes: Dream and Aurora. They both have micro, scattered holographic glitter in it, but unlike Dream and Aurora the holographic glitter is more subtle. 

Blaze was in the same collection as Aurora, the Winter 2012 Ornate collection.

Blaze cost $9       

The last item that I purchased was the Zoya nail polish remover. 

Zoya Remover plus Big Flipper Polish Remover in the 8oz bottle 
Zoya 3-in-1 Remover

The Zoya Remover plus Big Flipper Polish Remover in the 8oz bottle. I had talked about this remover in my last post, so I would not get in to it to much again. This it is a gentle, non acetone remover that is suppose to be non drying. I purchased the remover with the spill proof pump, which I still mange to spill because on the cap you turn the top to lock it and I went to put the cap on and it spilled some. So I personally still like the small Up& Up Target brand bottle that I got that is similar.

This is a nice remover that doesn't smell to strong like your normal nail polish remover, it does remove nail polish well, the only thing is this remover is pricey and the only reason why I purchased this was because of the deal I had.


Zoya Remover plus Big Flipper Polish Remover in the 8oz bottle The remover in the photo above cost $9.99

Link to the other remover 2oz, 8oz, and 32oz


In conclusion as always I really enjoy Zoya's product, and highly recommenced them. Also all of these products would have cost around $50, but with the awesome discount I got all this stuff for $26.49 with free shipping.

Hope all of you enjoy this Zoya haul and review!

See you next time for more fun and bright nail tutorials and nail fun!