Pool Nail Design
Here are the polishes and nail art tools used for this pool nail design:
Base and top coat - CND Stickey Base Coat and Revlon Extra Life No Chip top coat.
Nail polishes- Finger paints- Tiffany imposter, OPI- Hello Kitty- My Pal Joey, and China glaze- white on white.
Acrylic paints- White, red, blue, yellow, and green.
Nail art brushes- thin detail brush, and a medium dotting tool.
Other nail art supplies- Liquid latex for easier clean up around your nails, a plastic cup of room temp water for marble effect, rubbing alcohol in a spray bottle or hair spray, toothpicks to clean up the polish from the water, and paper towel. (Items not shown in photo above)
Other- cup of water for cleaning up nail art brushes.
Let's start this pool party! Where is your favorite place to swim in a pool, at the lake or in the ocean? My most favorite place to swim is the ocean, but I don't live near an ocean so I have to settle for a lake.
pool nail design
Start off with a thin layer of base coat, and then let that dry.
Once your base coat has dried polish your thumb, middle, and pinky finger nail with a light blue polish, and then polish your index and ring finger nail with a darker blue polish, or you can always polish more of your nails with the dark blue, it is up to you.
Now let your base colors of blue dry. Then grab a plastic cup of room temp water, this will be for the marbling effect for the pool water. You will also need hair spray or rubbing alcohol in a spray bottle for this as well.
For less of a mess apply a liquid latex around your fingers, if you are allergic to latex don't use this around your finger, you can always use tape instead.
pool nail design
For this part of the design we will kind of be doing a water marble design. Take a white polish with a lot of polish on the brush and drip it into the water, and wait for is to spread.
Then take your spray with rubbing alcohol or hair spray and not to close to the cup start to spray the polish to where it has a splatter look to it.
Then dip your finger into the part of the polish that you like, then take a toothpick and remove the extra polish from the cup, and then take your finger out of the cup, and remove the liquid latex, also if need to clean up any of the polish that might have gotten on your fingers.
Repeat this step for all of your nails, and then let this part dry.
pool nail design
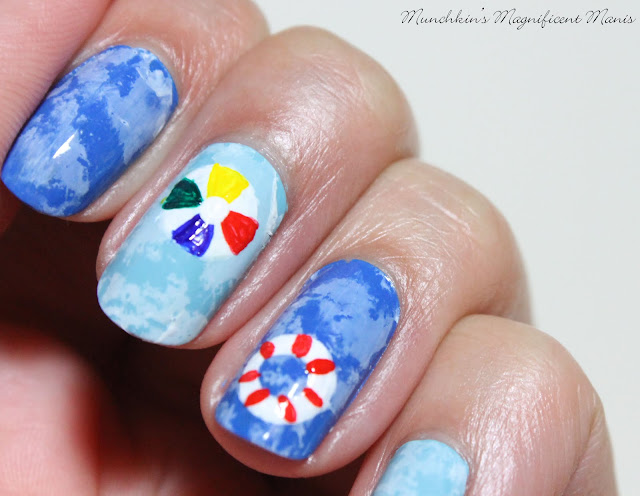
Once your marble design has dried we will make this look more like a swimming pool, by adding in a beach ball and a pool float.
On the middle finger nail we will make a beach ball. Take a thin detail brush with white paint on it and make a circle. Then add a blue, yellow, red and green triangle shapes to the ball. To finish the ball take a dotting tool with white paint on it and make a dot in the middle of the ball.
For the ring finger nail we will make a pool float. With that same detail brush with white paint on it make a donut shape. Then make red lines going all around the tube/ float.
pool nail design
Once your pool design is swim ready, apply a top coat to seal in your design and to help it last through all the rest of your summer pool parties.
Also for the marbling, I feel like it kind of looks like clouds too, but I made it work for the swimming pool design. So you can also use this technique for make clouds too.
Hope all of you enjoyed this nail design!
See you next time for more nail fun!


No comments:
Post a Comment