Showing posts with label Tropical Nail Design. Show all posts

Saturday, August 30, 2025

Pineapple & Hibiscus- Tropical Fruit & Flowers Nail Design

Hello everyone! Hope everyone is enjoying the somewhat end of summer. I still say it is summer until I think end of September and as long as it is still warm out. Anyways I still have a couple/ few tropical designs that I would like to make, this week we will be creating a pineapple, hibiscus flower design. In Hawaii I personal think the pineapple is the best it tastes so sweet and yummy and the hibiscus flower is one of the tropical flowers that can be found in Hawaii, that why I decided to make a tropical fruit and flower design.

Tropical Fruit & Flowers Nail Design

Here are the polishes and nail art tools used to create this Tropical fruit & flowers Nail Design-


Base and top coat- CND Stickey Base Coat and CND Super Shiney Top Coat. 

Polishes- Sally Hansen- Insta Dri- Peeps Blue, Glam Polish- Aloha State of Mind- Aloha Spirit, and Glam Polish- Beauty and the beach-Sandy toes anything goes. 

Acrylic Paint- Red, white, green, yellow and brown. Mix red and white to make a medium pink and a light pink, then mix green and yellow to make a light green.

Nail art brushes- Thin striper and liner brush.

Other- Water to clean off your nail art brushes. 

Tropical Fruit & Flowers Nail Design

Apply a top coat to clean dry nails, let that dry.

Polish- 

Thumb- Bright light blue (Sally Hansen- Insta Dri- Peeps Blue.)

Index and pinky- Teal with iridescent flakes ( Glam Polish- Aloha Spirit.)

Middle and ring- Light blue with iridescent flakes (Glam Polish-Sandy toes anything goes.)

Let that dry.

Tropical Fruit & Flowers Nail Design

Pineapple on the Middle Finger Nail-

We will first start off with the pineapple, for the pineapple I first make an outline of the shape with white paint, so that yellow would pop more. First take your liner brush with white paint on it, on the middle of the nail make an oval shape and fill in your oval with white paint. Let that dry, this is where I would go to another nail and start that nail, for this tutorial we will stay on this nail. 

Once the outline has dried, fill in your oval shape with yellow paint. For the crown of the pineapple, take a light green paint first and make a few thick lines and then take a darker green and repeat.

For the lines on the pineapple take a thin striper brush with brown paint on it and make a few lines on the pineapple.

Tropical Fruit & Flowers Nail Design

Tropical Fruit & Flowers Nail Design

Hibiscus Flower on the Ring Finger-

Next we will make a pink hibiscus flower, for the petals we will make five heart shaped petals, starting with the petal on the left side of the nail and then two on the side and then two under those petals, you will need to fill in the petals with pink a few times to be opaque. 

This step is optional because it is a little hard, you can take a light pink on striper brush and outline your flower petals, also add a few lines on the petals for some depth. 

For the center part of the hibiscus first make the outline with white and then go over it with yellow, first make a long line from the center of the flower and then make a few small dots at the end.

The last step will be to make some green leaves, starting with the light green, then the dark green make a few thick lines from the top of the flower, the side, the part near the tip of the nail, and bottom part of the flower neat the tip of the nail.  
 
Tropical Fruit & Flowers Nail Design

Pineapple and Hibiscus on the Thumb Nail-

On the thumb nail we will be making smaller version of the design that we made on the middle and ring finger nail. For the pineapple repeat the same steps just make the pineapple more off to the side of the thumb. 

For the hibiscus, we will make a red version of the flower and much smaller. Once again follow the steps that we did for the larger pink flower and make their flower slightly over lapping the pineapple on the lower left hand corner near the cuticle. 

Tropical Fruit & Flowers Nail Design

Once your nails are good enough to eat, or not apply a top coat to seal in your nails and to help them to last. 

Hope all of you enjoyed this tropical fruit and flower nail design! 


As always lately here is the practice version. 

See you next time for more nail fun! 

Saturday, July 27, 2024

Tropical Sunset- Tropical Nail Design

Hello everyone! Hope everyone is having a good summer so far. This summer My husband and I went to New York for our wedding anniversary. For our 10 year next year we hope to go back to Hawaii, the place we got married. Anyways today on the blog we will be creating a beautiful tropical sunset nail design because we are dream of a beautiful tropical vacation and watching the sunset on a beach, so for now creating one on our nails will have to do.

Tropical Nail Design

Here are the polishes and nail art tools used to create this tropical sunset nail design- 


Base and top coat- Holo Taco- Long-Lasting Base Coat, and Holo Taco- Glossy Taco- Top Coat.

Polishes- Holo Taco-Wireless Mode- Lite Mode Collection, Holo Taco- Red Licorice- Rainbow Collection, Holo Taco- Orange Drink- Rainbow Collection, Holo Taco- Lemon Sucker- Rainbow Collection, Zoya- Splash- Maren, and Sally Hansen- Hard as Nails- Black Heart.

Acrylic Paint- Black, white and yellow.

Nail art brushes- thin detail and stripper brushes.

Other- Water to clean off your nail art brushes, and Holo Taco Protective Peel.

Tropical Nail Design

Apply a base coat to clean dry nails, for this design I am using the Holo Taco long lasting base.

Let that dry.

Polishes- 

Thumb and pinky nails- A blue mutichrome polish (Holo Taco-Wireless Mode)

Index, middle and ring finger nails- Yellow holographic polish for your base (Holo Taco- Lemon Sucker)

Let that dry.

Next we will add Holo Taco Protective Peel to the index, middle and ring finger nails, this is a liquid latex barrier to help to make doing gradients less messy. 

Tropical Nail Design

Sunset Gradient:

To start off our nail design we will be creating a red, orange and yellow gradient for our sunset. Take a makeup sponge and first polish a red holo (Holo Taco- Red Licorice), then an orange holo (Holo Taco- Orange Drink), and then the holo yellow you used as your base color (Holo Taco- Lemon Sucker). It is ok if the polishes overlap on the sponge, it is actually better if they do overlap, that way the gradient will blend better. 

Then dab the sponge on the nails, the index, middle and ring finger nails, you will need to do this a few time to be opaque. 

For the ocean we will also sponge this on as well, original I did use a green and a blue polish but it didn't show up when I finished this design. So really you just need to sponge on a blue polish (Zoya- Maren) near the tip of the nails.

Lastly apply a top coat this helps the gradient to blend better. Let that dry.

Tropical Nail Design

Topical Island and Sunset:

Next we will be creating the tropical part of this design. First we will make the sunset on the middle finger nail. First take a detail brush with white paint on it and make a small oval on top of the water. Let that dry and then go over that with yellow paint.

For the land we will make a wavy shape on the tip of the nail. I did first paint this on with black paint and then went over it with black polish that way it would not wear away as fast. 

On to the two palm trees on the index nail the palm tree is on the left side, on the ring finger nail the palm tree is on the right side. To create a palm tree, take a thin stripper brush with black paint on it make long thin line for your tree stump, then make two curved lines at the top of that line, two more short ones from those line, then a short line for those two line. For the leaves we need to make very small thin line that are very close together, I feel like if you make your line some what close together, but not to close it can look like a blob or a cool looking palm leaf.

Ocean Water Waves: 

For our final detail for the ocean we will create some small waves. Take a thin stripper brush with white paint on it and make a line one the shore and then make each small line at a time for the waves, then with a detail brush with a small amount of white paint on it brush upward on the line you just made for the wave to give a wave effect to your design. 

Tropical Nail Design

Once your nails are tropical vacation ready apply your final top coat to all of the nails, to seal in your design and to help your nails to last through all of the sunset on your vacation. 

Here is the practice design 

Hope all of you enjoyed this tropical sunset nail design!

See you next time for more nail fun!

Saturday, June 22, 2024

My Happy Place- Tropical Nail Design

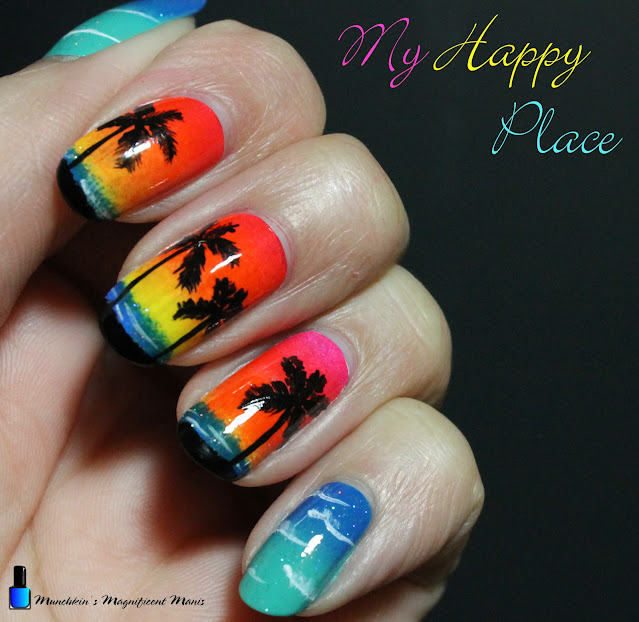
Hello everyone! Hope everyone is having a good start to summer and trying to stay cool. Today on the blog we will be creating a tropical design, this is my favorite time of year summer and I always love to create beautiful topical designs. Even more so lately I have been dream of my happy place some where tropical, just seating by the ocean and of course swimming in the ocean too. If this is also your happy place then you will also love to create this nail design. 

Tropical Nail Design

Here are the polishes and nail art tools used for your happy place, a tropical nail design: 

Base and Top Coat- CND Stickey Base Coat and CND Super Shiney Top Coat. 

Polishes- Zoya-Splash- Maren, Zoya- Splash- Harbor, Sally Hansen- Hard as Nails- Hard to Get, OPI- La Paz-itively Hot, OPI- Hello Kitty- 5 Apples Tall, Sally Hansen- Triple Shine- Play Koi, Sally Hansen- Triple Shine- Lemon Shark, Sally Hansen- Hard as Nails- Black Hearts, and Holo Taco- Scattered Holo Taco.

Acrylic Paint- Black and white.

Nail Art Tools- Thin stripper and detail brush, two makeup sponge for gradients.

Tropical Nail Design

Apply a base coat to clean dry nails, and let that dry.

For this design we will first be applying our base colors and then do the gradients.

Polish- 

Thumb and Pinky Finger Nails- Light green polish (Zoya- Harbor)

Index, Middle, Ring Finger Nails- white polish (Sally Hansen- Hard as Nails- Hard to Get), we will be polishing these nails white to help the colors, mainly yellow to show up better and to pop. 

Let that dry.

Tropical Nail Design

Tropical Nail Design

Ocean Gradient on the Thumb and Ring Finger Nails:

First we will start off with the ocean design which is the most simple part of this design. Take a makeup sponge and first polish the same color as the base color the light green polish (Zoya- Harbor) then right next to that color polish a darker blue (Zoya- Maren). Then dab the sponge on the nails, both the thumb and pinky finger nails, you will need to do this a few time to be opaque. 

For the small wave details, take a stripper brush with white paint on it and make a few wavy lines in random spots on the nail so it looks like waves, then what I did was take a clean detail brush and right away try and smudge the line so it kind of look more like a wave. 

Lastly to give the ocean more of a sparkle look, you can apply a scatter holo top coat. 

Tropical Nail Design

Tropical Island Design, the Sunset Gradient: 

First we will start off with the gradient, just like the ocean gradient we just did we will first make a sunset gradient. Take another makeup sponge, first polish a pink (OPI- La Paz-itively Hot), a red (OPI- Hello Kitty- 5 Apples Tall), a Orange (Sally Hansen-Play Koi,) lastly a yellow (Sally Hansen-Lemon Shark) on to the sponge. 

With the pink staring at the cuticle dab the sponge on the nails, you will need to repeat this step a few time to be opaque. As you can see the gradient I did on my nails the pink showed up a lot more on the ring nail and not so much on the middle and index nail. 

Tropical Nail Design

Ocean Water:

For the ocean water if you have a small part of your sponge that is clean you can use that, or you can cut some of your already used sponge to make a fresh piece of sponge. Take the darker blue that you used for your ocean and polish that on your sponge and then dab that on the tip of the nails, the reason that we dab the blue on with a sponge, is I feel like it give a more wave look to the water.  

Tropical Nail Design

Palm Trees:

For our final detail for our design, we will create some palm trees on the index nail make one palm tree on the left side of the nail, the middle finger nail two palm trees one taller then the other, then on the ring finger nail make one palm tree on the right side of the nail. 

This time I will describe how to create a palm tree, I feel like it has been a while since I fully explained how to paint a palm tree.  

Take a thin stripper brush with black paint on it make long thin line for your tree stump, then make two curved lines at the top of that line, two more short ones from those line, then a short line for those two line. For the leaves we need to make very small thin line that are very close together, I feel like if you make your line some what close together, but not to close it can look like a blob or a cool looking palm leaf. 

Once you your palm trees are done we need to make some land for your palm trees to be on. Take a black polish and swipe it on the tip of the nail kind of like a messy French manicure the line doesn't need to be straight. 

Lastly for the final touches on the water we need to make a few lines for the waves, take your stripper brush with white paint on it make just a few lines in the water. Then for an added sparkle take that same scattered holo polish and polish that on to your water. 

Tropical Nail Design

Once your nails are tropical vacation ready apply a top coat to seal in your design and to help it to last through your vacation. 


Here is the practice version of My Happy Place. 😊🏝️

Hope all of you enjoyed this tropical nail design!
See you next time for more nail fun! 

Wednesday, June 28, 2023

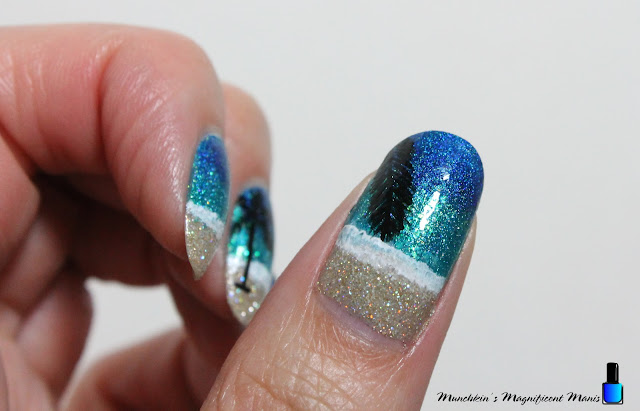
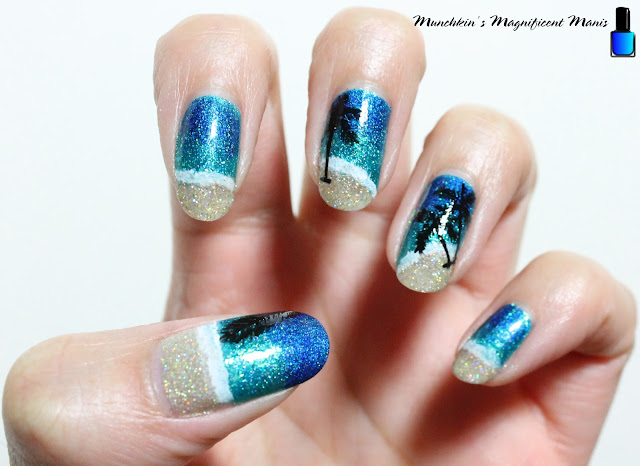
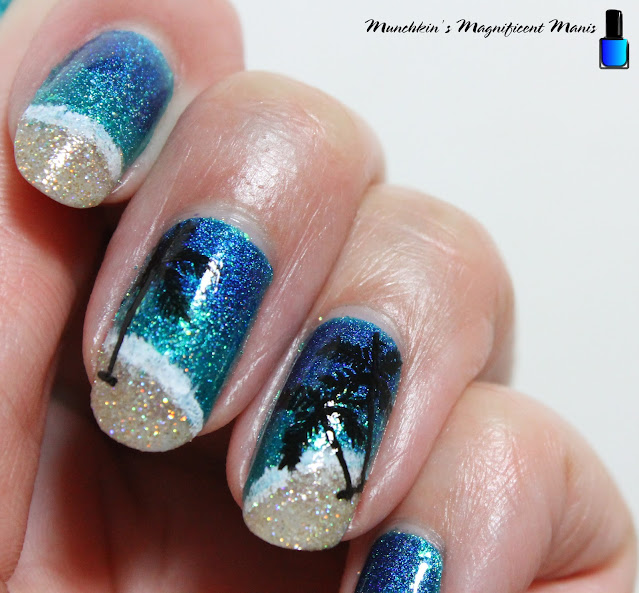
Sand Meets The Sea- Tropical Nail Design

Hello everyone! Today on the blog we will be creating a tropical nail design, using some polishes from the Holo Taco Vacation collection. When I first got this collection it gave me some inspiration for some tropical designs, which is my favorite to do in the summer time. So I do have a few planned that are inspired by this collection. 

Tropical Nail Design

Here are the polishes and nail art tools used to create this sand meet the seas nail design: 

Base and top coat- CND Stickey Base Coat and CND Super Shiney Top Coat.

Polishes- Holo Taco- Beach Please- Vacation collection, Holo Taco- Never Tide Down- Vacation collection, and Holo Taco- Blue Freezie- Rainbow Collection.

Acrylic paint- Black and white.

Nail art brushes- Thin stripper brush, and medium flat brush.

Other- Makeup sponge and water to clean off your nail art brushes. 

Tropical Nail Design

Tropical Nail Design

Apply a base coat to clean dry nails.

Let that dry. 

For this design we will be polishing as we go no base color polish is needed.

Tropical Nail Design

Tropical Nail Design

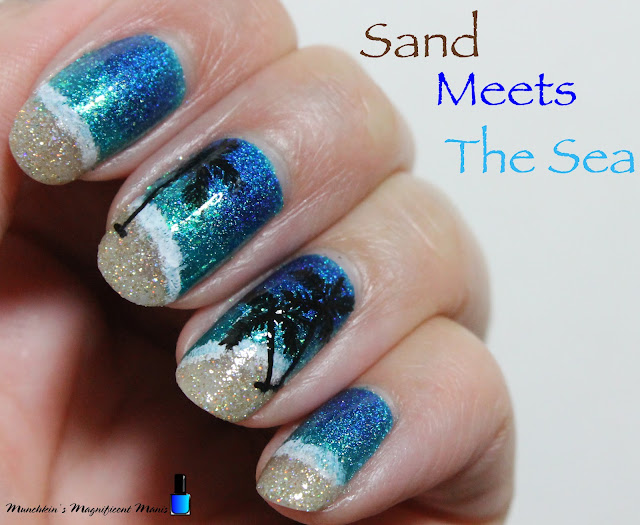
First we will start off with the sand color on the tips of the nails (Holo Taco- Beach Please). On the thumb, index and pink nail, polish the sand color straight across like a French manicure. 

For the middle and ring finger polish the sand color on a slant, the middle finger going to the left side, and the ring finger to the left side.

Tropical Nail Design

Tropical Nail Design

On all of the nails take a turquoise polish (Holo Taco- Never Tide Down) and polish from the sand to the cuticles.

For the darker color of the ocean, the darker blue take a makeup sponge with a blue holographic polish (Holo Taco- Blue Freezie) and polish some of the sponge and dab in on the nail near the cuticle until you get it to blend with the other color, you can also go back over the dark blue area with some of the turquoise color to blend the colors together. 

Once you have the sea and the sand done, let that dry.

Tropical Nail Design

Tropical Nail Design

Now that the sea and sand part is dry, we will make the white part where the sand meets the sea. Take a flat brush with watered down white paint and dab the brush on the line of where the sand meets the sea. 

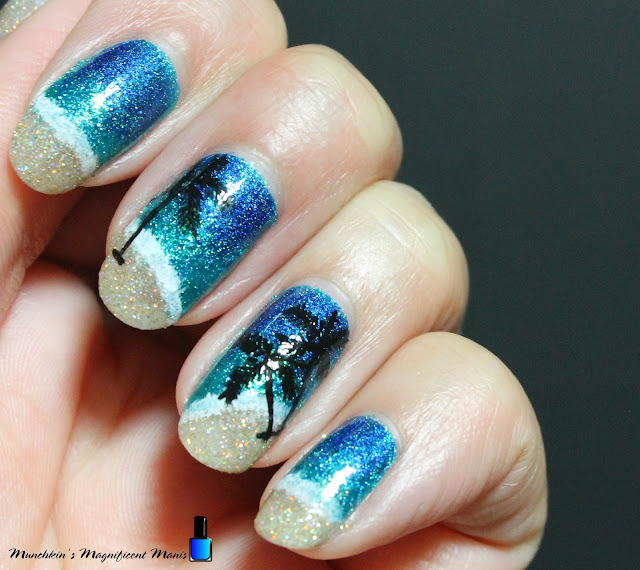
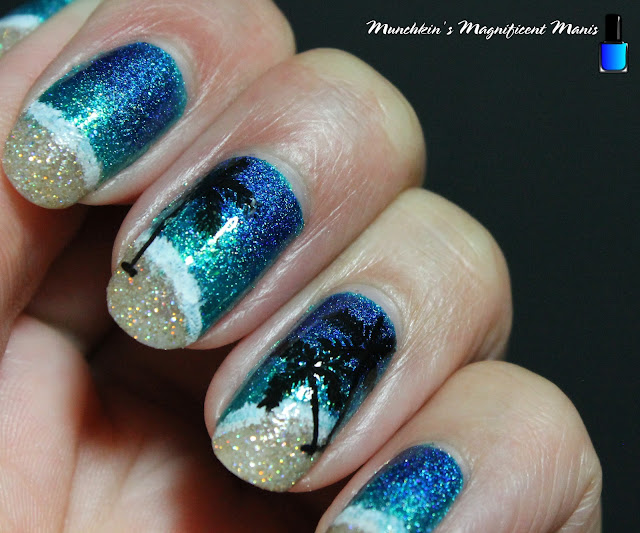
Once you have your ocean looking just the way you want, we will add the palm trees. On the middle finger nail make one palm tree on the left side.

On the ring finger nail make two palm trees no the right side, one palm tree small then the other one.

Tropical Nail Design

Tropical Nail Design

Lastly on the thumb add one palm leaf on the left side of the nail.

Tropical Nail Design

Tropical Nail Design

Once your nails are tropical vacation ready apply a top coat to seal in your design and help it last though your vacation.

Here is the practice version of the design. 


Hope all of you enjoyed the sand meets the sea nail design.

See you next time for more nail fun. 


Saturday, September 5, 2020

Tropical Dreaming- Holo Sunset

Hello everyone! Today we will be creating one more tropical design, even though summer is sadly coming to a close, I still wanted to create one more tropical design using the Holo Taco Rainbow Collection polishes. 

Tropical Sunset Nail Design, Holo Taco
   Tropical Sunset Nail Design

 Here are the polish and nail art tools used to create this bright tropical sunset: 

Base and Top coat - CND Stickey Base Coat, and Revlon Extra Life No Chip top coat. 

Polishes- Holo Taco Rainbow; Lemon Sucker, Purple Slushie, Magenta Jelly, Orange Drink, and Blue Freezie.  

Arcylic paint- Black, and yellow.

Nail art brushes- Thin detail brush and a stripper brush. 

Other- Makeup sponge for gradient and a cup of water to clean off your nail art brushes. 

Tropical Sunset Nail Design, Holo TacoTropical Sunset Nail Design
 
Apply base coat and let that dry.
 
Polish- 
Base colors
 
Thumb- Blue Freezie
Index, middle, and ring- Lemon Sucker
Pinky- Purple Slushie

 
Let that dry.
 
 
Tropical Sunset Nail Design, Holo Taco
Tropical Sunset Nail Design
 
This design is very similar to the last weeks tropical design, we will just be using more colors for the gradient.
 
 
Purple, Magenta, Orange, Yellow, and Blue Gradient (Sunset)
 
First we will start off with the gradient with a clean makeup sponge, polish Purple Slushie at the top of the sponge, then Magenta Jelly, Orange Drink, Lemon Sucker, and Blue Freezie. It does look like their is a green polish added, but it is just the yellow and blue blending together.
 
Then dab the sponge on to the nails, to make the polishes blend into a gradient like sunset. You can repeat this step another time if you feel like your gradient is not opqaue enough.   
 
Once again for this design I did apply a top coat before I did the design just to smooth out the gradient, then after I did the tropical design I did apply another top coat.   
 
 
Tropical Sunset Nail Design, Holo Taco
Tropical Sunset Nail Design
 
Tropical Design 
 
Once again I will not do a detailed description of this design, just a simple description.
 
Starting with the middle finger nail, the sunset, make a line in the middle of the nail and a sun on top of that line, then fill in your sun with yellow. Under the sun make a few small lines in the water, also make some more smaller lines in the sky. For a final touch add two small birds in the sky, by making two curved lines.

On the index nail make a oval for the land and add one palm tree on the small island. Also add a few lines under the palm tree for grass.
    
On the ring finger nail repeat the same steps like the index nail, just put the island and palm tree on the other side of the nail. For this nail also add a line in between the orange and yellow and some small lines in the water. Also for this nail add one small bird in the sky.  
  

Tropical Sunset Nail Design, Holo Taco
Tropical Sunset Nail Design
 
Once you have your bright tropical sunset design the way you like apply a top coat to seal in your design and to help it to last. 
 
 
Here is the practice design that I created. One thing I would have done differently on my final design on my nails is like my practice design I would have not had as much purple, I felt like I had to much purple in the sky and not enough blue for the water.  

Hope all of you enjoined this tropical design and hopefully soon we can all enjoy a nice tropical vacation and not just have it on our nails. 
 
Also check out last weeks tropical design as well.  Holo Sunset using Holo Taco Rainbow Polishes

See you next time for more nail fun!