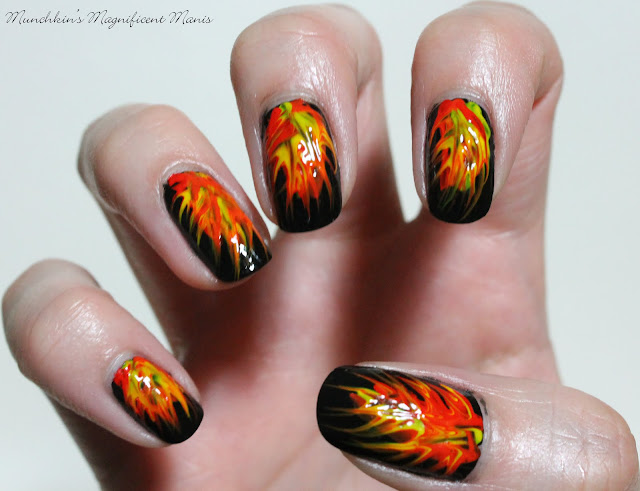
Fire Nail Design
Here is the nail polish, paints, and tools used for this fiery nail design:
Base and Top coat- CND Stickey Base Coat and Revlon Extra Life No Chip top coat.
I always use the same top and base, these work great for me so I see no reason to try anything new.
Nail polish- Sally Hansen- Hard as Nails- Black Heart. All you will need is a black polish.
Acrylic paint- red, yellow, and orange (I use red and yellow paint to make the orange.)
Nail art brushes- a thin detail brush and a thin stripper brush.
Other- small cup of water to clean off your nail art brushes.
Let's start this fiery hot nail design!
Fire Nail Design, left hand
As always start off by applying a thin layer of base coat to all of your nails, and then let it dry.
Once your base coat has dried, polish all of your nails black. I personally think Sally Hansen- Hard as Nails- Black Heart is one of the best black polishes out their, it covers in one coat like a black polish should, and it is only a $1.99!
Let the black polish dry and then we will start to create our flames.
Fire Nail Design, right hand
For the flames take three colors of paint yellow, red, and orange. With your detail brush with a lot of paint on the brush (you need a lot of paint to make sure the colors swirl together will), near the cuticle or tip of the nail (I started near the cuticle) make three lines of color right next to each other using the red, yellow, and orange.
Then with your stripper brush start to swirl the colors together from side to side, and also make sure to make points at the end that look like flames.
If needed you can always add more of one or more colors, to add more to the flame if you fell like the flames are lacking in color in certain areas. Their was a few times when I added a little more of each color, most of the time I felt like the flames needed more yellow.
Fire Nail Design, left hand
Fire Nail Design, right hand
Once you have your flames as fiery red, yellow, and orange as you want apply a top coat to seal in your design.
With any design that you use acrylic paint, make sure to apply enough top coat over the acrylic paint, so it does not look matte it looks shinny, this helps so your design will not rub off when you wash your hands or just use your hands in general.
Fire Nail Design- left and right hand, right hand design looks more like flames?
When I did this design on my right hand I actually like how it turned out better then on my left hand, I felt like the flames looked more flame like then on my right hand.
Here is a link to Suzie's from Nail Career Education YouTube channel, where I got the inspiration for this design. Red Hot Flaming Nails- Nail Career Education
Hope all of you enjoyed this nail design!
See you next time for more nail fun!


No comments:
Post a Comment