Saturday, December 31, 2022

Holo Taco- Magnetic Magic Collection Review

Hello everyone! Happy almost New Year! Today on the blog we will not be creating a new year's nail design, I just plain on doing something similar to what I did last year, black nails with glitter gradient, so their is no need to do another post on the same thing. Anyways today we will be taking a look at the newest collection from Holo Taco. It is a little over due (better late than never right?😀😉), this collection was released back in November, I always wear all of my polishes and nail art for a full week because I like to enjoy what I have on my nails. When I do a review it does take a little longer, I wear one polish on each hand and there is 5 polishes in the collection. This collection is still available on the Holo Taco website, you just can't purchase the collection box any more. 

Holo Taco- Magnetic Magic Collection Review

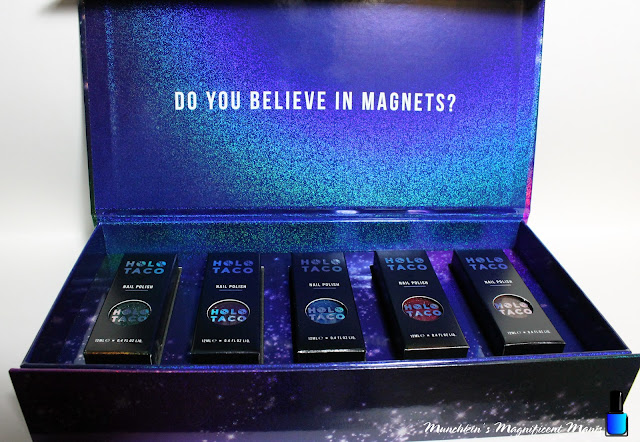
Let's take a look at the collection box.

Holo Taco- Magnetic Magic Collection Review

This collection like all/ most of the Holo Taco Collections have 5 polishes in it. 

Holo Taco- Magnetic Magic Collection Review

Holo Taco- Magnetic Magic Collection Review

Holo Taco- Magnetic Magic Collection Review

Holo Taco- Magnetic Magic Collection Review

Here are the polishes in the box and the magnet on the top of the box. There are two sides to the magnet the larger rectangle side and the small circle side. For all of the photos I used the large rectangle side. 

Holo Taco- Magnetic Magic Collection Review

Here are the polishes in the bottle with no magnetic effect and with the effect, this is how they are suppose to look on then nails.

Holo Taco- Magnetic Magic Collection Review

Holo Taco- Magnetic Magic Collection Review

Let take a look a these pretty polishes- 

All of these polishes are magnetic and need a special magnetic wand to activate the magnetic effect in the polish. When I purchased the collection it did come with a magnetic wand, also when you purchase the polishes, not the set you do get a wand as well.

*Also I just want to note that I will not be going over how to use these polishes, I will just be reviewing them. On Holo Taco's website and YouTube channel there is a lot of video's on how to use these polishes. 

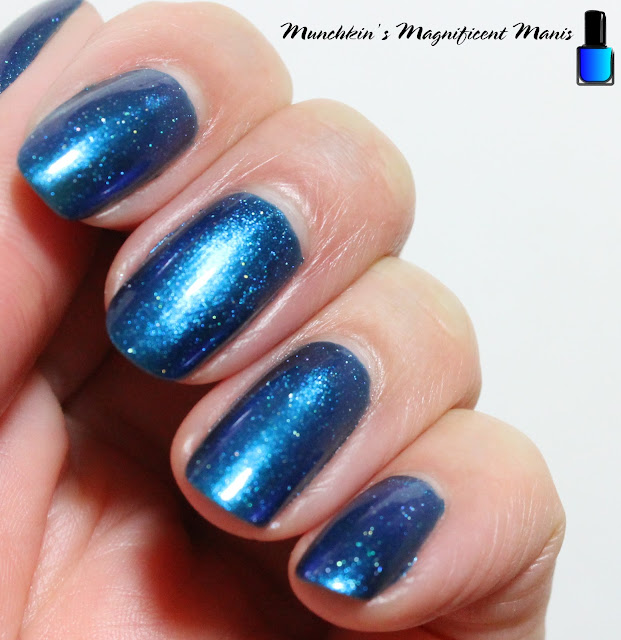
Holo Taco- Magnetic Polish- Twice In A Blue Moon
Holo Taco- Magnetic Polish- Twice In A Blue Moo

First we will start with Twice In A Blue Moon, this is described as a dark blue polish, that has an aqua blue shift, along with scattered holographic glitter in it. You can see the aqua blue shift when you use the magnet. 

For the first two polishes I was still trying to figure out how to use the magnet. I strongly suggest to follow what the Holo Taco website/ YouTube channel says to do, that way works the best. So with this polish and the purple one that was user error that it din't come out as well.

Holo Taco- Magnetic Polish- Twice In A Blue Moo
 
Holo Taco- Magnetic Polish- Twice In A Blue Moo

This polish is opaque in two coats, as stated above due to user error I was unable to really see the magnetic effect, just a little bit. I do plan on wear all of the polishes on my nails at once and I will add it to this post, so we will see if it looks any better. 


Holo Taco- Magnetic Polish- Queen's Curse

Holo Taco- Magnetic Polish- Queen's Curse

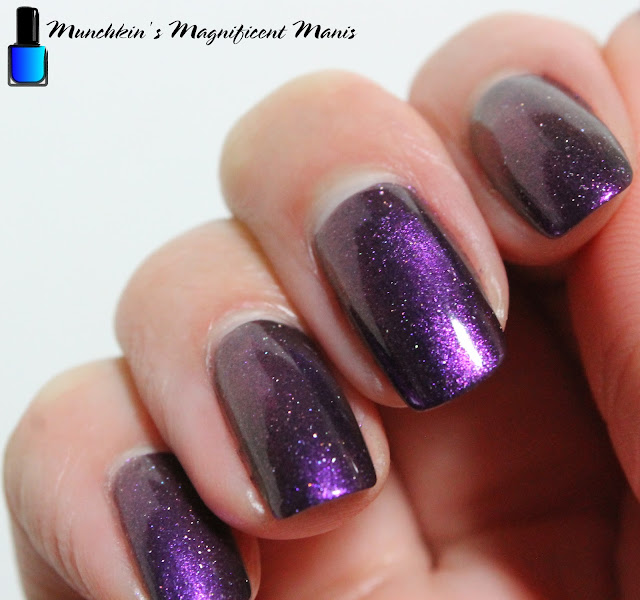
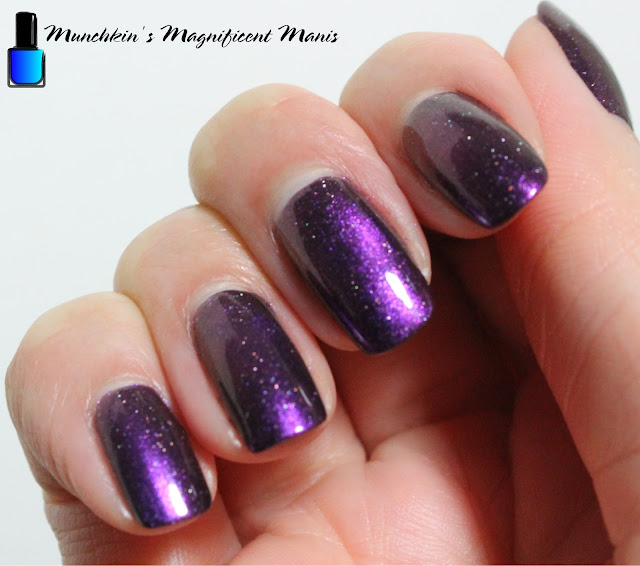
Next we have Queen's Curse, this is described as a dark royal purple with a lighter purple shift when you use the magnet, this also has scatter holo in it. 
 

Holo Taco- Magnetic Polish- Queen's Curse

Holo Taco- Magnetic Polish- Queen's Curse

This polish was also opaque for me in two coats. 
Just like the blue polish I had a little trouble with this one, so it is hard to see the magnet effect.

Holo Taco- Magnetic Polish- Love Spell

Holo Taco- Magnetic Polish- Love Spell

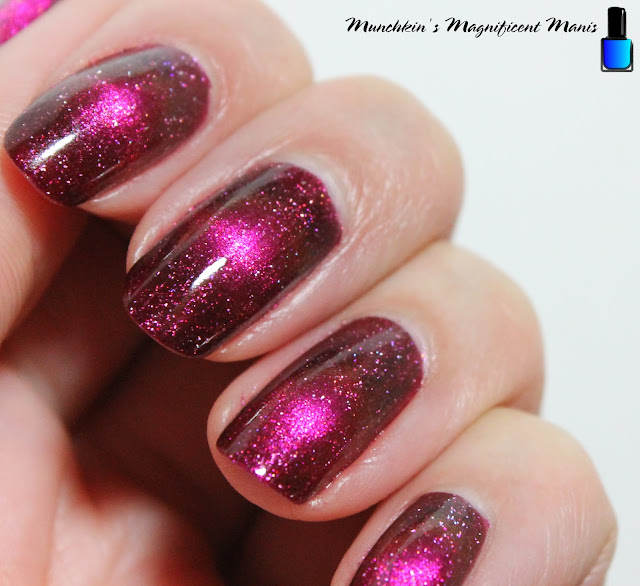
Now on to Love Spell, this is described as a red- magenta polish with a dark cranberry base, the magenta shift will show once the magnet is used. As all of the polishes this had scatted holo in it as well. 

Holo Taco- Magnetic Polish- Love Spell

Holo Taco- Magnetic Polish- Love Spell

This polish was also opaque in two coats. As you can tell from the photos this polish turned out and you can see the effect. 

Holo Taco- Magnetic Polish- Wicked Potion

Holo Taco- Magnetic Polish- Wicked Potion

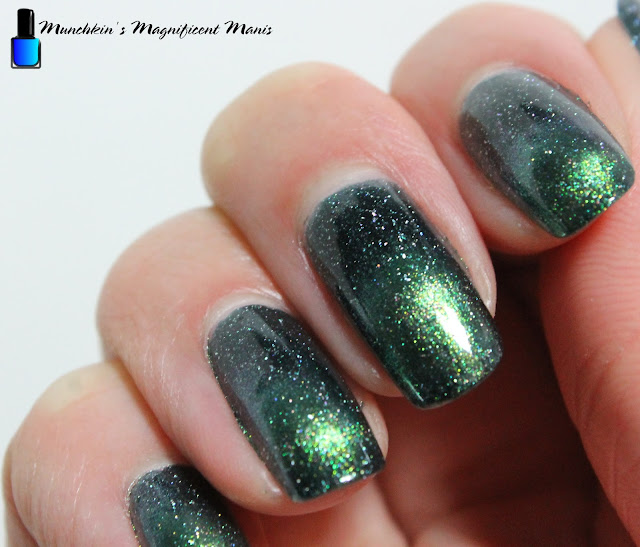
Next we have Wicked Potion, this is described as a dark hunter green polish, with a bright green shift that you can see once the magnet is used, this also has scattered holo in it. 

Holo Taco- Magnetic Polish- Wicked Potion

Holo Taco- Magnetic Polish- Wicked Potion

This polish was also opaque in two coats. This one also did the magnet effect very well, you can really see the shift in color. 

Holo Taco- Magnetic Polish- Fairy Tail

Holo Taco- Magnetic Polish- Fairy Tail

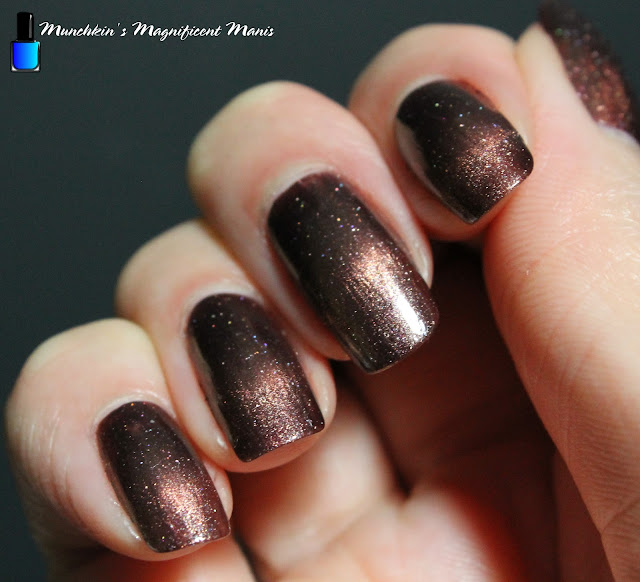
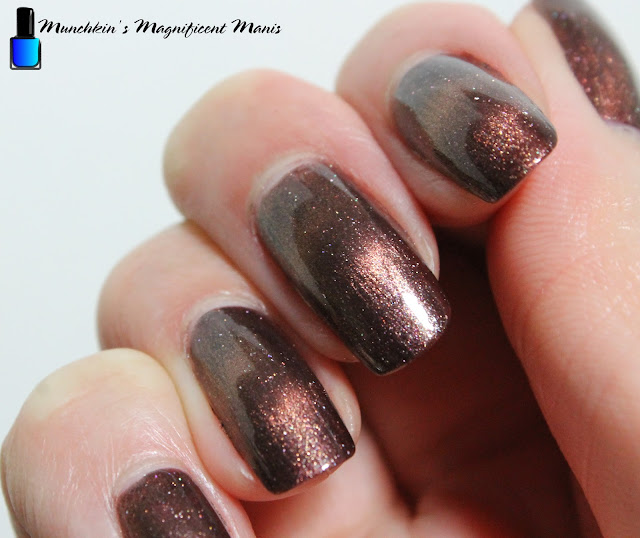
Lastly we have Fairy Tail, this is described as a brown polish with a bronze shift when the magnet is used. This has scattered holo in it as well.

Holo Taco- Magnetic Polish- Fairy Tail

Holo Taco- Magnetic Polish- Fairy Tail

This polish was also opaque in two coats. This polish I did the way that was instructed on the Holo Taco website, but I fell like the color shift was not as strong as the pink and green polish.


In conclusion I like all of these polishes, there was a little bit of a learning curve, or unlike me just follow the Holo Taco website/ YouTube channel. The polish that had the best effect with the magnet was Love Spell and Wicked Potion. As stated above I will try these all again on all of my nails at once, and I will add the photos to this post to see if I can get the effect to show more. I have see another review of this collection from a YouTuber that I am subscribed to and she also had a little bit of trouble having the magnet effect to show up really well.

These polishes are all still available on the website, just individual, the collection box is sold out.

https://www.holotaco.com/pages/magnetic $15.00 USD for each polish. 

The collection cost $75.00 USD.

Hope all of you enjoyed this review of the Holo Taco Magnetic Magic Collection! Also have a safe and Happy New Year 2023!! 

See you next time for more nail fun! 

Wednesday, December 21, 2022

Merry Merry Christmas- Christmas Nail Design

Hello everyone! Merry Christmas and Happy Holidays! Today on the blog we will be create a cute Christmas nail design for the holidays. This design will have a Rudolph the red nose reindeer, Christmas tree branches and a gingerbread man. I don't know about all of you, I can't believe that it all ready Christmas and almost a new year, time just goes way too fast! 

Christmas Nail Design

Here are the polishes and nail art tools used to create this Christmas nail design: 


Base and top coat- CND Stickey Base Coat and CND Super Shiney Top Coat.

Polishes- China Glaze- Chalk Me Up!, Sinful Colors- Cinderella, Colors by llarowe- Arturo, and China glaze mini- Grinch- Resting Grinch Face.

Acrylic paint- Brown, black, red, green and white.

Nail art brushes- thin detail and stripper brush, and a large dotting tool.

Other- a cup of water to clean off your nail art brushes. Also. toothpick to place the glitter on the tree branches. 

Christmas Nail Design

Apply base coat to clean nails, let that dry.

Polishes-

Thumb, index, middle, and pinky- a light blue and a light blue shimmer polish.
(I first applied a cream light blue polish and then a light blue shimmer polish, just to get the light blue to be more opaque.) 

Ring finger nail- a light blue Holographic polish.

Let that dry.

Christmas Nail Design

Christmas Nail Design

Christmas tree branches on the index, middle and ring finger nails-

First we will start off with the more simple part the tree branches, first take a thin stripper brush with brown paint on it on each of the nails (index, middle and ring) make a curved line.

Then with that same brush, take a green paint and make thin lines on the top and bottom of that brown line, that are close together.

Once the green lines are dry, make a few white line for some snow.

For a final touch take some rainbow glitter polish and dab a few of those glitter pieces on to the branches. I used a tooth pick of this. 

Christmas Nail Design

Gingerbread Man on the ring finger nail- 

Now on to the Gingerbread man, take a thin detail brush with brown paint on it, make a circle near the cuticle, make to oval shapes on the side for his arms, then two more oval shapes for his legs/feet. You will need to go over this a few time to be opaque.

Once your gingerbread man shape has dried we can add his details. Take a large dotting tool with white paint on it and make two dots in the center of the circle/ his head. Then with a detail brush, also with white paint on it make a small dot for his nose, then take a thin striper brush and make small curve for his smile.

Now on to the Gingerbread's other features, For the bow take the same striper brush with white paint on it and make a line going around his neck, then make two loops in the center of that line and then make two lines going down from those loops. 

On both of his arms and legs make a small wavy line. Lastly make two dots for buttons. 

Christmas Nail Design

Reindeer on the thumb nail- 

Lastly we will make a Rudolph the red nose reindeer. Take you detail brush with brown paint on it first make a curved line near the center of the nail and then make an oval shape for his head, then make tow triangles on each side of the head for his ears. 

For his antlers make two curved line on the top of the head, make a few smaller lines on those lines for the antlers. 

For his face take a detail brush with black paint on it a make two small ovals for his eyes and then with red paint make a large oval for his bright red nose.  

For a final touch take your dotting tool with red and then green, make few dots near Rudolph's antlers. 

Christmas Nail Design

Once your nails are Christmas ready, apply a topcoat to seal in your design and to help it to last all Christmas. 


Here is my practice version, I actually like how the reindeer turned out better on the practice, on the final design I made his head a weird shape. 


Hope all of you enjoyed this Christmas nail design! Have a safe and Happy Holidays! Merry Christmas and Happy New Year 2023!!

See you next time for more nail fun! 


Saturday, December 3, 2022

Cutest in the Galaxy- Grogu Nail Design

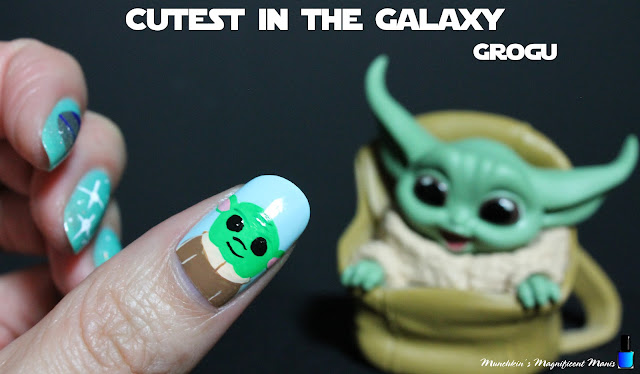
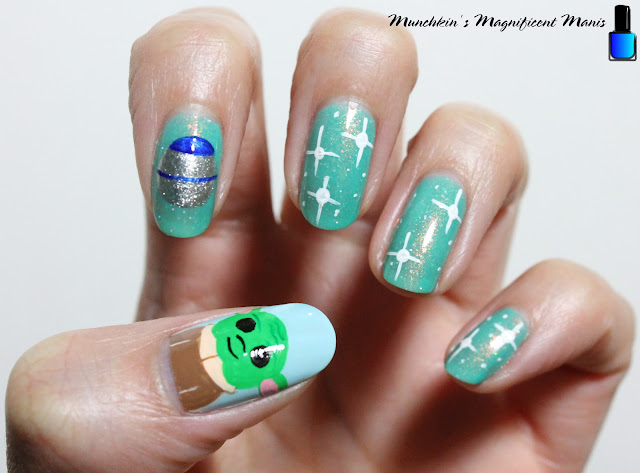
Hello everyone! Today on the blog we will be creating a cute Grogu, The Child (Baby Yoda) nail design. This design I decided to do for fun, The new season of the Mandalorian does not start until March 2023. But why not create a cute Grogu design now. I have created another Grogu design before we knew what his name was, before on the show he was just know as the child, or by fans Baby Yoda. From the very being I fell in love with this cute little dude and my love for Grogu just keeps growing, I mean how can you not love that cute face! 🥰

Grogu Nail Design

 Here are the polishes and nail art tools used to create this cutest in the galaxy nail design: 


Base and top coat- CND Stickey Base Coat and CND Super Shiney Top Coat.

Nail polishes- China Glaze- Chalk Me Up!, Glam Polish- The Child- Mando Collection, and Sally Hansen- xtreme wear-Celeb city.

Acrylic paint- Green, yellow, white, black, blue, red, peach, and brown.

Nail art tools- detail and striper brush, and a large dotting tool.

Grogu Nail Design

Grogu Nail Design

Apply a base coat to clean nails.

Let that dry.

Polish- 

Thumb- Light blue polish (China Glaze- Chalk Me Up)

Index, Middle, Rings and Pinky- Shimmery light green polish (Glam Polish- The Child) of course we have to use the Grogu polish. 😊

Let that dry. 

Grogu Nail Design
Grogu Nail Design

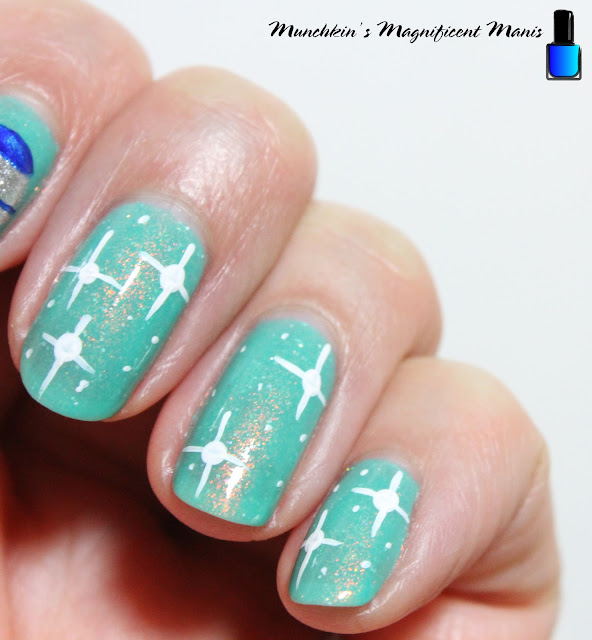
Stars on the Middle, Ring and Pinky Finger Nail- 

First we will start with the easier part the stars. Take a dotting tool with white paint on it make two dots on the pinky and ring finger, and then three dots on the middle finger, or do as many as you would like for the stars.
 
Then take a striper brush with white paint on it, on the dots that we just made make two lines going through that dots for your stars. 

Lastly for our stars we will make very tiny dot on random parts of the nails. 

Grogu Nail Design

Grogu Nail Design

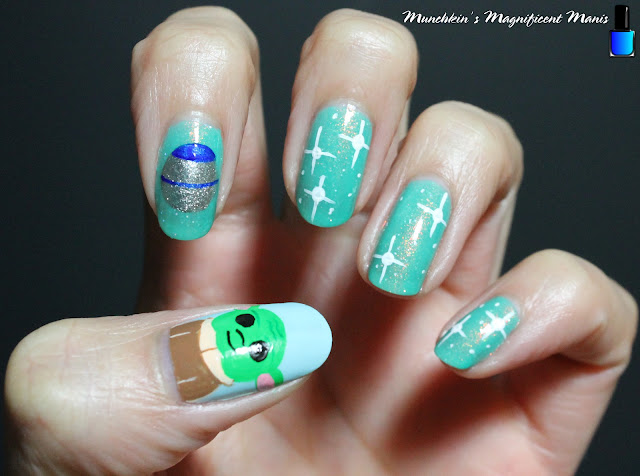
Grogu's Ball/ Razor Crest Shifter Knob Design on the Index Nail- 

Next we will be making Gorgu's Ball or the Razor Crest Shifter knob that Mando gave Grogu from his ship. Grogu loves to play with this "ball" so I thought it would be good to add this to the design.

For Grogu's ball, take a detail brush with silver polish on it make a circle in the middle of the nail. You may need to go over this a few time to be opaque. 

You will need to let this dry before adding more details.  

Once the silver ball has dried. Take a striper brush with blue paint on it make a line in the middle of the ball. Then with a detail brush with that same blue paint, make a half circle on the top of the silver circle. 

Grogu Nail Design

Grogu Nail Design

Grogu On the Thumb Nail- 

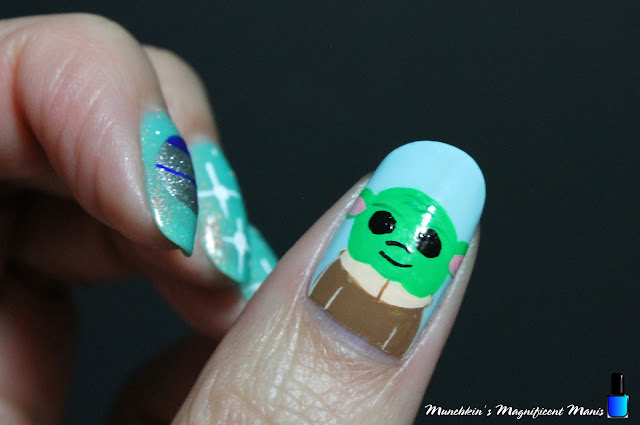
Now we will make the star of the design, Grogu. 

For Grogu I did need to mix some paint to try and make his color, I still feel like Grogu should be a lighter green, it would be best to just have a light green, but this was what I had. The paints I used is a Darker green, yellow, and white paint mixed together. Also keep a little bit of dark green for the lines on his face.

For Grogu's head make a large circle in the middle of the nail, for the chin make three curved lines in a M shape. Fill in his head, you will need to go over this a few times.

Grogu has very large ears, so will will only show a little bit of the ears. For the ears just make a half oval that will go right off the sides of the nail, then for the inner part of the ear just add a little bit of pink (I needed to mix red and white for the pink.)

Next Grogu's robe, we will first make the sherpa part that is around his neck. We will first start off with a peach colored paint on a detail brush. This is a little hard to describe, but I would say when it comes to the shapes two rectangles with a rounded sides.

For the rest of the robe take a brown paint on the same detail brush, make a large square shape and the two curved lines on the sides for his arms. 

As an added detail I did outline his robe with peach and brown paint, if this step is a little too hard you can always skip this step.

Grogu Nail Design

Lastly we will make Grogu's cute little face. Take your detail brush with black paint on it and make two large circle for his eyes, then fill that in.

Make a curved line for his nose, then another small curved line for a little smile.

Then for lines on his face (He may be a baby in species, but Grogu is actually 50 years old) take a thin striper brush with the dark green paint, make two curved lines for the eye brows and then two squiggly lines on his forehead.   
 
Grogu Nail Design
Grogu Nail Design

Once your nails are the cutest in the galaxy apply a top coat to seal in your design and to help it to last, though all of your space adventures. 

Also I have create a darker/ with black polish Grogu, the child design, If you have not checked that out here is a link to that deign. 

Here is the link to my first design: Baby-Yoda-Child-nail-design


Hope all of you enjoy this nail design! 

See you next time for more nail fun!