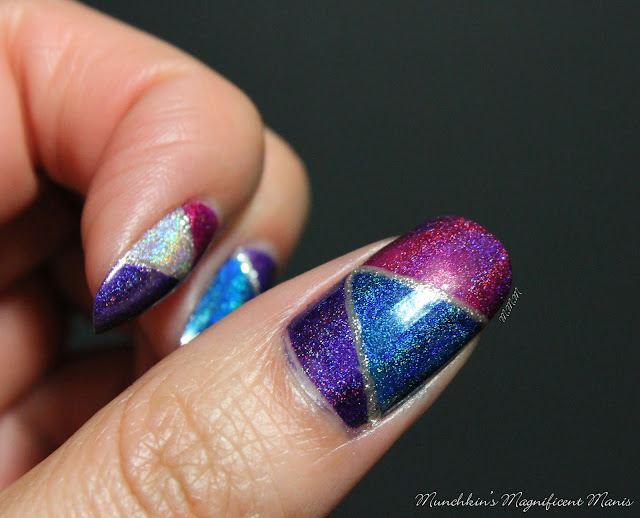
Hello everyone! Today we will be creating a pretty holographic color blocking nail design. In theory this design is simple, but also kind of tricky to do as well, if you ended up doing a design that I did on my ring finger nail, then yes this design can be a little hard. 😁
Here are the polishes and nail art tools used to create this color blocking design:
Top and base coat- CND Stickey Base Coat and Revlon Extra Life No Chip top coat.
Polishes- Holo Taco- Blue Freezie- Rainbow Collection, Holo Taco- Purple Slushie- Rainbow Collection, Holo Taco- Magenta Jelly- Rainbow Collection, Color Club Halo's- Harp on, and Kiss nail art stripper- Silver.
Other- stripping tape/ nail art tape.
Apply Base coat, let that dry
This design does not require any base polishes at first.
First we will need to apply stripping tape/ nail art tape to our nails. For the index and middle finger nail I made an X shape on the sides of the nails using two pieces of tape.
For the polish, I polished each area with the brush that came in the bottle (carefully) in each section.
Then before the polish dries quickly take off the stripping tape/ nail art tape, do not wait for the polish to dry! This area will not have polish, so for this area take a nail art polish or just some silver polish and carefully go over those lines, for the outline.
For the thumb and pinky nail place the tape into a V shape on the side of the nails, once again using two pieces of stripping tape.
Repeat the same steps as you did with the index and middle nail.
Now for the more complex nail the ring finger nail. When I was practice this design I was going to try and make this nail a little more simple, but as you can tell I didn't end up doing that. 😄 Anyways for this nail I think I place six pieces of tape on this nail, to create a very random design.
As always you don't have to create this same design on you ring finger nail, you can always go much more simple with less tape. If you choose to do this same design it was a little bit hard to polish into each little area with your nail polish brush, so if you do have some trouble you can use a small nail art brush to get into each area.
Also once again repeat the same steps again for polishing and taking off the nail art tape.
Here is my practice design where my ring finger is not as complex? This took four pieces of tape to make.
Once you have your holographic color blocking nail design the way you like apply a top coat to seal in your design and to help it to last.
Hope all of you enjoyed this this color blocking nail design!
See you next time for more nail fun!


Gorgeous :-D
ReplyDeleteThank you :)
ReplyDelete