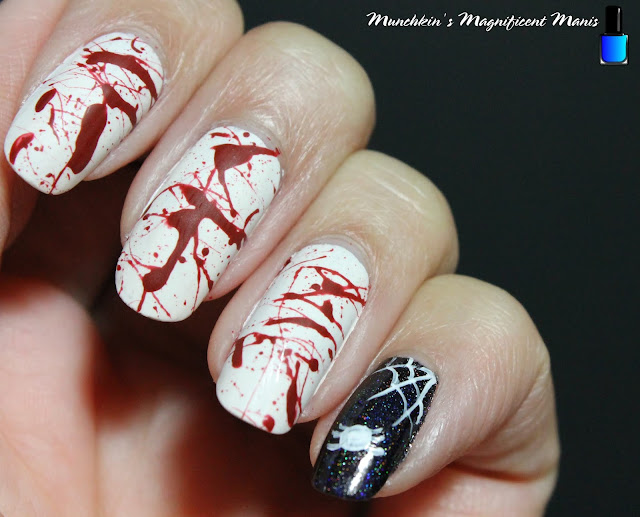
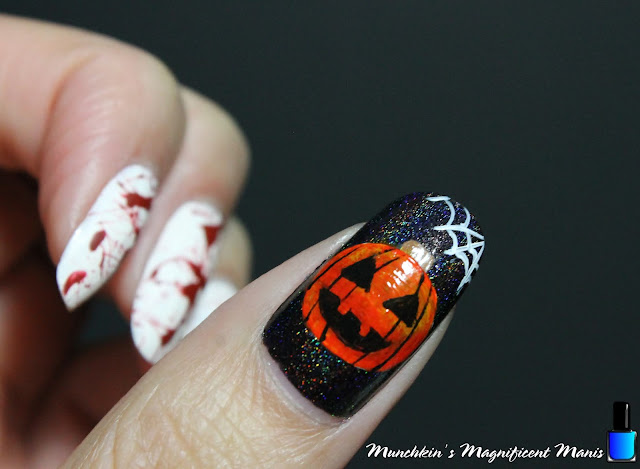
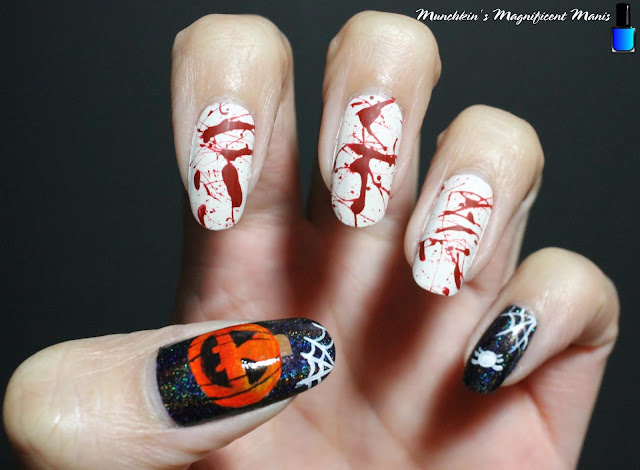
Hello everyone! Happy Halloween! Well early Halloween. Anyone have any plans for halloween this year? Not me, the most I do is of course create a fun nail design and eat candy, that pretty much it. Anyways this year we will be kind of recreating a design that I created back in 2018, with a few of the nails having a fake blood splatter on them, and of course changing it up by adding a pumpkin on the thumb nail and a spider web on the pinky nail.
Here are the polishes and tool used to create this spooky/ gross nail design:
Base and top coat- CND Stickey Base Coat, Revlon Extra Life No Chip top coat, and - OPI- Matte Topcoat.
Polish- Holo Taco- Electrostatic- Electric Holo Collection, and Essie Coconut Cove.
Acrylic paint- red, black, yellow, white, and brown. (mixed red and yellow to make orange.)
Nail art brushes- thin detail and stripper brush, and a medium flat brush.
Water to clean up your nail art brushes and the big mess you will make on your fingers.
Apply a base to clean dry nails.
Let that dry.
Polish-
Thumb and pinky- black holographic or creme polish
Index, middle, and ring- an off white polish.
Let that dry.
Fake Blood Splatter on the index, middle and ring finger nails:
Now time for the messy part!
*For this part use paint and not nail polish! Also wait to polish your other hand last, this step is very messy and your other hand will be all red at the end! Also make sure to have something down on your surface that you do your nails, I use a nail mat.*
First we need to make our fake blood take a red paint and add the smallest amount of black to it, or until your red looks blood like. This time I added a little more black to make the red look darker, last time it was a little to bright red.
Then water down your red paint/ fake blood, so it is very watery! this will make it easier to splatter. Take a flat brush and make sure your brush is soaked with the red paint/ fake blood, then with your other hand and one finger, flick your brush at your nail to make the blood splatter, your will need to do this step a few time to have the right amount of splatter.
Spider Web and Spider on the pinky nail:
For the spider web make three long lines on the right hand corner of the cuticle. Then staring from the corner, make a curved line in each section.
For your little spider make a large circle and fill that in with white paint for the body. Then make three curved lines on each side of the circle for the legs.
Pumpkin and Spider Web on the thumb nail:
* I always jump around from nail to nail when doing nail art that way you are not setting their waiting for each part to dry.*
On the thumb nail we will make the pumpkin first and then the spider web. First make a white oval, with a small square at the top, in the middle of the nail. Let that dry, then fill in the white oval with orange, you will need to do this a few time to be opaque. To add some light to the top of the pumpkin, add a little bit of yellow paint to the top.
Let that dry. Then add a few curved liens to your pumpkin. Also fill in your stem/ small square at the top of your pumpkin with brown paint.
For the pumpkins face make two triangles, then fill that in with black paint, then make a curved line for his smile and and some squares for teeth, fill that in as well.
Once your nail are Halloween ready apply a top coat to seal in your design and to help it to last through all of your trick or treats. Also on the nails that we did the blood splatter apply a matte top coat, after the gloss top coat has dried.
Hope all of you enjoyed this Halloween nail design. I enjoyed creating a design similar to this a few years ago and just wanted to do a similar design again, with of course some differences. Even though this design is very messy!
Hope all of you have a bloody good Halloween!
See you next time for more nail fun! 👻 🎃


