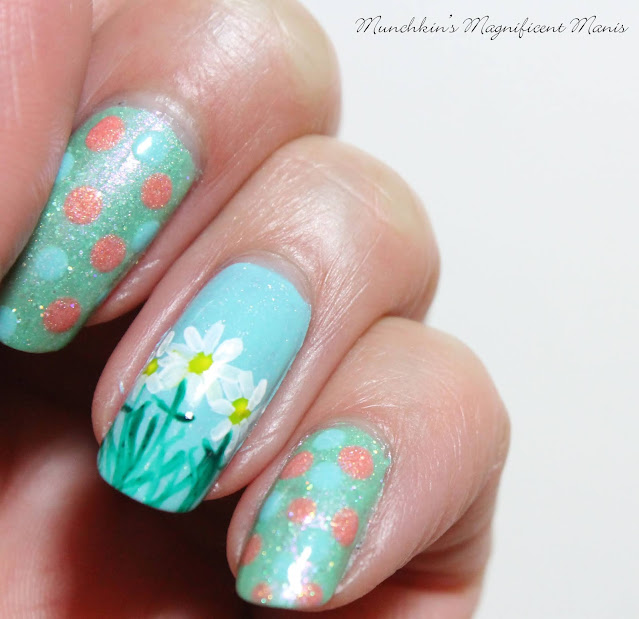
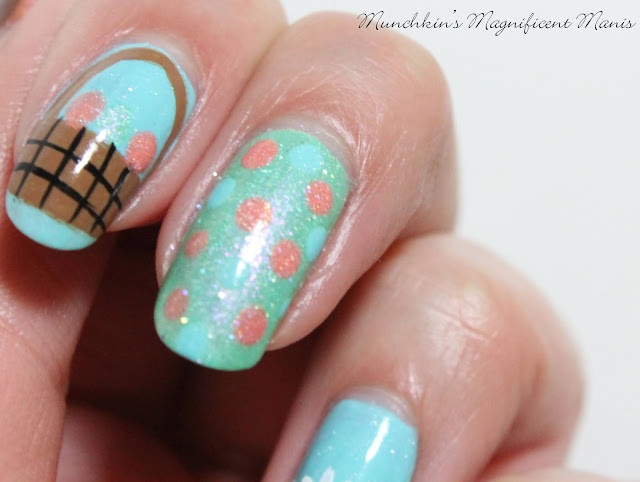
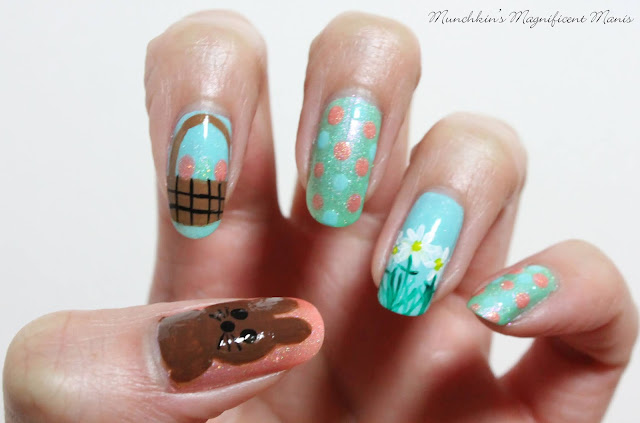
Hello everyone! Happy Easter! Anyone have any fun plains this year? This year we don't have anything planned, even though things have been opening up where I live, unlike last year we won't be doing anything, unless you count eating Easter candy. Anyways for this Easter nail design we will be creating a chocolate bunny on our thumb, an Easter basket, some dots and some daisy on our nails, for a yummy Easter treat and spring nail design.
Here are the polishes and nail art tools to create this Easter nail design:
Base and top coats- CND Stickey Base Coat, Revlon Extra Life No Chip top coat, and OPI- Matte Topcoat for your bunny.
Polishes- Glam Polish Experiment 626- I'm sorry I bit you and pulled your hair..., Glam Polish Experiment 626- Nobody gets left behind or forgotten, Picture Polish- Salt Water- Nailstorming, and Nicole by OPI- That's Just Plain Nuts!
Arcylic paint- green, yellow, white, black, and brown.
Nail art brushes- thin stripping and detail brush, and a large dotting tool.
Small cup of water to clean of your nail art brush, and a little bit of acetone to also clean off your nail art brushes.
Apply your base coat an let that dry.
Polishes-
Thumb- a glitter pink polish.
Index and ring finger- a glitter light blue polish.
middle and pinky finger- a glitter green polish.
Let that dry.
Dots on the Middle and Pinky Finger Nails-
We will start off with the simple nails first, using the other base colored polishes for your dots, the pink and blue, dip your dotting tool into those polishes one at a time and randomly dot that on the nails.
Daisy's on the Ring Finger-
For your flower scene, first make some grass on the tip of the nails with a thin stripper brush, make different sizes of green lines. Then make three small yellow dots in the middle of the nail, then with a detail brush make small lines around that yellow dot for your daisies petals. Lastly make a some lien for your stems of your flowers and some leaves.
Easter basket with eggs on the Index Nail-
Take a detail brush with brown paint on it, near the tip of the make a small rectangle shape and fill that in. For the handle make a arch that attached to the rectangle, then take some black paint on a stripper brush and make some lines to make small boxes on the basket.
For an added touch add a few eggs in your basket with a dotting tool dipped into the pink, green and blue polishes you used.
Chocolate Easter Bunny on the Thumb Nail-
Lastly for the Chocolate Bunny make a large circle for the head with brown polish and then a half oval for the body, with to arms on the side, then add two ears on top of the bunnies head. Once your bunny is dry make two black dots and a small dot under that for his eyes and nose, then make three lines on each side of the nose for whiskers.
As you cans see from the first photo I actually forgot to matte topcoat the bunny to give the bunny that chocolate look, so you can do that to make your bunny look for chocolate or leave him shinny.
Once you are done apply a glossy topcoat to all for your nails except for your bunny, unless you want your bunny to be shinny.
Hope all of you enjoyed this Easter nail design!
See you next time for more nail fun!


