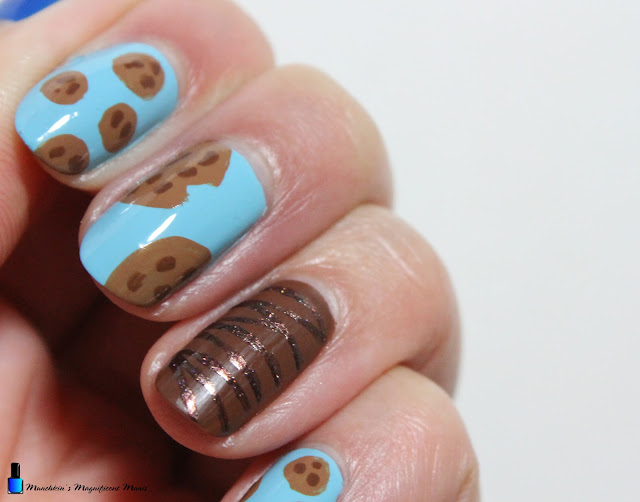
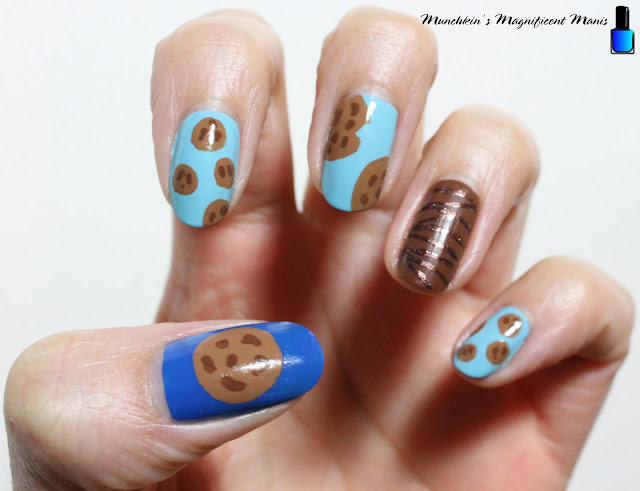
Hello everyone! Today on the blog we will be creating a fun cookie nail design to be specific a chocolate chip cookie nail design. I love all things chocolate and dessert and I just thought it would be fun and cute to make a cookie nail design. If you are a cookie monster just like me then this nail design is just for you.
Here are the polish and nail art tools used to create this cookie nail design:
Base and top coat- CND Stickey Base Coat and CND Super Shiney Top Coat. OPI- Matte Topcoat (for the chocolate look on one nail.)Polishes- Zoya- Splash- Maren, Finger paints- Tiffany Imposter, Nicole by OPI- That's Just Plain Nuts!, and Holo Taco- Fairy Tail- Magnetic Magic Collection.
Acrylic paint- Brown.
Nail art brushes- Thin detail and stripper brushes.
Other- Water to clean off nail art brushes.
Apply a top coat, let that dry.Polish-
Thumb- a dark blue (Zoya- Maren)
Index, middle, and pinky- a light blue (Finger paints- Tiffany Imposter)
Ring finger nail- a brown cream polish (Nicole by OPI- That's Just Plain Nuts!)
Let that dry.
* Also apply a Matte top coat over your brown polish on the ring finger nail. *
Large Cookie on the Thumb Nail:
First we will start off with the large cookie on the thumb nail. Take a detail brush with brown paint on it and make a large circle on the middle of the nail and fill that in, you will need to go over that a few times to be opaque.
When that is dry take the brown polish that you used on your ring finger nail and we will make the chocolate chips. With that same clean detail brush with a small amount of brown polish on it make some random shapes for your chocolate chips.
The nice part of this design is the cookie doesn't need to be a perfect circle along with the chocolate chips. 😊
Small cookies on the index and pinky nails:
Next we will make some very small cookies on the index and pinky nail. Once again take your small detail brush with brown paint on it and make a few small circles, on both nails I made four circles. Some of the circles I did make half circles.
Then repeat the same steps that you did for the large cookie just for the smaller cookies.
Half Cookies on the Middle Finger Nail:
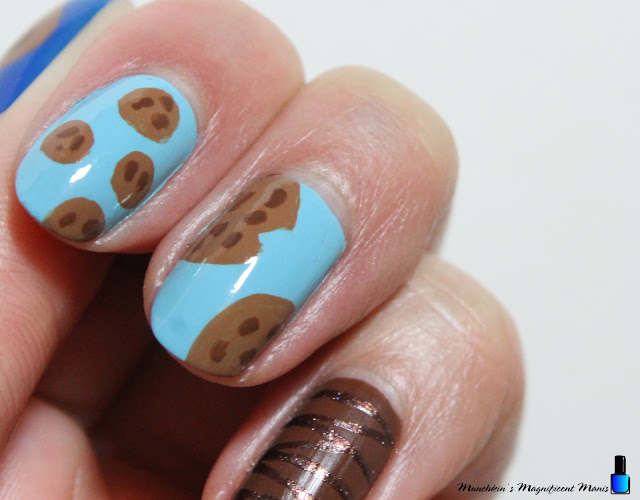
For the middle finger nail we will make one cookie that someone bit and one half cookie.
For our half eaten cookie make a large half circle near the cuticle, the way I made this was I made the half circle fill it in and then wiped away the area that I made the bitten part and made a triangle shape for the bit mark.
Once again repeat the same steps you did before for the other cookies.
Chocolate Ring Finger Nail:
On your ring finger nail that has the matte top coat, this gives a nice chocolate look to it. We will now add a chocolate drizzle on it. Take a more shimmery brown polish (I used Holo Taco- Fairy Tail) and with a stripper brush make some random lines all over the nail.
Once your cookie nails are good enough to eat, apply a top coat to seal in your nails and to help them last.
Hope all of you enjoyed this cookie nail design!
See you next time for more nail fun!


No comments:
Post a Comment