Pages

Thursday, December 30, 2021

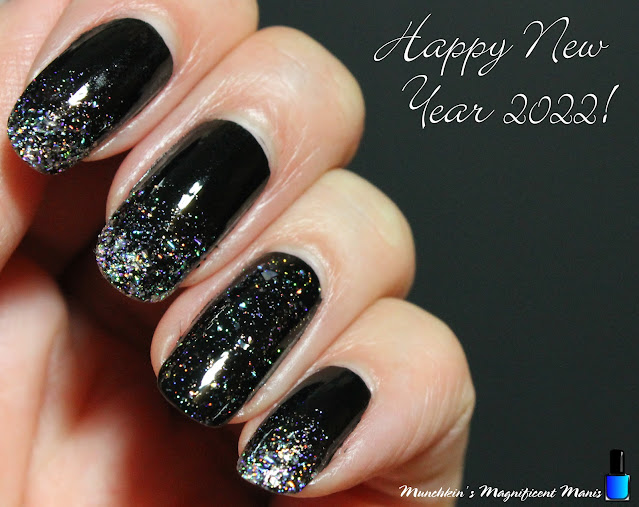
New Year 2022- Glitter Gradient Nail Design

Hello everyone! Happy New Year 2022! (almost New Year) I still can't believe that I am saying that, time is just going so fast. So for this year we are doing a New Year same Munchkin design because this design is very similar to the one I did last year and the year before, a glitter gradient using a silver holo polish and not gold, that really is the only difference. I just find doing black nails with a glitter gradient to be time less and a great class look for New Years. Plus I did use two of the topper from the Holo Taco toppers collection, which was part of the very first collection, which I just got not to long ago.

Glitter Gradient Nail Design, New Years

Here are the polishes and nail art tools used to create this glitter gradient for New Years:


Base and top coat- CND Stickey Base Coat and  Revlon Extra Life No Chip top coat.

Polishes- Sally Hansen- Hard as Nails- Black Heart, Holo Taco- Scattered, and Holo Taco- Flakie.

Other- Makeup sponge for the glitter gradient. 

Glitter Gradient Nail Design, New Years

Apply a base coat.

Let that dry.

Polish all of the nails with a black creme polish.

Let that dry.

Glitter Gradient Nail Design, New Years

Glitter Gradient Nail Design, New Years

For this glitter gradient we will be using two types of holographic glitter polish, a flakie holo (larger holo glitter pieces) and a scatter holo (smaller more sparse glitter.) 

For the glitter gradient we will be doing this on all of the nails except the ring finger.

First take your silver flakie holo polish and polish that a little bit on the tip of the nail. Then take a makeup sponge, polish that same flakie polish on that sponge and dab that on the tips of the nail, focusing most of the glitter on the tip of the nail.

Repeat this for all four nails.

Then take your silver scattered polish and polish over the flakie and going a little past the glitter that you dabbed on to give a gradient effect. Basically larger glitter more at the tip and small glitter near the middle of the nail, for that gradient look. 

Glitter Gradient Nail Design, New Years

Then for the ring finger nail, polish the whole nail with both the flakie and scattered silver holo polish.

Glitter Gradient Nail Design, New Years

Their you have it a beautiful silver holo glitter gradient, that looks great for the new year, kind of like the ball that drops in New York ever year at midnight? minus the holo glitter, I'm pretty sure the ball is just sliver with lights on it. 

Also don't forget the apply a top coat to add more of shine and to help your polish to last well into the new year. 

Hope all of you enjoyed this glitter gradient design.

Have a safe and Happy New Year 2022!

See you next year for more nail fun! 

Wednesday, December 22, 2021

Merry Christmas-Holographic French Mani

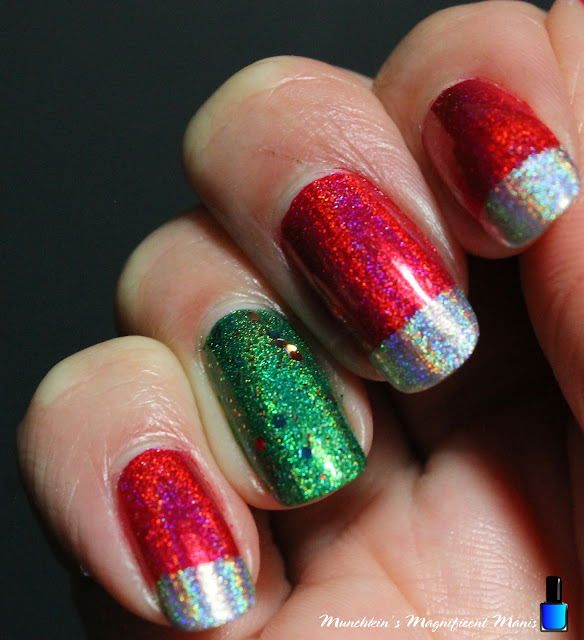
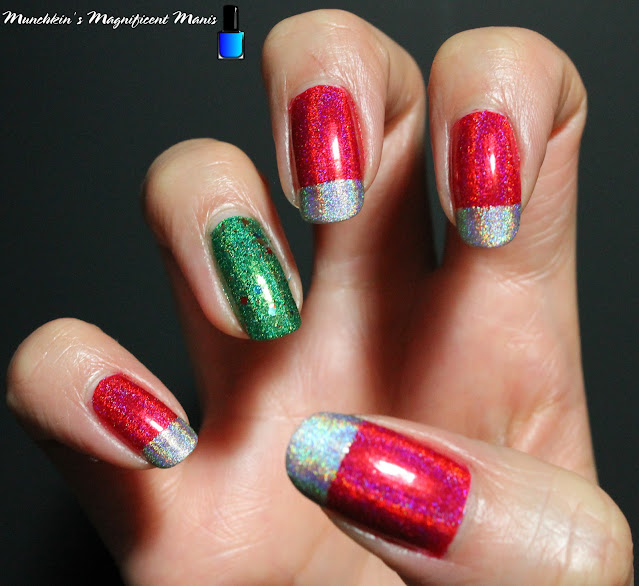
Hello everyone! Merry Christmas and Happy Holiday's! I can't believe that it is that time of year again and the this year is almost over with! Today on the M.M.M big we will be doing a classic Munchkin mani design, that I use to do back when I first started growing my nails out in high school, for the holiday's. The Mani we will be doing to day is a French manicure with a holiday twist, using red holo polish, gold for the tips on the left hand, and then silver holo on the tips for the right hand. The only different between this mani and the one I use to do years ago, is I used a creme red and just a gold or sliver. 

Holographic/ Christmas French Mani

Here are the polishes used to create this Holiday French mani:


Base and top coat - CND Stickey Base Coat and Revlon Extra Life No Chip top coat. 

Polishes- Holo Taco- Red Licorice- Rainbow Collection, Holo Taco- Green Taffy- Rainbow Collection, Revlon- Gold Coin, Fun Lacquer- Million Dollar Dream, Holo Taco- Circuit Breaker- Electric Holo Collection, and China glaze mini- Grinch- Resting Grinch Face.

*No nail art tools required!*

Holographic/ Christmas French Mani

Holographic/ Christmas French Mani

Holographic/ Christmas French Mani

First apply a base coat.

Let that dry.

Polish all of the nails except the ring finger nail with a red holo polish, going almost all the way up the nails stopping almost near the tips of the nails. 

For the ring finger nail, polish that with a green holo polish, then once that is dry using a colorful glitter topper polish over that green, this will give the nail a Christmas tree look.

For the left hand we will do the French mani with a gold polish. When I do French mani's I just follow the nail line with the polish brush, starting from one side, to the other side and meeting in the middle.

For an added holo touch apply a gold holo glitter polish right over the gold polish on the tips of the nails. 

Holographic/ Christmas French Mani

Holographic/ Christmas French Mani

Holographic/ Christmas French Mani

Now for the right hand, do the same thing, this time use a silver holo polish on the tips of the nails. 

As with any of my designs, for this you can do all of the tips of your nails with gold or silver, or mix it up and do one hand gold the other silver. 

Holographic/ Christmas French Mani

Holographic/ Christmas French Mani

As with any mani apply a top coat to seal in your design to help it last and to shine all Christmas long. 

Hope all of you enjoy this Christmas French mani! 

Merry Christmas and Happy Holiday's!

See you next time for more nail fun! 
Tuesday, December 14, 2021

Happy Holiday's 2021- Holiday Nail Design

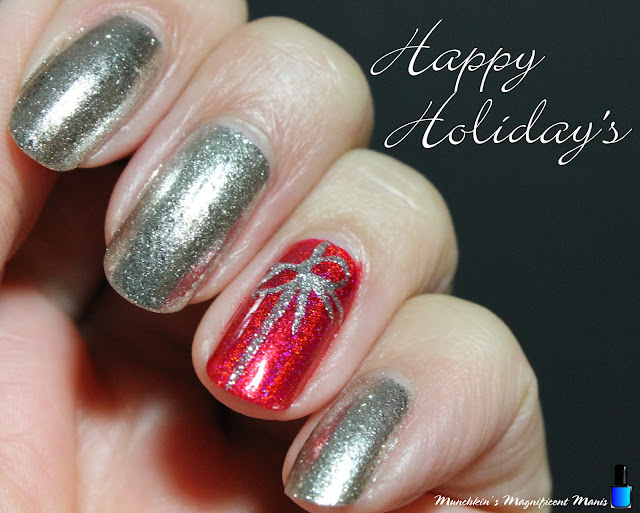
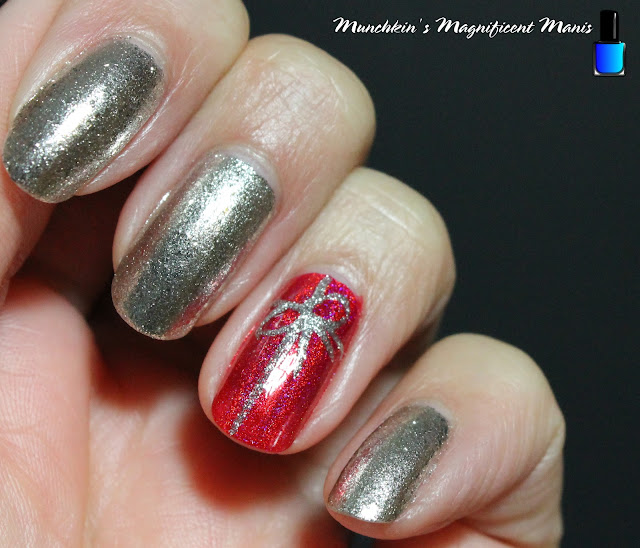
Hello everyone! Happy Holiday's to all of you! Today we will be creating a simple Holiday/ Christmas nail design, with a Christmas tress and a gift on our nails. 

Holiday Nail Design


Here are the polishes and nail art tools used to create this simple holiday nail design-


Base and top coat - CND Stickey Base Coat, Revlon Extra Life No Chip top coat, and OPI- matte topcoat.

Polishes- Holo Taco- Gift Receipt- Metallic Foil Collection, Sally Hansen- Hard as Nails- Black Heart, Holo Taco- Red Licorice- Rainbow Collection, Holo Taco- Scattered, Color Club- Halo's- Crystal Baller, Kiss nail art striper- Silver, and Snowman rainbow glitter- frosty.

Nail art brushes- thin stripper and detail brush. 

Water and acetone to clean off your nail art brushes, and a toothpick, to pick up glitter to put on the nails. 

Holiday Nail Design

Apply a base coat. 

Let that dry.

Polish- 

Thumb- Black creme polish, with a matte topcoat. First apply your black polish, then a clear topcoat and then a matte topcoat. 

Index, middle and pinky  finger nail- A silver foil polish (Holo Taco- Gift Receipt.) 

Ring finger nail- Red holographic polish (Holo Taco- Red Licorice.)

Let that dry.

Holiday Nail Design

On the index, middle and pinky nail, leave those nails as is with just the silver foil polish, we will not be doing nail art on those nails, just the thumb and the ring finger nail.

Holiday Nail Design

Holiday Nail Design

Gift on the ring finger nail: 

For the gift, we will be making on the ring finger nail all we need to do is make a bow. 

Take a silver stripper polish and make a T shape on the nail. Then make one loop on each side of the middle of the T. 

Then lastly make to lines coming down from those to loops. Then you have your gift. 

Holiday Nail Design

Glitter Christmas Tree:

On your matte black thumb nail, take a detail brush with a scattered holo polish (Holo Taco- Scattered) make a a triangle for your tree shape. 

Then take a thin stripper brush with a blue holo polish on it (Color Club- Halo's- Crystal Baller) and make a zig-zag line going up the nail.

Lastly take a toothpick with some rainbow/ colorful glitter on it (Snowman rainbow glitter- frosty.) and place some on the zig-zag line, also place some at the top of the trees as well.

Holiday Nail Design

Once your nails are Holiday ready, apply a glossy top coat to all of the nails, except the thumb nail, to help your nail design to last.

Hope all of you enjoyed this Holiday nail design and hope all of you are having/ will have a nice Holiday (no matter what Holiday that maybe)  

See you next time for more nail fun!

Wednesday, December 8, 2021

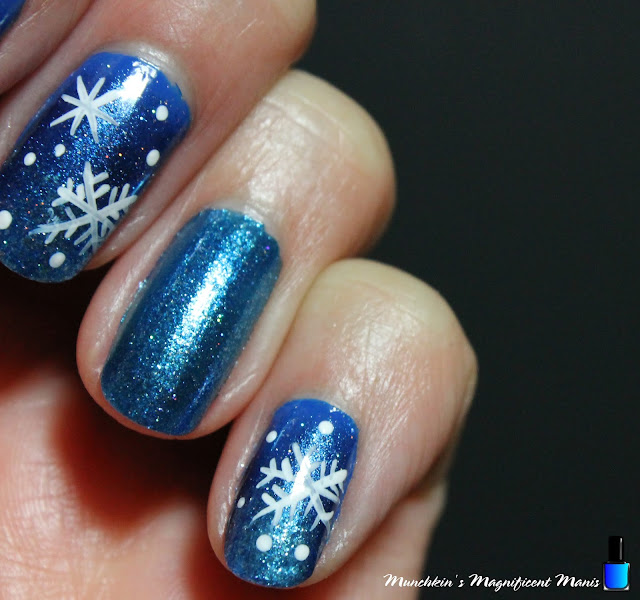
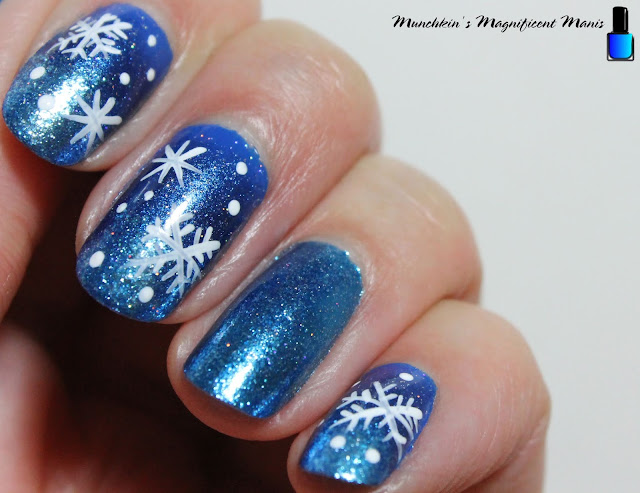
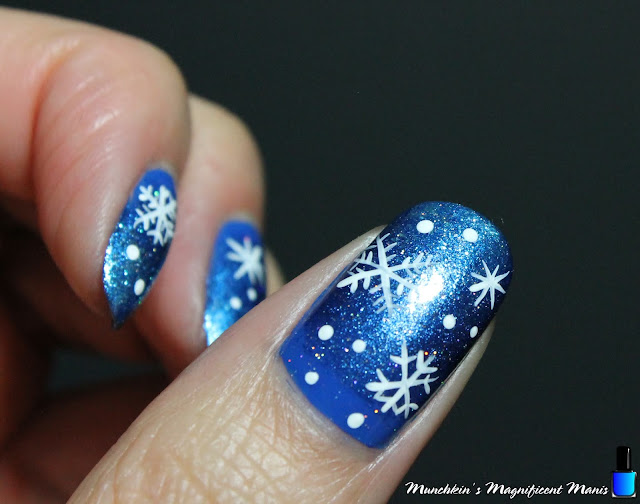
First Snow Fall- Snowflake Nail Design

Hello everyone! Today on the blog we will be create a snowflake nail design on our nails. If you live somewhere cold like I do, then it has already snowed some because it is December, which is still hard to believe, that it is December and the year is almost over with! Time has just been going way to fast!

Snowflake Nail Design

Here are the polishes and nail art tools used to create this beautiful snow design:


Base and top coat- CND Stickey Base Coat and Revlon Extra Life No Chip top coat.

Polishes- Zoya- Splash- Maren, Zoya- Estelle, Zoya- Twinkling- Alessia, and Holo Taco- Scattered. 

Acrylic paint- White.

Nail art brushes- a very small dotting tool and a thin stripper brush.

Other- a makeup sponge and water to clean off your nail art brushes.  

Snowflake Nail Design

Snowflake Nail Design

Apply a base coat.

Let that dry.

Polish- 
Thumb, index, middle, and pinky- A creme blue (Zoya- Maren) This is your base color polish. 
Ring finger nail- A shimmery blue (Zoya- Alessia) 

Let that dry.

Snowflake Nail Design

Gradient on thumb, index, middles and pinky nails: 

On almost all of the nails we will be create a gradient except for the ring finger nail, that nail will just stay as is with a shimmery blue. For this gradient I decided to go with three polishes that are very close in color that way they will blend well. 

For the gradient take a makeup sponge and first polish Zoya- Alessia, (a blue with silver shimmer in it) and then polish right next to that with Zoya- Estelle (a shimmer blue.)

Then dab the sponge on to the nail, all of the nails except the ring finger nail. You will need to do this twice on each nail to be opaque. 

Snowflake Nail Design


Snowflake Nail Design


Snowflake Nail Design

Snowflakes on the nails: 

On all of the nails except the ring finger nail, we will create a simple snowflake design, staring off with a big snowflake, then smaller star shape snowflake, and lastly small dots for snowflakes. 

For all of the nails I stuck with the same looking snowflakes which I usually don't do, they are just placed different on the nail.  

First take a thin stripper brush with white paint on it and make a star shape and then add small lines on each line. 

For the smaller snowflake, with that same stripper brush with white paint on it, just make star shapes for that snowflake.

Then lastly take a very small dotting tool and make small dots around the larger ones, making sure to leave space around the larger snowflakes.

Snowflake Nail Design

For the final touch apply a scattered holo topcoat to all of the nails for an even more glittery holo look!

Snowflake Nail Design

Once your snowflake nail design is ready for the first snow fall/ many more snow falls, apply a top coat to seal in your design and to help it to last all winter long or at least until you want to change your nails.

Hope all of you enjoyed this snowflake nail design! 

See you next time for more nail fun! 

Wednesday, November 24, 2021

What about Thanksgiving?- Thanksgiving Nail Design

Hello everyone! Happy Thanksgiving! Today on the blog we will be creating a design for a holiday that does not get much love, Thanksgiving. I feel like a few years ago or more (time is going so fast!) that first their is Halloween (kind of) then right to Christmas, but what about poor Thanksgiving? So this year to show Thanksgiving some love, I wanted to create a Thanksgiving nail design. I have done one before, but it has been some years, so I thought it was time for an update.

Thanksgiving Nail Design

Here are the polishes and nail art tools used to create this Thanksgiving nail design:

Base coat and Topcoat- CND Stickey Base Coat and Revlon Extra Life No Chip top coat.

Polish- OPI Hawaii- Do you take Lei away, OPI Lisbon- Now Museum Now You Don't, and Wet n wild- Glitter orange.

Acrylic- black, red, green, yellow, white, brown, and peach.

Nail art tools- thin stripper, and detail brush, and a large dotting tool. 

A cup of water to clean off your nail art brushes.

Thanksgiving Nail Design

Apply a base coat.

Let that dry.

Polish- 
Thumb and ring finger nail- a peach/ tan polish (OPI Do you take Lei away)
Index nail- orange glitter (Wet n wild- Glitter orange)
Middle and pinky nail- a brick red/ red-orange (OPI Now Museum Now You Don't)

Let that dry.

Thanksgiving Nail Design

Thanksgiving Nail Design

For this design we will just be doing nail art on the thumb and ring finger nail. The other nails leave them as is with the red and orange.

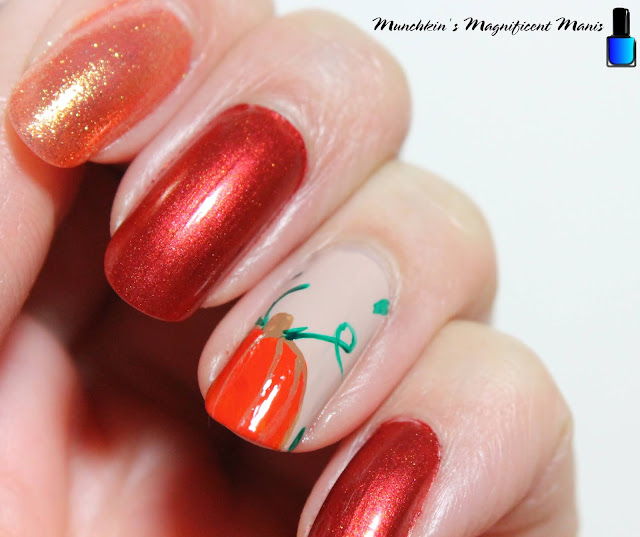
Pumpkin on the ring finger nail: 

Starting with the pumpkin, make an oval shape, with your detail brush dipped in orange paint, near the tip of the nail on the left side, then fill that in a few times with the orange paint. 

On the top of your pumpkin make a small square with brown paint for the steam.

Then with that same brown make some curved lines on your pumpkin.

Lastly take your thin stripper brush with green paint on it, and make some swirl lines for the vines, and a few green leaves on the pumpkin and on the sides of the nail.

Thanksgiving Nail Design

Turkey on the thumb nail:

To finish this design we will make a turkey on the thumb. First take your detail brush with brown paint on it, make a medium size circle in the middle of the nail, then make an oval shape for the body and two longer ovals for the arms. You will need to go over this a few time to be opaque. 

For the turkey's feather's starting at the top of his head make a half oval (the colors I used was red, orange, and yellow.) Do this all the way around the head stopping at the shoulders. 

An optional step is to outline your turkey with a peach paint. 

For his face, we will make his eyes, with a large dotting tool with white paint on it, dot two eyes in the center of the face. Then when that is dry make to small black dots in the large white dots.

Lastly we need to make his beak, take your detail brush with orange on it and make an upside down triangle and then fill that in with the orange. Also add a red curves line on the side of the beak. 
 
Thanksgiving Nail Design

Once your nails are Thanksgiving day ready, apply a top coat to seal in your design and to help it last though all of the yummy food. 

What is your favorite Thanksgiving food? My fav's are pumpkin pie, ham and Mac and cheese made by My Mom In Law. 

Hope all of you have a wonderful Thanksgiving!

See you next time for more nail fun! 

Tuesday, November 16, 2021

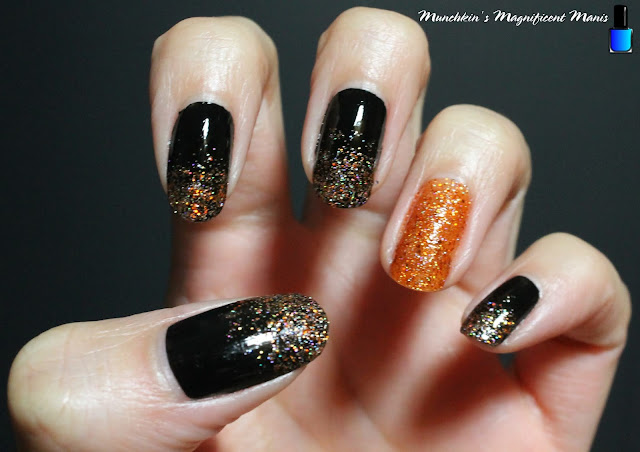
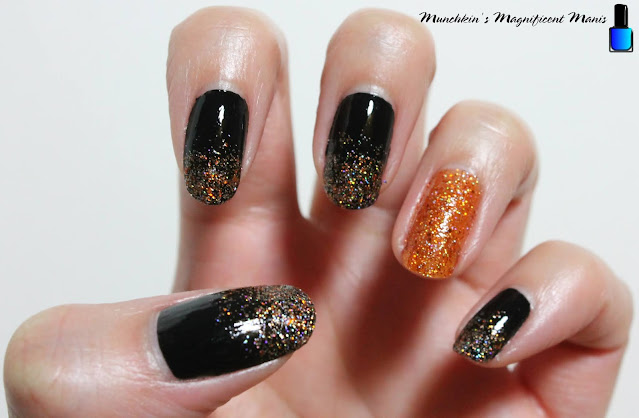
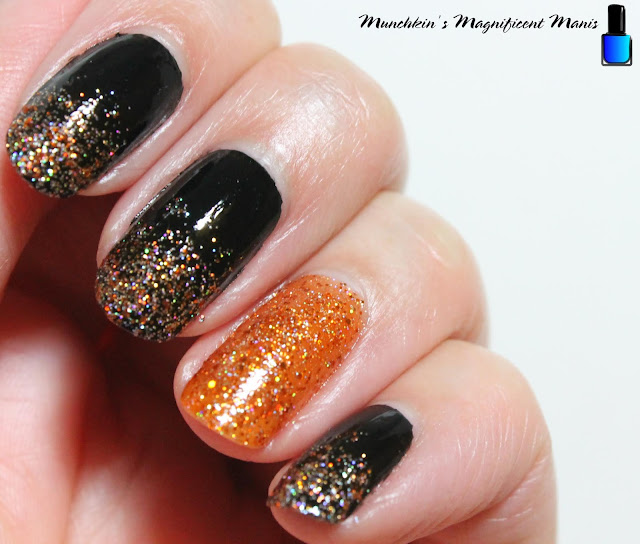
Fall Glitter Gradient

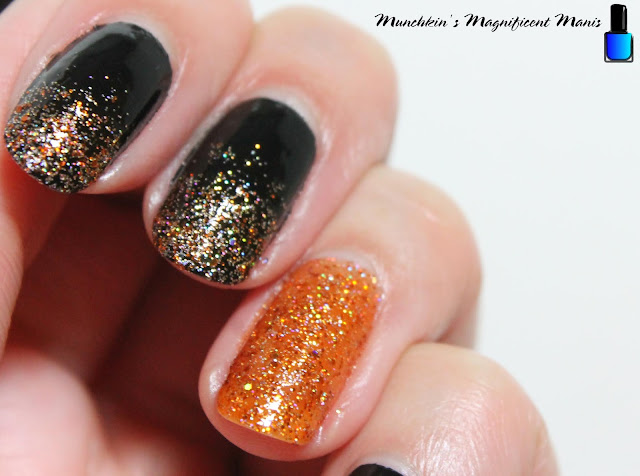
Hello everyone! Today we will be creating another glitter gradient, for the fall. For this gradient we will be using a Holo Taco's Zyler the cat. I remember in one of Simply Nailogical's video's, Cristine had said that Zyler's polish doesn't get much love, so I wanted to show this polish some love by creating a glitter gradient with it. Also this orange glitter polish is perfect for a fall glitter gradient or a Halloween design even though Halloween is over with. 

Fall Glitter Gradient

Here are the polishes and nail art tools used to create this fall glitter gradient:


Base and top coat- CND Stickey Base Coat and Revlon Extra Life No Chip top coat.

Polishes- Sally Hansen- Hard as Nails- Black Heart and Holo Taco- Zyler the cat.

Nail art tools- Just a makeup sponge. 

Fall Glitter Gradient

Fall Glitter Gradient

Apply a base coat to clean dry nails. 

Let that dry.

Polish- 

Thumb, index, middle, and pinky- a black creme polish.

Ring finger- Orange glitter polish (Holo Taco- Zyler the cat) 

Let that dry.

Fall Glitter Gradient

Fall Glitter Gradient

Once your base polish has dried. Take your orange glitter polish and polish a very thin layer on the tip of your nails, focusing most of the polish on the tip of the nail and a little going up the nail.

Do this on all the nails except the ring finger nail, unless you decided to create this gradient on all the nails.

Fall Glitter Gradient

Fall Glitter Gradient

Now take a makeup sponge and polish some of the orange glitter polish on the sponge, then dab the sponge on to just the tip of the nails.

Do this on all of the nails again.

For this polish I did take the polish brush and went over the glitter part one more time, just to add a little more in the middle of the nails, that way it looks like a gradient. 

Fall Glitter Gradient

Fall Glitter Gradient

Now that your fall glitter gradient is done apply a top coat to seal in your design and to help it to last. 

Fall Glitter Gradient

There you go a simple and fun fall nail design, that you can create anytime of the year or just change up the colors of glitters. I have done quite a few glitter gradients on this blog and they are always a fun and simple way to jazz up your nails.  

Hope all of you are enjoying the fall season here in the US. Also hope you enjoy this fall glitter nail design!
See you next time for more nail fun!