Pages

Saturday, July 29, 2023

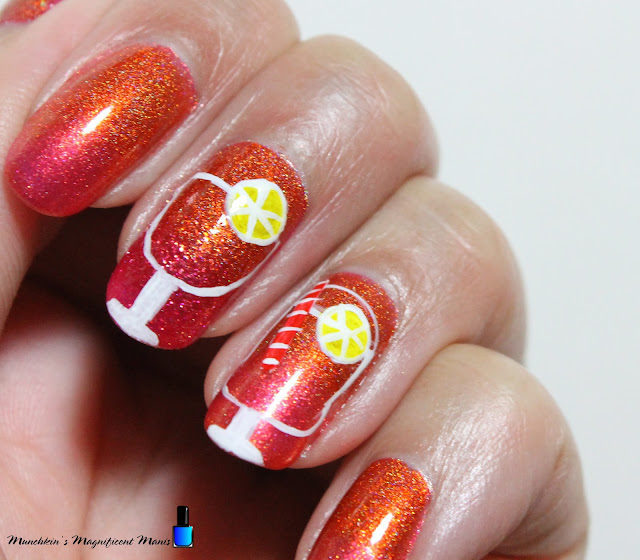
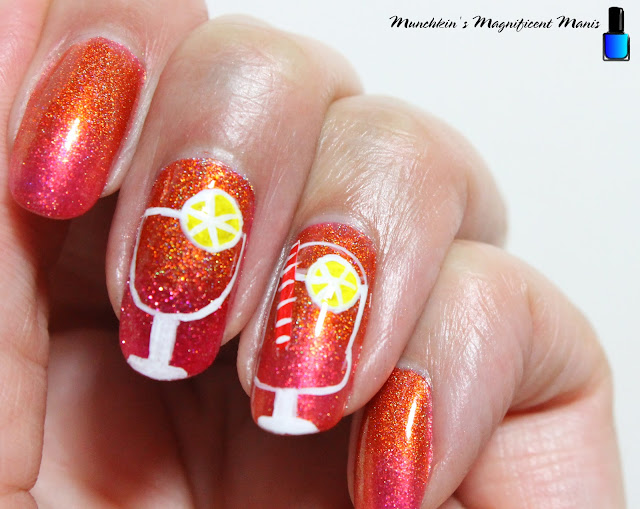
Drinkie Drink- Tropical Drink Nail Design

Hello everyone! Today on the blog we will be creating a tropical drink design or as I like to call it drinkie drink. In my last post, I had said that my hubby and I just got back from a trip to Florida and one thing we probably had to much of was the fruity drinks, but when you are on vacation sometimes it happens. 😉 So I thought it would be cool to create a tropical drink design once again using some of the polishes from the Holo Taco vacation collection, along with some other colors from Holo Taco that go well with this design. 

Tropical Drink Nail Design

Here are the polishes and nail art tools used to create this tropical drink design- 

Base and top coat- CND Stickey Base Coat and CND Super Shiney Top Coat.

Polishes- Holo Taco- Encryption Key- Lite Mode Collection, Holo Taco- Private Villa- Vacation collection, and Holo Taco- Orange Drink- Rainbow Collection. 

Nail art tools- Thin stripper and detail brush, and a makeup sponge. 

Other- Small jar of water to clean off your nail art brushes.

Tropical Drink Nail Design

Apply a base coat to clean dry nails. 

Let that dry.

We will be creating a gradient on all of the nails, here is the base colors that we will use for our nails.

Polish- (shimmery pink polishes) 

Thumb and middle finger nail- 
Holo Taco- Private Villa. 

Index, ring and pinky finger nail- Holo Taco- Encryption Key. 

Let that dry. 


Tropical Drink Nail Design

Tropical Drink Nail Design

Pink and Orange Gradient- 

First we will start off with the gradient on all of the nails. I did use two different pinks, you can do the same or just use one. For the thumb and middle finger nail take a makeup sponge and polish Holo Taco- Private Villa first then Holo Taco- Orange Drink on the sponge, then dab the sponge on to the thumb nail, then the middle finger nail. You will need to repeat this step one more time to me opaque.

Repeat this step on the index, ring and pinky nails using Holo Taco- Encryption Key and then Holo Taco- Orange Drink again. 

Let the nails dry.

Tropical Drink Nail Design

Margarita Drink on the Middle Finger Nail- 

For the nail art we will first create the margarita glass on the middle finger nail. First take a thin striper brush with white paint on it and make a long line near the cuticle, then make a U shape that is connected. For the stem of the glass make a rectangle shape and then a flat base and fill that in with the white. 

*For this drinkie drink design try to get both of the colors of the gradient to show in the glasses.

Lastly for our garnish, we will add a lemon on the side of the glass. Take a detail brush with white paint on it and make a small circle on the rim of the glass. Then go over that with yellow, then lastly take a stripper brush with white paint on it and make the lemon slices in your lemon. 

Tropical Drink Nail Design

Cocktail Drink on the Ring Finger Nail- 

On the ring finger nail we will create a cocktail glass. Take a thin stripper brush with white paint on it and make a small oval near the cuticle, then make two long lines down the side, then small curve on each side, for the bottom make one curve line to attach the glass together. For the stem do the same as the margarita glass, make a rectangle shape and then a flat base and fill that in with the white. 

For the garnish repeat the same step that you did for the margarita, if you want to make another lemon.

Lastly for a final touch we will add a straw to this drink. First we will make an outline, by making a thin white rectangle that you fill in with white, then one that is dry you can go over that with red (or what ever color you would like) and then add very small white stripes as well.

Tropical Drink Nail Design

Once your drinkie drink design looks good enough to drink, apply a top coat to seal in your designs and to help it to last. 


Here is the practice version of the drinkie drink design.

Hope all of you enjoyed this drinkie drink, tropical drink design! 

See you next time for more nail fun!

Saturday, July 22, 2023

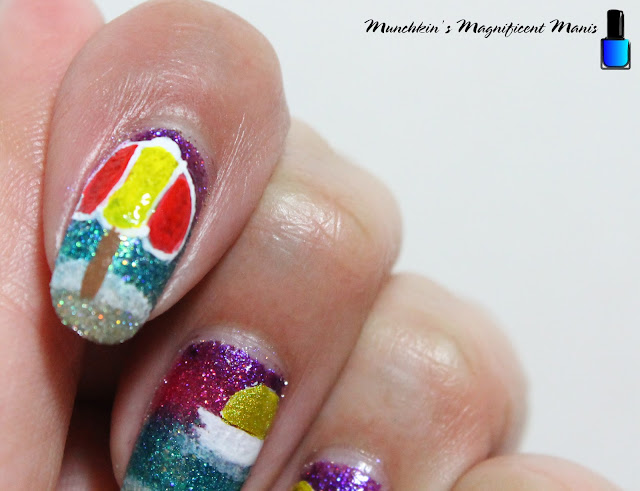
Wish You Were Here- Beach Nail Design

Hello everyone! Today day on the blog we will be creating a fun beach themed nail design that is inspired by the Holo Taco vacation collection box. Also just recently my hubby and I went to Florida for our anniversary trip, it was very hot like most of the USA has been this summer and all we really wanted to do was be in the water. I personal love to be in the water especially if it is very hot outside and being in the ocean is the best, the ocean water in Florida was so nice and warm. To kind of relive our trip I decided to create this beach themed design, to say wish you/ we were still there.

Beach Nail Design

Here are the polishes and nail art tools to create this beach fun nail design:

Base and top coat- CND Stickey Base Coat and CND Super Shiney Top Coat.

Polishes- Holo Taco- Purple Slushie, Holo Taco- Hot - Wire Pink, Holo Taco- Beach Please, Holo Taco- Never Tide Down, Holo Taco- Private Villa, Holo Taco- Private Villa, and Holo Taco- Lemon Sucker.

Acrylic paint- White, red, yellow and brown. 

Nail art brushes- Thin stripper and detail brusher and flat brush.

Other- Makeup sponge and water to clean off your nail art brushes.

Beach Nail Design

Apply a base coat to clean dry nails.

Let that dry.

Polish- 

Thumb- Purple holographic polish (Holo Taco- Purple Slushie)

Index, middles and ring finger nails- Sand colored polish, this is your base color for the gradient (Holo Taco- Beach Please)

Pinky finger nail- Pink holographic polish (Holo Taco- Hot - Wire Pink)

Let that dry.

Beach Nail Design

Beach Nail Design

Gradient for the Ocean and the Sunset:

First we will start off with the gradient for the ocean and the sunset on the index, middle and ring finger nails. Take a makeup sponge with a sand colored polish (the same as your base color), then over lapping that color with a ocean blue, a pink and then a purple. 

Then dab the sponge on to all of the nails, you will need to repeat this step for each nails, two to three times. 

Once you have your gradient, take a flat brush with a very small amount of white paint on it and where the sand and ocean meet, dab the brush along the nail for a small wave.

Beach Nail Design

Beach Nail Design

Sunset on the Middle and Ring Finger Nail: 

For the sunset, first we will make the outline for the sun, take a detail brush with white paint on it and make a half oval on the middle and ring finger nail and try to get them to almost line up with the nails are next to each other. Then to make the refection in the water just smudge some white paint under the sun. I did make my refection a little to opaque, I think it would be better to thin the refection out more with water. 

Then let that dry.

Then go over the oval shapes for the sun with a yellow holographic polish. 

Beach Nail Design

Umbrella on the Index Nail: 

Lastly we will make an umbrella that is in the sand. Take a thin stripper brush with white paint on it, near the cuticle make a large curve shape like a upside down U, then at the bottom of that U make three small curves, then inside the umbrella the shape should look like tear drops. 

Then the center part of the umbrella fill that in with white. For the side parts mix red and white, with more red in if for the two sides of the umbrella, then the center part that we painted white now go over that with yellow. 

Once your umbrella top is done, make a brown line that is kind of thick for stand of the umbrella that goes in then sand. 

Beach Nail Design

Once your nails are beach ready apply a top coat to seal in your design and to help it to last though your beach vacation.

Practice version of the beach design.


Hope all of you enjoyed this beach nail design and are having a good summer and trying to stay cool if you live somewhere where it has been super hot!

See you next time for more nail fun!