Pages

Thursday, October 29, 2020

Jack Holo Lanterns- Halloween Nail Design

Hello everyone! Happy Halloween! This year Halloween for many people/ kids will be very different, but I feel like even before everything that has happened this year  Halloween just has not been the same. I remember when I was a kid and would go out trick or treating that I would get so much candy and now not really any kids go out anymore (even in past years.) So this year we will  keep things simple, we will be creating holographic pumpkin's or Jack O Lanterns on our nails, with a few of the polishes from the Holo Taco line and some other polsihes as well.

Halloween Nail Design


Here are the polish and nail art tools used to create this holo pumpkin nail design.


Base and Top coat- - CND Stickey Base Coat and Revlon Extra Life No Chip top coat.

Polishes- Color Club- Black Magic- holo, Holo Taco- Zyler the cat, and Holo Taco- Orange Drink- Rainbow Collection.

Acrylic paint- black and green.

Nail art brushes- Thin detail and stripper brush.

Small glass cup of acetone to clean off your nail art brushes and a cup of water as well.

Halloween Nail Design

 Apply base coat, let that dry.

Polishes- 

Thumb nail- Holographic orange. (I used Holo Taco- Orange Drink)

Index, middle, and pinky finger nail- holographic black. (I used Color Club- Black Magic)

Ring finger nail- Holographic glitter orange. ( I used Holo Taco- Zyler the cat) 

Let that dry.

Halloween Nail DesignHalloween Nail Design 
 
Halloween Nail Design
 Halloween Nail Design
 
Full Pumpkin on the index, middle and pinky nails:
 
On the index, middle and pinky finger nail we will create a circle/ full pumpkin on the tips of our nails. 
 
First take a thin detail brush with an orange holo polish and make a circle near the tip of the nail and fill that in, then let that dry. 
 
Once that is dry take a detail brush with black paint on it and make two triangles for the eyes and then with your stripper brush make a thin curve for the smile.
 
Lastly make a thick green line or a small square on top of your pumpkin for the steam.   
 
Halloween Nail Design
 Halloween Nail Design 
 
 
Pumpkin face on the thumb and ring finger nail:
  
For an even simpler option on the thumb and ring finger nail we will just make the Jack O Lanterns face.   
 
Take a thin detail brush with black paint on it and make two triangles kind of near the tip of your nails for the eyes, then make a small triangle under the two eyes for the nose. Then take a thin stripper brush with black paint on it and make a curved line for the smile, then make two flat line above the curve and leave an empty space in between that for the pumpkin's tooth, also don't forget to fill in each shape with black paint as well. 
 
Halloween Nail Design
Halloween Nail Design 
 
Once you have your Halloween nails the way you like apply a top coat to seal in your design and to help your nails to last through all the candy and scary movies that you will be watching this Halloween, or like me just help your nails to last though all the candy eating.
 
Hope all of you enjoyed this holographic pumpkin nail design!
 
Happy Halloween!
 
See you next time for more nail fun! 

Saturday, October 10, 2020

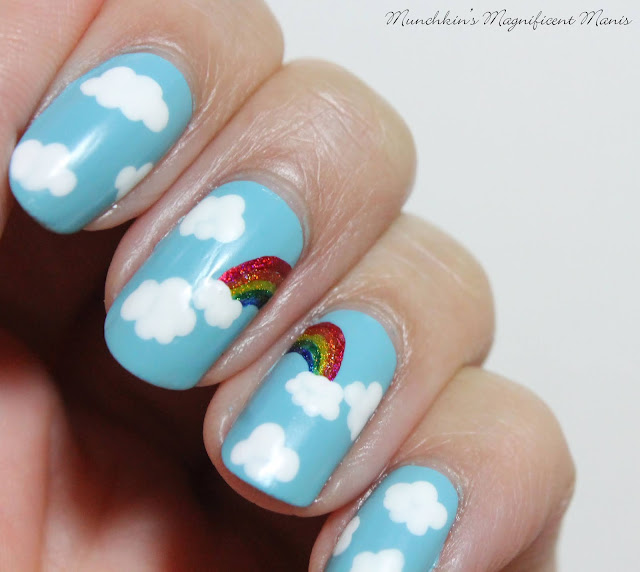
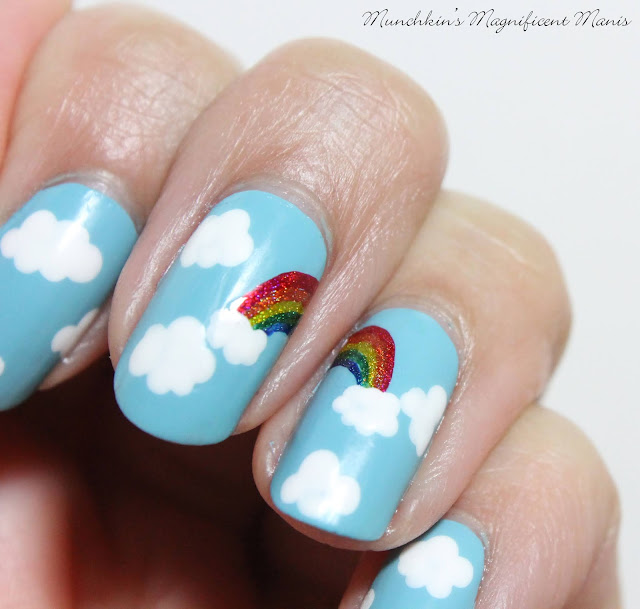
Rainbow After The Storm- Rainbow and Clouds Nail Design

Hello everyone! This year has been a horrible year for everyone! I will not sugar coat that at all, I don't know about all of you but I can't wait for this year to be over with and hopeful soon things can go back to normal. They do say that after a storm their is a rainbow, after this horrible of a stormy year hopefully that saying will come true. So today we will be creating a design based on that theme, just so we can maybe have some kind of hope in these hard time, even if it is just showing it on our nails.    

Rainbow and Clouds Nail Design
Rainbow and Clouds Nail Design 

 
 Here are the polish and nail art tools used to create this rainbow and clouds nail design:
 
 
Base and top coat- CND Stickey Base Coat, Revlon Extra Life No Chip top coat, and NYC- Matte Me Crazy topcoat (this top coat is not longer made, but you can use any matte topcoat)

Nail polish- Finger paints- Tiffany imposter, Holo Taco Rainbow Collection; Red Licorice, Orange Drink, Lemon Sucker, Green Taffy, and Blue Freezie.(You only need a very small amount of these polishes.) 

Acrylic paint- white.

Nail art brushes- thin stripper brush, and large dotting tool.

Rainbow and Clouds Nail Design
Rainbow and Clouds Nail Design 

Apply base coat.

Let that dry.
 
Polish all of your nails with a light blue polish.
 
Let that dry.
 
Rainbow and Clouds Nail Design
Rainbow and Clouds Nail Design 
 
Clouds on every nail:
 
The clouds will be done on all of the nails, just the middle and ring nail will have the rainbow and the other nails will just have the clouds. 
 
For the clouds take a large dotting tool with white paint on it make two dots at the top, one on each side and two more under those dots. I only made a few clouds on each nail, leaving a lot of blue showing. 

Rainbow and Clouds Nail Design
Rainbow and Clouds Nail Design 
 
 Rainbow on the middle and ring finger:

For the rainbow starting on the middle finger nail, make an arch with your thin stripper brush starting with red, then orange, yellow, green, and blue. Then do the same on the ring finger nail, trying to make sure things line up.  
 
Once you have your rainbow just right make a cloud on each end of the rainbow.
 
Now add a glossy top coat, and let that dry. 
 
Rainbow and Clouds Nail Design
Rainbow and Clouds Nail Design 
 
Once your glossy topcoat has dried apply a matte top coat over that, on the nails while trying to avoid the rainbow with the matte topcoat, make sure the rainbow is still shinny.
 
Their you have it the rainbow after the storm.
 
Hope all of you enjoyed this rainbow after the storm nail design and try to stay safe and healthy as best as you can and hopefully we will all see that rainbow soon!
 
See you next time for more nail fun! 

Saturday, October 3, 2020

Holo Taco's Menchie and Zyler The Cat Polishes

Hello everyone! Today on the blog we have another collection/ polish duo from Holo Taco, Menchie and Zyler. These polishes did come out in mid August because Holo Taco keeps releasing new polishes every month and I of course keep buying them, it has been a little hard to keep up with my reviews. But have no fear if you do want these polishes as of typing this post they are still available.

Holo Taco's  Menchie and Zyler
Holo Taco's  Menchie and Zyler 
 

This collection/ duo has only two polishes in it unlike most of Cristine's/ Holo Taco's other collections. Also all of her other collection's would come in a special collection box, these polishes did not, they did come in a different box that has a cat shape cut out and when you put the two polish boxes together they make a holographic cat.

Also a side note these polishes are named after Cristine's cats Menchie and Zyler. Zyler is her first cat and Menchie is her secound cat that she got after she started dating her boyfriend Ben.


Holo Taco's  Menchie and ZylerHolo Taco's  Menchie and Zyler
 

Let's take a look at these polishes, first we will take a look at Menchie.

Holo Taco's  Menchie
Holo Taco's  MenchieHolo Taco's  Menchie
 
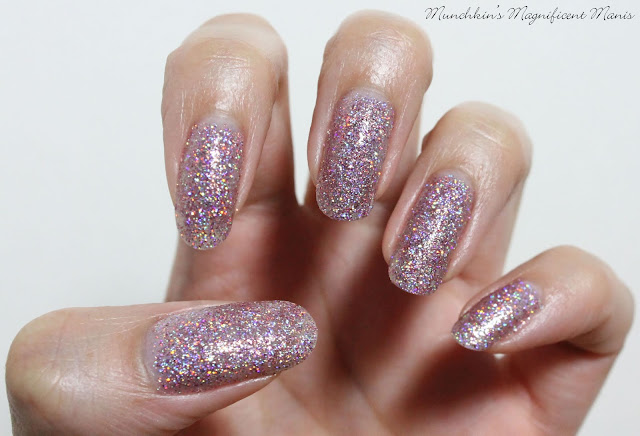
Menchie the cat is described on the Holo Taco's website as a baby pink holographic polish, that is packed with different size sliver and pink holo glitters that are in a clear base.  
 
This polish applied well for me in two coats, these polishes are not meant to be toppers they can be applied as a full coverage polish, but you can always just apply one coat over a polish as a topper if you would like.   
 
Holo Taco's  Menchie
Holo Taco's  Menchie
 
 Lastly but not lest is Zyler.
 
Holo Taco's Zyler
 
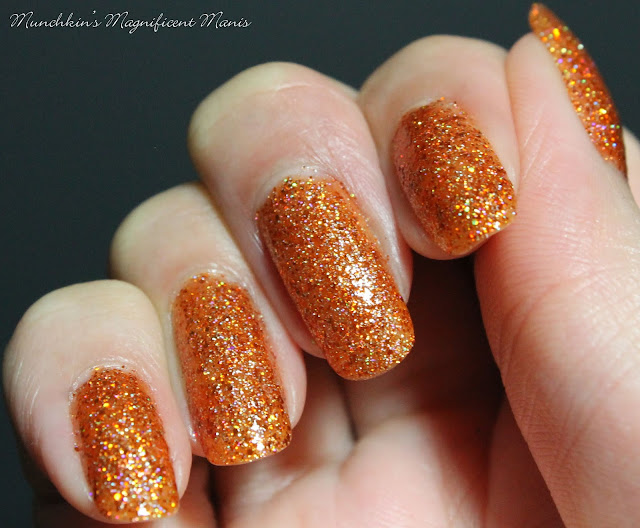
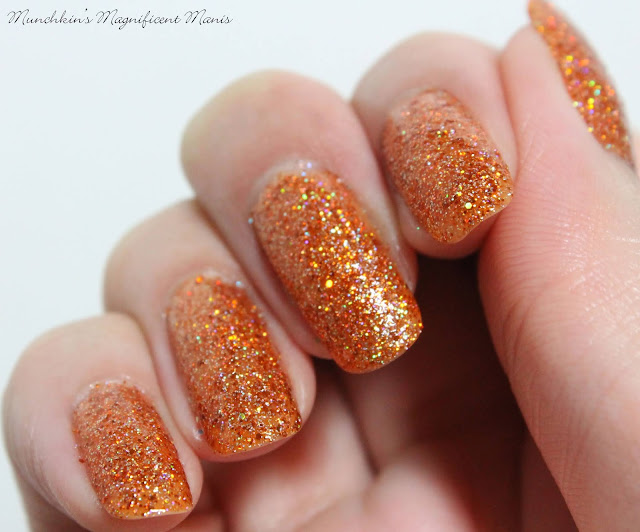
Zyler the cat is described on the Holo Taco as a rusted orange holographic polish, packed with different size copper holo glitters, also this polish is in an orange tinted jelly base. This polish also applied well in two coats.

Holo Taco's ZylerHolo Taco's Zyler
Holo Taco's Zyler
 
In conclusion these polishes are really pretty and did have a good formula, for a glitter polish you might think they would very thick, but that was not the case for these two polishes.  
 
Due to these polishes being very glitter, I did soaked them off kind of like you would with gel polish minus the buffing off the top layer. What I did was took cotton and foil with regular acetone and raped them around each finger and let them soak for five minutes. I did still have to remove a little of the polish that was left over with a cotton ball, but for the most part this did take off most of the glitter. 
 
Holo Taco Menchie
Holo Taco Menchie
Holo Taco Zyler
Holo Taco Menchie and Zyler
 
As stated above Menchie and Zyler are still available on HoloTaco.com.
 
Menchie & Zyler Duo  $26.00 USD for the two polishes 
 
Zyler the Cat $13.00 USD

Menchie the Cat $13.00 USD 
 
 
Also for the first few week a portion of the sales of these polishes were donated to PetSmart charities, Holo taco actually raised $50,000 for PetSmart, which is really awesome!   

Hope all of you enjoyed this review of the new Holo Taco Menchie and Zyler polishes! 

See you next time for more nail fun!